


You’ve probably heard that email marketing is dead. Is it, though?
Think about it. Today’s consumers are looking for brands that respect their time, protect their privacy, and provide solutions tailored to their specific needs. Email is the perfect “space” to honor those preferences. It’s a private, direct line to your customer, away from the noise of public feeds and the unpredictability of algorithms.
When these campaigns are thoughtful and human, they don’t just work. They work miracles.
In this guide, we’ll explain why the importance of email marketing is beyond doubt, how it stands apart from other popular channels, and what makes it a marketing powerhouse.
Email marketing to the rescue
Nudge your audience with the right message at the right time.
Try MoosendTop Email Marketing Benefits that Last in Time
Let’s explore some of the key reasons why email marketing stands out and can truly elevate a business’s marketing strategy.
1. High return-on-investment (ROI)
Based on recent email stats, the average email ROI is $36 for every $1 you spend. Moreover, the global email marketing revenue is expected to reach $17.9 billion, proving that the channel is only gaining momentum. These are exceptional results, considering that email marketing is both cost-effective and highly scalable.
This high revenue also shows how well email marketing has adapted to privacy-led marketing. With traditional tracking methods gradually disappearing, consented connection is a big must.
2. Direct communication
One of the biggest benefits of email marketing is that you have complete ownership of your email list members without relying on social media algorithms or third-party platforms to reach subscribers. You can overview your exact target audience and access their data whenever you want.
Think of your email list as digital insurance against the ‘rented land’ of social media. You aren’t just renting a space in a feed. You own the direct connection to every person who has invited you into their inbox.
3. Hyper-personalization
Consumers no longer respond to impersonal promotions and broadcasts. They expect tailored experiences that take their needs and preferences into consideration. And with email, this is more than “workable.”
Email segmentation, automation workflows, and dynamic content help deliver relevant and resonant content to subscribers based on their demographics and behavioral data, such as previous purchases and browsing habits. Therefore, with the right email marketing strategy in place, it’s hard to miss out on customer engagement.
Check out this pre-made template to get a better understanding of what an automated workflow looks like:

4. Permission-based marketing
Email marketing is subject to strict compliance standards. To start mailing customers and prospects, you first need to get their opt-in, the permission to reach out via email. Moreover, consumers can retrieve access to their data at any time or opt out of a brand’s list. You can also share preference centers so they can choose which topics they want to receive and how often.
Considering that people are increasingly protective of their digital footprints, serving these boundaries isn’t just a legal requirement but a competitive advantage. And by giving subscribers total control over their data and an easy way to leave, you build a level of brand trust that simply can’t be bought with a social media ad.
5. High conversion rates
Since subscribers have chosen to join your email list, they’re more likely to convert than random website visitors or social media scrollers. Combine this with personalization tactics and more people will start taking action, leading to more purchases, signups, or downloads.
Smart email copywriting and design play a key role here. As long as your call-to-action is easy to grasp at first glance and the button is prominently placed, it gets harder to miss the clicks of interested subscribers.
Check out this email marketing campaign from Velasca. Would you skip it if it landed in your inbox after browsing that pair of shoes?

6. Diverse content
Email isn’t just for promotions and sales. You can use it to educate your audience around your brand, send transactional emails that secure a smooth customer experience, and even collect their honest feedback through anonymous email surveys.
By combining these different types of emails, you support your customers at every stage of their journey. This helps keep your brand top-of-mind, as long as your email frequency isn’t overwhelming or spam-looking.
7. Measured results
Modern email marketing tools provide users with real-time analytics and reporting capabilities. You can keep track of significant metrics, including:
- Open rates
- Click-through rates
- Spam complaints
- Unsubscribes
- Bounce rates
This data can help you recognize patterns that work for your audience and what needs improvement. Moreover, it gives insight into metrics that can hurt deliverability rates, allowing you to fix these issues before they harm your brand reputation and keep the momentum steady.
Here’s Moosend’s analytics dashboard to get a better grasp:

8. A/B testing
Another benefit of email marketing is that it lets users experiment with different email variations through A/B testing. For example, you can test two different subject lines, one with the recipient’s first name and one without, to see how a small segment reacts to them. Then, the winner is automatically sent to the rest of your list.
Being able to predict an important amount of user behavior in advance is a big win. Once you collect more data about your audience, you can reach safer conclusions and secure better email performance.
9. High scalability
As your business grows, your email channel has all the potential to grow, too. Most platforms let you upgrade your plan with a few clicks and reasonable price changes when you gain more subscribers.
In most cases, you still get access to key email marketing features and can explore more advanced capabilities through add-ons. But at the end of the day, your revenue will surpass costs, and you’ll reap the benefits of an owned list.
Email vs. Other Platforms: Comparison Table
We’ve already mentioned some of the key differences between email and other marketing channels, such as social media and ads. Find them in more detail in the table below:
| Feature | Email Marketing | Social Media / Ads |
| Ownership | You own the list. It’s a permanent business asset. | You “rent” the audience. The platform owns the data. |
| Reach | Reliable. If you send it, it lands in the inbox. | Uncertain. Algorithms decide who sees your posts. |
| Longevity | Permanent. It stays in the inbox until acted upon. | Temporary. It disappears in the “scroll” within minutes. |
| Context | Private. It’s a personal, one-on-one conversation. | Public. It’s competing with millions of other posts. |
| Data | Deep. You know exactly what “this” person likes. | Broad. You only see general trends and “likes.” |
Does that mean that you swap these methods for email marketing? No, this digital marketing tactic isn’t a replacement for other channels, but the glue that holds them together. While social media and ads excel at discovery and building hype, email is your “owned” territory where you nurture those leads into loyal customers through direct, personalized communication.
By integrating these platforms, using social media to grow your list and email to secure the final conversion, you create a balanced system that respects consumer privacy while driving consistent, long-term growth.
Additional Resources
Need more insights? Check out these relevant blog posts:
- Email Marketing Vs. Social Media: Which Is Best For You
- Effective Cross-Promotions: When and How They Work Best
Email Marketing Success Stories that Grabbed Our Attention
Let’s explore three different email marketing success stories to better understand its impact.
Anastasia Blogger
As a blogger and content marketing expert, Anastasia Blogger has a growing subscriber base of 27,000. This channel helps her drive traffic, build brand awareness, and promote her products. To maintain engagement as her audience grew, she focused on several key strategies, including:
- Deliverability practices to ensure emails reach inboxes.
- Optimized subject lines to boost open rates.
- Automated flows to support sales and promotions.
The result? She achieved an average open rate of 25%, maintained good inbox placement, and supported her sales through automation. The email marketing capabilities provided by modern platforms (Moosend, in this case) helped her successfully meet her business goals.
Sephora
Sephora needs no introduction. This popular eCommerce beauty brand wanted to reduce cart abandonment and turn high-intent visitors into loyal buyers. To achieve this, they implemented several key tactics:
- Automated targeted email campaigns to reach visitors at the right time.
- Abandoned cart emails to recover lost interest.
- Unique, high-engagement campaigns tailored to both current and potential customers.
The results speak for themselves: the brand achieved a 240% increase in open rates and saw a 5% increase in sales. Abandoned cart emails became one of their strongest assets
Overall, the brand sends unique email campaigns to current and potential customers that are hard to skip. Here’s an example that speaks for itself:
Subject line: As seen in GRWMs everywhere ⚡

Outsider Tart
The bakery Outsider Tart needed a channel to communicate consistently with its audience to promote key events and products. The bakery used email to build that “space” inside recipients’ inboxes. Through a combination of specific tactics, they reached phenomenal results:
- Segmentation to target the right audience members.
- Automation to ensure consistent communication.
- Personalization to make every email feel relevant.
They achieved a year-over-year 45% list growth, a 53% open rate (unique in this industry), and a 5% click-through rate. They proved that small businesses have loads to gain from email marketing.
Best Practices to Get More from Email Marketing
Success in email marketing is the result of consistent, intentional efforts. Follow these steps to polish your process and get the most out of your email channel.
- Create an email marketing plan: Set clear goals for each stage of the customer journey to nurture your audience from welcome through customer loyalty. Determine the marketing budget you’ll allocate to this channel and the marketing stack that will help bring your plan to life.
- Stay consistent with your brand: Keep a consistent customer experience across your marketing touchpoints to develop brand awareness. This way, it will get easier for visitors and customers to recognize your emails and resources at a glance.
- Send targeted messaging: Use marketing automation to set up triggered workflows, such as abandoned cart and welcome emails, with timely and relevant content. Plus, segment your audience by demographics or browsing behavior to consistently hit the mark.
- Follow regional compliance regulations: Obtain your subscribers’ opt-in and comply with regional email laws regarding data privacy access and the right to withdraw. Ensure that subscribers can easily opt out upon their request by adding transparent unsubscribe buttons to your email footer.
- Clean your email lists regularly: Remove inactive or mistyped email addresses to maintain high deliverability. Using verification tools and double opt-in can save you from lots of trouble.
- Ensure mobile-responsiveness: Make sure all your emails read well on mobile devices for a smooth user experience. For example, use single-column layouts, make your CTA clickable, and keep your subject line up to 60 characters so that it is not cut off.
- Make data-driven decisions: Monitor key metrics, such as open and conversion rates, to optimize your strategy in the long run, and explore industry benchmarks. Moreover, use A/B testing to experiment with email variations when you see fit.
Seize the Power of Email Marketing
No, email isn’t vanishing. In fact, it’s getting stronger and stronger. Through direct communication, personalized content, and even synergy with other marketing platforms, it can be your key to customer retention and loyalty.
Still hesitant? Choose an email marketing platform like Moosend or Constant Contact, sign up for a free trial, and see what it can do for you.
FAQs
Let’s review some frequently asked questions about the importance of email marketing.
1. Is email marketing dead because of AI?
No, it’s actually the opposite. AI has helped email evolve through smarter segmentation and copywriting. As long as you use it ethically, as an assistant and not a replacement, it can help you elevate your email marketing efforts.
2. What are the 5 C’s of email marketing?
They stand for Clear, Concise, Correct, Consent, and Considerate, and they sum up what an effective email marketing strategy should strive for. Following them helps ensure strong performance and compliance with email regulations.
3. How do you grow an eCommerce business through email?
To scale your eCommerce business through email marketing, start by automating key customer journey workflows, such as welcome and re-engagement emails. Segment your audience based on demographics and preferences, and use AI-driven recommendations and dynamic content to increase your email revenue.
4. Should I buy an email list to get started faster?
No. It’s considered an unethical marketing practice and can have a detrimental impact on your bounce rates and spam complaints. In fact, many email marketing regulations, such as GDPR and CASL, consider this an important violation, which can lead to fines and a compromised sender reputation that is hard to restore.
Email is one of the most effective channels for scaling your marketing. Through advanced automation and personalization, you can nurture your audience at key moments in the customer journey, delivering content that truly resonates.
But there’s a catch.
Failing to comply with evolving global email and privacy laws doesn’t just put your sender reputation at risk. In fact, it exposes your brand to significant financial penalties and legal costs.
In this guide, we share essential global email marketing regulations and provide actionable compliance steps to keep your outreach both effective and legally sound.
Disclaimer: This guide is for educational purposes only and doesn’t replace legal advice. Since compliance requirements vary by jurisdiction and sender volume and change regularly, you should consult with your legal counsel or data privacy expert to audit your specific strategy.
Secure your compliance with confidence
Choose an email marketing platform with a high deliverability rate.
Try MoosendKey Email Laws and Regulations Per Region
Compliance isn’t determined by where your headquarters are located, but by where your recipients are. Whether you’re a global startup or a growing enterprise, understanding these regional benchmarks is critical to protect your deliverability and bottom line.
Let’s explore noteworthy email laws by region.
United States
The CAN-SPAM Act sets the ground for commercial email in the US, and it’s overseen by the Federal Trade Commission (FTC). While you don’t need explicit consent to hit send, you do have to be transparent about your content and avoid deceptive practices. This means recipients should be able to tell right from the subject line that your email is for commercial purposes.
Other tactics, like including a physical address and an easy way to opt out of your list, are non-negotiable. Your domain name also needs to be accurate, showing the sender’s name without confusing the recipients. It’s generally a high-stakes law, as violating it can lead to penalties of up to $53,088.
Another major regulation to keep on your radar is the CCPA, which gave California consumers much more control over their personal data starting from January 1, 2020. Under this law, they have the right to know how their data is handled, ask to access or delete it, and opt out whenever they wish.
On top of that, consumers have a right to non-discrimination and can request the correction of their private data at any time. They can also stop businesses from selling or sharing their information with third parties. To stay fully compliant, it’s also important to have a clear privacy policy that’s easy for your audience to find and read.
Europe/UK
If you collect data from or contact citizens in the European Union or the UK, you need to comply with the GDPR (General Data Protection Regulation). This law was established in 2018 to protect the privacy and personal data of consumers in these regions. Even though the UK has its own version now, the standards remain just as high.
To reach out to consumers with commercial emails and messages, you need clear opt-in consent to process their data. This means no pre-ticked boxes; the user has to actively say “yes.” Once they’re on your list, consumers have the right to access, delete, or change their data, or even restrict you from processing it at any time.
Businesses should also implement strong security strategies to protect that data and must report any potential data breaches within 72 hours. The stakes are high: GDPR penalties can reach up to €20 million (or £17.5 million in the UK), or 4% of your global annual turnover.
In the UK, the PECR (Privacy and Electronic Communications Regulations) is also effective alongside GDPR. It adds even stricter rules on how you treat customer data in commercial electronic messages, including specific consent for tracking methods, such as maintaining an up-to-date cookie policy.
Canada
Canada’s Anti-Spam Legislation (CASL) is one of the strictest laws that regulates commercial electronic messages to protect Canadian residents wherever they are. Its legal requirements include clear express or implied consent, sender identification through name, valid postal address, and telephone number, and transparent opt-out mechanisms.
Non-compliance is a major issue in Canada. Violating CASL can result in fines of up to $10 million for businesses and $1 million for individuals.
Australia
The Spam Act 2003 applies to Australian businesses or anyone sending from or to Australia. It prohibits unsolicited emails and messages, including SMS and MMS, without consent, whether direct (express) or inferred by an ongoing relationship.
The sender and their contact information should be clearly identified, along with a functional unsubscribe process. Opt-out requests must be handled within 5 business days, and non-compliance can cost millions, especially in cases of mass violations.
South Africa
The Protection of Personal Information Act (POPIA) was enacted in 2021 to protect personal data in South Africa. As with the other regulations we’ve discussed, it protects the right to clear consent, transparent processing, and the user’s ability to access, withdraw, or change their information at any time. Businesses also need to be ready to report data breaches to the Regulator as soon as reasonably possible.
Brazil
In Brazil, a relevant regulation was introduced in 2020 called the LGPD (Lei Geral de Proteção de Dados), which is very similar to the GDPR. It applies to any business offering goods or services to people in Brazil, focusing on data-driven marketing, from ads to emails, regardless of where the company is based. The fines for non-compliance are significant and can reach up to R$50 million per violation.
Southeast Asia
Finally, the Personal Data Protection Act (PDPA) applies in Singapore, Malaysia, and Thailand, with similar requirements for handling data. In Singapore, for instance, the stakes are particularly high, as fines can reach up to 10% of an organization’s annual turnover (for those with revenue over S$10 million), which can be detrimental for organizations.
Best Practices for Complying with Most Email Marketing Laws
What do the above email marketing regulations have in common? Clear opt-in and opt-out, transparency, and the right to data access, usage purposes, and deletion are at their core.
The good news is that most email marketing platforms like Moosend or Contact Contact help streamline most assets successfully through built-in features and integrations with top tools. Use these tactics to ensure your email marketing efforts remain protected and compliant.
1. Collect and record clear consent
Besides the CAN-SPAM Act, which focuses more on opt-out, most email privacy laws require a clear opt-in process.
Consent can be express, where the data subject confirms during the signup process that they want to receive future emails with commercial content. Inferred consent (or implied consent) occurs when the relationship with the consumer is ongoing, typically because they’ve already purchased from you or made a business inquiry.
Most businesses collect users’ opt-ins through signup forms on their website, lead magnets, or landing pages. Keep the subscription process simple, request only mandatory data, and ask permission to contact them for marketing purposes. You can also enable a double opt-in process to get clearer permission and ensure the addresses on your email lists are valid.
Check out this opt-in form from Lush Cosmetics, which mentions what email content to expect. Plus, they added links to their Privacy Notice and Terms & Conditions for consumers who wish to be informed further and to prove good intent:

Keep in mind that manipulative tactics, such as pre-checked consent boxes, should be off the list. Always keep a record of the consents you’ve collected as proof. And remember, the consumer can withdraw it at any time, and you should honor that request immediately.
2. Make unsubscribe easy
A critical part of every global privacy and anti-spam law is the recipient’s right to say “no.” Providing a clear, functional way for users to opt out of your list at any time is paramount.
While most brands place the unsubscribe link in the footer, the secret to staying compliant is visibility. Don’t hide your link behind tiny, “soft” fonts or low-contrast colors. If a subscriber wants to leave, you want them to find the link easily.
Modern regulations and ISP requirements (including those from Google and Yahoo) require that users be able to unsubscribe without taking extra steps, such as entering their email address twice or logging into an account.
Take a look at how UNIQLO manages compliance in their promotional emails. By including clear links to unsubscribe, customer support, and their privacy policy, they stay transparent. They also proactively prompt recipients to add them to their address book, a simple move that signals to spam filters that the sender is “trusted” and helps keep their content out of the spam folder.

A good tactic is to offer a preference center alongside your unsubscribe link. This gives you one last chance to save the relationship by letting users manage their frequency and choose specific topics. This way, you can keep a subscriber who might have otherwise left, and you ensure your list stays clean and compliant.
3. Use email authentication
Email authentication signals to service providers that you’re a legitimate sender and not a scammer. Failing to provide this proof is a red flag that can spike your bounce rates and send your campaigns straight to the spam folder. Here’s what each authentication protocol does and why it matters:
- SPF (Sender Policy Framework): SPF is a DNS record that lists the servers authorized to send email on your behalf (such as your ESP or CRM). To protect your reputation, make sure to remove any outdated services you no longer use.
- DKIM (DomainKeys Identified Mail): This adds a cryptographic “seal” to your email header, proving that your content wasn’t altered after you hit “send.” It protects you against spoofing, where scammers impersonate your brand to steal data.
- DMARC (Domain-based Message Authentication, Reporting & Conformance): DMARC tells receiving servers exactly what to do (e.g., “Do nothing,” “Send to spam,” or “Reject”) if the SPF and DKIM protocols fail. If the domains on your SPF and DKIM don’t align with your “From” address, DMARC will fail.
Keep in mind that aligning your domain and hardening your DMARC policy protects your reputation from spoofers and ensures your resonant content actually reaches your audience.
4. Create transparent content
Email marketing compliance relies heavily on setting clear expectations and delivering on them. Urgency should never be used as a marketing trick but as a genuine nudge when a deadline is actually approaching. To stay on the right side of the law, avoid manipulative tactics like fake countdown timers or flashing “warning” alerts.
Also, never start a marketing subject line with “Re:” or “Fwd:” to mimic a personal conversation. This is a direct violation of CAN-SPAM and is easily flagged by filters. Your subject line and copy should always hint at the commercial purpose of the message without using deceptive language just to force an open.
Check out these examples to see the difference between being “clever” and being compliant:
| Strategy | Non-compliant (Deceptive) | Compliant (Transparent) |
| Prizes | You’ve won a $500 Gift Card! | Enter for a chance to win a $500 Gift Card |
| Personalization | Fwd: Thought you’d like this | Ideas for our upcoming meeting |
| Urgency | URGENT: Your account is expiring! | 24 Hours Left: Our Summer Sale is Ending |
Maintaining a consistent, recognizable sender name is also vital for helping recipients immediately understand who is hitting their inbox. But transparency goes beyond just the words.
Using alt text for images is a requirement for accessibility compliance. Additionally, using high-contrast colors and a clear hierarchy in your titles ensures your content is transparent for visually impaired readers, too.
Finally, ensure the information in your email footer is clear. Don’t place your opt-out link or preference center in a way that readers might miss. Hiding these elements doesn’t just frustrate your customers. It means you’re missing a serious compliance gateway that protects your brand’s reputation.
5. Manage your email lists
Effective list management is a core requirement for data privacy and high-performance marketing. By proactively removing inactive or incorrect addresses, you protect your deliverability and your brand’s reputation. For mailbox providers, a clean list is a primary signal that you are a compliant, trustworthy sender.
Compliance starts at the signup form. Using email verification tools and double opt-in ensures that the addresses entering your database are legitimate and not “spam traps” or disposable emails. Beyond the technical setup, segmentation helps you keep subscribers engaged by delivering resonant content tailored to their interests. This reduces the manual spam complaints that can hurt your sender score.
Before you permanently remove inactive subscribers, give them a chance to stay. A re-engagement series is a great way to rekindle the spark with inspiring content or by offering a “Preference Center” where they can adjust how often they hear from you. However, if they stay silent after a few attempts, it’s time to wave goodbye.
Take a look at this re-engagement campaign from Fenty Beauty, which uses a clear incentive and a friendly tone to check in with quiet subscribers:
Subject line: We’ve been missing you 🩷 Here’s 20% off

When someone unsubscribes, move them to a suppression List. This is an important compliance step as it acts as a permanent “do not contact” tag. If you accidentally upload a new lead list later, your system will cross-reference the suppression list and prevent you from re-importing someone who already opted out, a mistake that can lead to hefty fines under most email laws.
Finally, audit your lead sources and email metrics regularly. If you notice that a specific resource or sign-up form is resulting in high bounce rates, remove it immediately. Staying below the 0.3% spam complaint threshold is a requirement, and regular list hygiene is the only way to ensure you never cross that line.
6. Disclose your contact information
According to global laws, failing to disclose who you are and where you’re located is considered suspicious by default and can lead to significant fines. So, what information should you include in your email marketing campaigns to ensure compliance?
Seeing a real address builds immediate credibility and signals to your subscribers that you’re a legitimate entity they can contact if they have a problem. To increase this trust, always use your registered business name and include a clear link to your website.
Including a valid physical mailing address is also a requirement. If you’re working from home and value your privacy, it’s a wise move to invest in a P.O. Box or a virtual business address rather than using your own street address. It’s also helpful to include secondary contact methods, such as a professional email address or a telephone number.
Adding a “Contact us” button that leads directly to your customer support is an excellent way to reduce friction. So are links to your social media profiles, since most of them include built-in messaging apps that customers can use.
Keep in mind that using a placeholder like “123 Main St” or a fake address is actually worse than having no address at all. Modern email service providers (ESPs) use automated tools to verify address formats. If they spot a fake one, they may permanently block your domain’s reach to protect their own reputation.
7. Share your privacy policy
According to many privacy laws, such as GDPR, having a privacy policy hidden somewhere inside your website isn’t enough. You should make it accessible in your email campaigns so that subscribers can review it without having to search elsewhere.
Most businesses include their privacy policy in their email footer so readers can find their data-handling practices. Providing this also reduces the so-called “privacy anxiety” many people face and helps prevent them from marking your email marketing messages as spam.
Here’s what to include to ensure transparency:
- Private data categories: Explain exactly what kind of data you collect (e.g., name, email address, IP address).
- Third parties: Disclose who else has access to that data, such as your ESP and CRM.
- AI and automation: If you use artificial intelligence and automation, explain how these marketing practices work.
- Retention timeframe: Mention how long you retain private data before deleting it.
- Consumer rights: Clarify that consumers have the right to access, change, or delete their data.
Finally, according to CCPA and GDPR, you should proactively notify your customers and subscribers of any changes to your privacy practices to remain compliant.
8. Track upcoming compliance trends
The rise of AI and the subsequent changes it brought to data privacy have created a new landscape for email marketers. The EU AI Act will be fully effective as of August 2026. If you use AI for copywriting or design, you should disclose this to the recipient with a relevant “AI-assisted” tag. Consumers will also be able to opt out of ADMT (Automated Decision-Making) if they feel algorithms are making choices for them.
At the end of 2026, many states in the USA will also introduce their own specific privacy laws. For example, under the Global Privacy Control in many states, enabling a “Do Not Track” signal in a browser should automatically be considered an opt-out.
Moreover, if you fail authentication or exceed the 0.3% threshold in spam complaints, your emails are often rejected, not just landing in spam, but completely disappearing. As third-party data is increasingly marked as non-compliant, zero-party strategies, where a user intentionally shares their data with you, are the safest pathway to remain compliant.
To stay up to date, you can subscribe to relevant newsletters from top ESPs and organizations such as the IAPP (International Association of Privacy Professionals). Sync with your legal team to regularly monitor compliance updates and ensure your strategy remains future-proof.
Navigate Email Compliance Stress-Free
Maintaining a compliant email marketing strategy can be challenging at times, but everyone’s on the same boat. Moreover, following the above practices also secures a high deliverability rate and stellar email performance.
So don’t leave compliance to chance. Put sustained effort into maintaining and improving these habits to keep your business and your customers safe and sound.
If you’re looking for an email marketing platform that checks all the boxes for compliance, sign up for a Moosend 30-day free trial to have all the time you need before making a decision.
FAQS
Here are the most frequently asked questions regarding email marketing regulations:
1. What is email compliance?
Email compliance is the process of adhering to data privacy laws and technical standards when sending commercial emails. While requirements can slightly differ by region, it is built on four main pillars: Consent (getting a subscriber’s permission to send), Transparency (being honest about your brand and your purpose), Control (the user’s power to opt out or manage their data), and Authentication (using technical “passports” like SPF, DKIM, and DMARC).
2. Does GDPR apply to the UK?
Yes, through the version known as UK GDPR. While the UK introduced the Data (Use and Access) Act 2025 (which fully implemented new reforms in early 2026), the core principles remain very similar to the EU version. If you target residents in both the EU and the UK, you must comply with both sets of regulations, which largely overlap in their requirements for consent and transparency.
3. Do anti-spam laws apply to cold outreach emails?
Yes, but they vary significantly by region. In the US (CAN-SPAM Act), cold emailing is legal as long as your intent is transparent, you include a physical address, and you provide a clear opt-out method. In the EU/UK, you are generally only compliant if you have a “Legitimate Interest” and the email is highly relevant to the recipient’s professional role. Finally, in Canada (CASL) and Australia, it is much riskier, as express or implied consent is typically required before sending.
4. What is HIPAA?
HIPAA (Health Insurance Portability and Accountability Act) is a U.S. federal law protecting sensitive patient health information. For email marketers in healthcare, this means you cannot send that information via standard email without specific safeguards, such as encryption and a signed Business Associate Agreement (BAA) with your email provider. It applies to health practitioners, hospitals, insurers, and any business partners handling patient data.
You spend hours crafting the perfect email. You polish the visuals and fine-tune every word until the message feels just right. But even with a “perfect” design, something is often missing.
In many cases, that missing piece is simpler than it seems: trust.
Before making purchase decisions, most consumers look for social proof. Whether it’s a real customer testimonial or a 10-second unboxing video from TikTok, user-generated content (UGC) often builds credibility faster than a studio-shot campaign. Instead of telling your audience you’re the best, you let their peers prove it.
In this post, we’ll show you how to use UGC in your emails successfully. From high-converting use cases to valuable marketing tips, here’s how to make social proof the most organic and profitable part of your campaigns.
Enrich your emails with UGC
Use Moosend’s pre-made templates and drag-and-drop builder to design memorable campaigns.
Start for freeWhy UGC Can Make Your Emails Stand Out
If you’re skeptical about adding user-generated content, these benefits will clear the air:
- Stops the “scroll-past” effect: Considering how many emails land in an inbox, and how similar most promotions look, scrolling past them is inevitable. But an authentic photo or video from a customer stands out. It feels like something a friend would send, which naturally makes people stop and look.
- Proves you’re authentic: Since many brands rely on polished studio images and AI-generated copy, using raw imagery and real customer quotes makes your brand feel more relatable. It’s proof that your products work in the real world, not just under perfect lighting.
- Increases trust: No one wants to be the first to try a new product or service. User-generated content reassures prospective customers that they’re making a great choice, giving them the confidence to move faster to checkout.
- Adds a human touch: It’s hard to resonate with a logo. Sharing stories from real people who use and trust your products is like a friendly recommendation. It builds a connection that a standard sales pitch simply can’t match.
The bottom line? UGC shifts the focus from what you say about your brand to what the world says about it. Being real is your biggest competitive advantage.
Common User-Generated Content Types
To use UGC effectively, you first need to identify the different types of content available and what will resonate most with your audience. Here are the most common options:
- Photos & short videos: This includes raw smartphone captures, such as lifestyle images, unboxing reels, or vertical clips showing the product in action.
- Written reviews & ratings: Testimonials and star ratings from popular review sites can work wonders, especially when paired with “Verified Buyer” badges or indicators like date and location to prove authenticity.
- Social media mentions: Snapshots of your brand being mentioned on platforms like Instagram or TikTok can capture real-time hype around your products.
- Customer stories: Longer narratives, such as case studies, can demonstrate the real impact your products or services have on a customer’s life.
- Gamified user content: Interactive elements, like community polls or “voted by you” product designs, help build trust through the power of real-time data.
- Micro-influencer endorsements: When not part of a paid partnership, content from niche creators can offer more authority than a casual customer post while remaining more relatable than a professional ad.
The good news is that adding UGC to your emails doesn’t necessarily require coding or design skills. With the right email marketing platform, you can easily combine automation and design tools to bring these ideas to life.
For example, tools like Moosend offer ready-made workflows and a drag-and-drop editor to get you started quickly. Feel free to sign up for a 30-day free trial and see how it suits your needs.
Top UGC Email Campaigns & Use Cases
Which email types benefit most from UGC? The short answer is any campaign where you want to see higher conversion rates. Here are the most effective use cases, along with examples from notable brands to inspire your next send.
1. Welcome emails
First impressions matter, and that’s why adding UGC to your welcome emails can make a significant difference. Since new subscribers are often at their most engaged the moment they join your list, reinforcing that interest with social proof can be the final nudge they need to make their first purchase.
Triple Nikel, a veteran-owned apparel business, welcomes new subscribers with a time-sensitive discount paired with a “What they say about us” section. In it, new subscribers can read a genuine customer review alongside an image of real people wearing the brand’s T-shirts.
This not only showcases the quality, but also highlights the brand’s legacy. There’s no better way to kick off a relationship than by showing off happy customers from day one.
Subject line: Welcome to Triple Nikel!

2. Product recommendations
Instead of just listing a product to convince people to buy it, show it in action or feature the customers who already trust it. Enhance your “Recommended for you” section with best-selling items or customer ratings and reviews to sharpen your marketing message.
For example, instead of simply recommending its top products, FILA shared a campaign featuring the items that received the most likes on Instagram. They let recipients know exactly what the email was about right from the subject line. Plus, the clear “Shop Now” call-to-action buttons help turn that social proof into immediate conversions.
Subject line: Most ❤️’ed Instagram

3. Upsell/Cross-sell campaigns
If a customer has recently made a purchase, you can enhance their experience and boost your ROI with upsell or cross-sell emails. Instead of simply suggesting products they might like, invite them to join a successful community already using those solutions.
In this example from Gorgias, they invite trial members whose access is about to expire to upgrade by including a powerful quote from a current customer who saw a rapid increase in productivity. By adding the customer’s headshot and a link to the full case study, Gorgias provides the proof needed for those still on the fence.
Subject line: ⌛️ Your Gorgias trial ends tomorrow

4. Abandoned cart emails
Did you know that approximately 69% of abandoned cart emails are opened? Because these triggered messages receive such high traction, they’re the perfect place for social proof. Instead of a standard “You forgot this,” try a more compelling angle like: “See why [Customer Name] loves this.” Often, that’s exactly the motivation a shopper needs to head back to the checkout.
In their abandoned cart email, Endy embeds a high star rating directly next to the product image, including the total number of customer reviews. By showing that the product’s popularity is backed by thousands of real users, they instantly build the credibility needed to overcome prospects’ hesitance.
Subject line: It looks like you left something behind…

5. Seasonal newsletters
Given how hectic inboxes get during peak seasons like Christmas or summer, adding authentic voices to your emails can help you stand out. By using reviews or content from your community that truly resonates with your audience, you give your seasonal ROI a better chance to spike.
For instance, Oodie created a high-energy GIF featuring customer images and ratings to boost their Valentine’s Day sale. It’s the kind of content that’s hard to scroll past. This addition helps prospects visualize themselves using the product, making it much easier for them to hit “purchase.”
Subject line: 🌹 Valentine’s Day sale ends soon

6. Post-purchase emails
Reassuring your recent buyers that they made the right choice by sending a post-purchase email filled with pro tips or product insights is a great tactic. When this advice comes directly from the community, the perceived value is much higher. It transforms a simple transaction into the feeling of joining an active, supportive circle.
After a CTA button that links to educational content, Sundays shared reviews from real customers, each with a happy pet’s headshot to engage pet owners.
Subject line: Get ready for the good stuff!

7. Lead nurturing campaigns
Most SaaS businesses invest in moving leads down the funnel, and nurturing emails are an important part of that process. To remove any hesitation regarding your service, provide user-generated content at key decision points to turn prospects into users. For instance, triggering these emails for people who have recently browsed your pricing or product pages can effectively move the needle.
In Moosend’s monthly newsletter, for instance, we feature top-performing posts from our blog. We often include compelling customer stories to subtly encourage those who haven’t signed up yet to give us a try, while showing existing users how to get the most out of our platform.
Subject line: Don’t Be That Brand 🤦

8. Re-engagement emails
When a subscriber hasn’t opened your emails for months, a simple “We miss you” is usually not enough. To truly win them back, follow that sentiment with evidence from authentic voices on why your brand is still worth their attention. Including testimonials from real customers can remind them of the value they’re missing and spark a new reaction.
Surreal, the cereal brand known for its uniquely witty tone, shared an honest review in a recent re-engagement campaign. It perfectly reflects the recipient’s mindset, from initial skepticism to eventually liking the product.
Subject line: You’ve got Surreally good taste 👌

How to Collect High-Quality UGC
Ready-to-use reviews, especially high-quality visual content, are unlikely to reach you unless you’re actively looking for them. To start collecting valuable user-generated content, you need a streamlined strategy.
Check out these simple tactics to get started:
Track social media hashtags and mentions
Create unique branded hashtags and monitor what’s being said about your brand and products. Don’t just track direct mentions; look for the lifestyle being built around your brand. Also, choose content that doesn’t just show how good your products are, but how they actually feel and fit into your customers’ lives.
Beyond hashtags, use social listening tools like Brand24 or Sprout Social to monitor brand mentions and broader niche hashtags. When you find a great post, save it to build a mood board for future email campaigns.
Don’t forget to keep an eye on niche platforms like Reddit or Slack communities, too. A detailed recommendation in a private channel is often more “high-intent” than a public Instagram post, providing a deeper level of trust.
Set up post-purchase triggers
With email automation, you can trigger the right requests at the perfect moment. To collect UGC, you can schedule post-purchase triggers 24-48 hours after delivery to ask for unboxing content, or follow up 1-2 weeks later for more in-depth performance reviews.
Choose the content type that your audience is most likely to share, and then make the process frictionless. For example, you can embed a star-rating system directly in your email or provide a quick checklist on how to film a brief TikTok reel and successfully upload it.
To bring this UGC strategy to life, an email marketing platform with robust automation and design capabilities is essential. You can choose from pre-made workflow recipes and easily adjust the send criteria using if/then branching logic. This allows you to automatically follow up with customers based on their specific actions, or lack of them.

Share compelling incentives
If you’re looking for UGC that requires more effort, like high-definition video or a recorded podcast quote, it’s best to offer something in return to the customers who “join the mission.”
A tiered reward program is an excellent way to scale these incentives based on the level of effort required. For example:
- Written reviews: Offer free shipping on their next order.
- Video tutorials: Provide a 10% discount or a gift card.
- High-quality creators: Run a giveaway where anyone submitting top-tier UGC can win a high-value grand prize.
Keep in mind that in certain industries, especially SaaS, where your customers are often other businesses, status often outweighs discounts. Instead of a coupon, give them the opportunity to be featured in your next newsletter or dedicate a full case study to their success and share it across your social channels.
Check popular review platforms
Your best reviews don’t always live on your own assets, like your website or social media. External platforms, such as Yelp and Google, or G2 and Capterra for SaaS, often contain gem reviews you can proudly share with your audience.
Seek out 5-star ratings and generous testimonials and re-package them into brand-aligned graphics for your email campaigns. This is especially effective for written reviews that highlight your product’s unique features in a way your own marketing copy might miss.
Moreover, if your brand has gained enough traction, search YouTube and TikTok for “Best [Product Category] of 2026” videos to see if you’ve been featured. If you find a shoutout you love, reach out to the creator and ask for permission to share a snippet of their content in your next email.
Reach out to loyal customers
There’s no better advocate than a customer who has stood by your brand for years. These loyal members know your products inside and out. To tap into their trust, invite your top 1% into an ‘Insiders Circle.’
Give them early access to product drops in exchange for their honest, first-look reviews. By giving them a seat at the table, you aren’t just collecting content; you’re turning customers into co-creators who are eager to share their experiences with the world.
To save them time, share a dedicated landing page where they can easily drag and drop their videos and photos directly from their phones. This keeps the quality high and the process simple.
Best Practices for Adding UGC to Your Email Campaigns
Is simply adding UGC enough to make your emails more appealing and high-converting? How you apply that content matters just as much as the content itself. Follow these best practices to ensure your UGC-based email campaigns perform their best.
1. Secure explicit consent and rights
Authenticity requires integrity, so before displaying any type of UGC, you must obtain the customer’s consent. When you find a great post, reach out via email or DM to ask for permission to feature it.
To be as transparent as possible, provide context on where the content will appear. Try something like: “We love how you showcased our service! We’d be honored to feature your post in our next weekly newsletter.” Always keep a screenshot of their reply or use a rights management tool (DRM) tool to maintain digital proof of consent.
Keep in mind that under recent privacy regulations, users have the right to request the removal of their content at any time. While this is rare for email, it can be tricky when it happens. Since you can’t “unsend” an email, your best move is to replace the file at the source URL. By doing this, the photo will be updated (or disappear) the next time someone opens the email.
Want to learn more? Download our email privacy guide to dive into the most essential compliance rules.
2. Match UCG with the email context
Not every piece of user-generated content fits every email. If you sell bedding, for example, there’s no need to include a review about your linen sheets in a product recommendation email specifically for mattresses.
Make sure the UGC you choose aligns with the overall “vibe” of the email, including its design and core messaging. Audience segmentation plays a huge role here: if you’re sending different campaigns to Gen Z and Gen X, you might lead with a high-energy short-form video for the former and a detailed, authoritative written review for the latter.
Finally, when a specific product is featured in your UGC, ensure the CTA button leads directly to that product page. Making a customer navigate from your homepage to find what they just saw in a photo adds unnecessary friction and can cost you the sale.
3. Make social proof easy to spot
Why add UGC to your emails if it’s buried in the copy or hidden at the very bottom? Your subscribers should be able to identify a customer story at a glance.
Start by making your UGC stand out visually. You can replicate a social media UI frame (like an Instagram post layout) or add a “Verified Buyer” badge to differentiate from your standard assets. Additionally, when pairing social proof with a specific product, place them close together to strengthen the connection, while maintaining enough white space for a clean, scannable reading experience.
Finally, some brands use handwritten-style email fonts for quotes to give the impression they were written by real people. This small design choice makes the content feel more human and approachable.
4. Optimize for responsiveness and accessibility
Most users open their emails on mobile devices, so ensuring an optimal experience is non-negotiable. Make your UGC fully mobile-responsive by using vertical (9:16) or square (1:1) aspect ratios that naturally fit a phone screen.
Avoid using large files that slow down loading times and hurt the overall user experience. Instead, use modern formats like WebP to compress customer media without losing quality. Finally, to ensure your content is accessible to everyone, add alternative (alt) text to all images. This allows screen readers to describe your UGC to visually impaired users, making your brand more inclusive.
5. Ensure quality without over-editing
User-generated content doesn’t need to be perfect. In fact, it’s often more convincing when it feels raw and authentic. While light polishing of colors, audio, or typos is fine, the final output should feel like it was created by a friend, not a creative agency.
Make sure any modifications stay true to the original vibe. If you find yourself spending too much time trying to “fix” a specific customer photo, it’s a sign you should choose a different one. The goal is to find content that’s naturally high-quality, not to over-edit it into something that looks like a studio shot.
Pre-made UGC-based Email Templates
Most email marketing platforms provide pre-made, fully responsive templates to save you time. Here are a few standout designs from Moosend’s library that are perfect for showcasing user-generated content.
You can sign up for a free trial and use our drag-and-drop builder to customize these layouts to fit your brand in minutes.
Visual UGC email template
Enhance this eCommerce template with user-generated photos that showcase your brand in the real world. You can easily swap static images for high-energy lifestyle videos, just remember to keep your file sizes optimized so they don’t impact loading times or the mobile experience.

Written UGC email design
Customize this template to fit your brand’s specific goals, whether you’re in SaaS or eCommerce. You can easily include images, videos, or any other content type that resonates with your audience. With Moosend’s drag-and-drop editor, making these adjustments is simple and requires zero coding knowledge.

Real Stories, Real Results
Is now the right time to start incorporating UGC into your email campaigns? Absolutely. And if you’re already using it, there’s always room to optimize. Before you build your next campaign, remember that authentic stories are your most powerful tools for turning skeptical visitors into loyal customers.
Seek out the quotes and social media posts that complement your brand, plan your outreach, and let the world see your greatest reward: the trust and preference of your customers.
FAQs
Here’s a quick round of frequently asked questions regarding UGC in emails.
1. What is user-generated content (UGC)?
User-generated content refers to any type of social proof created directly by your customers, such as testimonials, lifestyle images, or “day-in-the-life” videos featuring your products or services. It’s the most effective form of word-of-mouth marketing because it comes from real people, whom consumers find far more trustworthy than traditional brand advertisements
2. How can I collect UCG through emails?
Use automation to schedule post-purchase triggers 24–48 hours after delivery (for unboxing content) or 1–2 weeks later (for performance reviews). Asking for a “real opinion to help other shoppers” is a powerful motivator, and offering a small incentive, like free shipping or entry into a giveaway, can significantly boost your response rates.
3. Can I use AI-generated images if I don’t have real photos?
No. If a customer detects AI-generated content being passed off as authentic UGC, it will damage your brand’s reputation and destroy consumer trust. It’s much better to feature a single, high-quality written review from a real customer than to put your credibility at risk with “fake” visuals. For UGC to work, it must remain raw, real, and authentic.
Most of the time, launching a campaign isn’t hard. On the contrary, it’s repetition that makes the task menial and, sometimes, uninspiring.
You’re rebuilding layouts you’ve already used, rewriting sections that barely change, and spending time on setup instead of the actual message. That’s the friction. Not the tool or the strategy.
How about, instead of optimizing how you build from scratch, you just skip that step entirely?
Reuse what already exists. Start from a template, duplicate a campaign, pull in saved sections, and only touch what actually impacts performance.
In this guide, we’ll show you how to create an email marketing campaign in Moosend without starting from zero, so you can get from idea to send-ready much faster.
Build faster with what already works
Start with premade templates to get from idea to send-ready without creating from scratch.
Try MoosendHow to Go from Setup to Send
The fastest way to launch a campaign in Moosend is to build on existing assets, whether that’s a saved layout, a previous campaign, or reusable sections. Let’s break the process down into six easy steps.
Step 1: Start with a regular campaign
To create an email marketing campaign, start with a regular campaign. That’s the type Moosend uses for newsletters, promotional emails, and product updates, so it is the right default for most recurring sends.
On the setup screen, focus on the fields that actually move the campaign forward: The campaign name, subject line, preview text, and from name/email:

Moosend also lets you add an unsubscribe link (which is a core element of your email marketing strategy as a whole), reply-to details, a confirmation email, and optional tracking settings at this stage:

This is your basic setup, not where you should spend your creative energy, so don’t treat this step like the campaign itself. The campaign name is for internal use; the subject line can be refined later, and sender details should already be established before launch.
In other words, this step gets you through the setup cleanly. Then, you can save time and effort by choosing an existing template, duplicating a past campaign, or reusing saved sections instead of building from scratch.
Step 2: Choose your starting point
As we’ve already established, you don’t need to begin with a blank canvas. During campaign creation, you’re taken to the template library, where you can either use a prebuilt template or create your own.
If the goal is speed, the better move is to start with something that already has structure and then customize it.
Moosend also lets you duplicate an existing campaign to reuse its settings and design, or save individual items and layouts in the editor so you can pull them into future emails without saving the entire design as a template:

Let’s explain your starting points in more detail.
Option A: Start with a ready-made template
Use this when you’re creating a campaign for the first time or testing a new format. Since the layout, spacing, and content hierarchy are already in place, you can focus on the content instead of rebuilding the structure yourself.

In practice, that means you only need to replace the parts that are campaign-specific, such as the copy, images, and your call-to-action copy or button (CTA). Moosend’s template library is built for this exact workflow.
Option B: Duplicate a previous campaign
Ideal for recurring sends such as newsletters, promotions, or product updates. Moosend’s duplicate option lets you reuse a campaign’s settings and design with slight variations, saving time compared to creating a new campaign from scratch.
This is the better route when the format already works and only the message changes. Instead of rebuilding, you keep the logic and update the offer, copy, and links.
Option C: Reuse saved sections
Use this when your campaigns change often, but certain components stay the same. In the campaign editor, Moosend lets you save custom items and layouts without saving the full email as a template.

Saved items appear in the Items tab, and saved layouts appear in the Layouts tab, so you can drop reusable sections like buttons, timers, headers, or promo blocks into future campaigns as needed.
These elements help you avoid rebuilding structures that already work, allowing you to take your campaign off the ground more easily and quickly.
Step 3: Edit only what drives performance
Now the risk shifts. Since you’re not starting from zero, avoid making unnecessary changes to parts of the campaign that already perform well.
To avoid that, ask yourself whether the element you’re changing affects performance or just how the email looks.
Only focus on what impacts outcomes:
- Context: What’s different in this send (offer, timing, angle)
- Entry point: Subject line and preview text (what gets the recipient to open your email)
- Action: The CTA’s clarity and destination (what drives the click)
Everything else is already doing its job.
Moosend’s editor makes it easy to adjust individual elements like text blocks, buttons, or images, without touching the full structure. You can edit specific components, preview changes instantly, and keep the rest of the layout intact.
Step 4: Use the AI writer for faster content generation
Once the structure is in place, email copy is usually the last thing that slows the campaign down, particularly when starting from a blank field.
This is where Moosend’s AI writer is useful, as it creates a shortcut when you already know what the campaign needs to say:
- In the campaign setup, you can use the AI writer to generate subject lines and preview text directly from the basic settings screen.
- Inside the editor, you can create body copy for text blocks, using prompts plus built-in options for content type, tone, and word limit.
Moosend also lets you revise existing text rather than generating new text from scratch. You can improve writing, fix spelling and grammar, make the copy shorter or longer, summarize it, or change the tone:

The AI Writer helps you create an email marketing campaign without treating every line as a fresh writing task. If the template, layout, and offer already exist, it’ll help you move faster through the wording by generating content, performing copy checks, or refining the messaging.
Step 5: Select an existing audience
To create an efficient email marketing campaign, you need to choose the right audience. Start with the lists you already have, then narrow the send using segments.
In Moosend, you can send a regular campaign to one or more existing email lists. If the same contact appears in multiple selected lists, the platform checks for duplicates to ensure the recipient receives the campaign only once. This way, you reduce friction and save time.
The better workflow is to use some of Moosend’s pre-made segment templates to define who should receive this version of the campaign. Moosend lets you build segments from data you already collect, including custom fields and prior campaign activity such as opens, clicks, and specific link interactions.

You can also layer in eCommerce and behavior-based criteria, such as viewed product, added to cart, purchased product, total spent, device type, or funnel stage, when those data points are available. In practice, that means you don’t need a brand-new audience every time the message changes. You simply create a filter.
Step 6: Run quick checks and launch
This final step validates the campaign you already built from existing assets. That way, you don’t need to revisit decisions you have already made.
Start with a test email. In Moosend, you can send a test directly from the campaign editor to up to six recipients, which is enough to check how the email renders in real inboxes before launch.

Keep in mind that personalization tags and unsubscribe links don’t work in test campaigns, and Moosend doesn’t record statistics for them, so use the test for layout and rendering, not performance review.
You can also use Preview mode to review the campaign across device types. Moosend’s visual editor lets you preview the newsletter on mobile, tablet, and desktop. It also supports a separate mobile editing mode for mobile-specific adjustments without affecting the desktop design. That makes this step useful for checking the email’s presentation without forcing a broader redesign.
Before sending, review any personalization in the live campaign settings and run a Spam Test from the campaign preview stage. Moosend includes both “Send A Test Email” and “Spam Test” on the Preview page before launch, so you can catch potential issues early and improve your email deliverability before sending:

These actions ensure you’re ready to launch your campaign with zero added friction.
Businesses That Benefit from This Workflow
This workflow suits teams that want to create an email marketing campaign without having to build every part themselves.
It works best for smaller teams, eCommerce marketers, SaaS teams, and agencies that send frequently and need a faster way to turn their ideas into send-ready campaigns.
The operational advantage comes from a repeatable process that team members can follow without having to approach campaign creation differently each time. In Moosend, marketers can start from the template library to keep layouts consistent across sends, use built-in email segments instead of defining audiences from scratch, and rely on the AI Writer to speed up subject line, preview text, and copy production during high-volume periods.
That structure helps teams move faster while keeping branding, messaging, and audience targeting aligned across campaigns. It also reduces reliance on design or development support for routine sends, which can otherwise slow production down.
For teams that send frequently, this workflow also simplifies approvals and onboarding. New team members can work within existing processes and campaign patterns instead of having to figure everything out independently.
Stop Building Every Email from the Ground Up
You don’t need to produce all elements from scratch to create your first email marketing campaign. You can start with what Moosend already puts within reach and refine from there.
A regular campaign can begin with a premade template; audience targeting can be narrowed using existing segmentation templates; and copy can be generated or improved with the AI Writer rather than written from a blank field.
Inside the editor, layouts and items are modular by design, which makes campaigns easier to assemble, adjust, and launch without restarting the process each time.
The better workflow is simpler: use the existing structure, assets, and support, then focus your effort on the message that actually changes.
If you want to put this approach into practice, try creating your next campaign in Moosend by working with what’s already available inside the platform.
FAQs
Now, let’s answer some of the most common questions on campaign creation.
1. What’s the fastest way to create an email marketing campaign in Moosend?
Start with a premade template from the template library instead of a blank design. Moosend already provides structured layouts, so you can skip building the email’s foundation and focus only on updating the message, visuals, and CTA.
2. Can I create an email marketing campaign in Moosend without using a template?
Yes, Moosend lets you start with a blank design, but it’s rarely the fastest option. If your goal is to create an email marketing campaign efficiently, using a premade template or duplicating an existing campaign removes the need to define structure, layout, and spacing from scratch.
3. Do I need design or coding skills to build a campaign in Moosend?
No. Moosend’s premade templates and drag-and-drop editor handle the design structure for you. You don’t need to code or manually design layouts. Just select a template and customize the parts that are specific to your campaign.
4. What parts of a campaign can I skip when using premade assets?
You can skip most of the setup work, including layout creation, content structure, and initial copywriting. With an extensive template library, a built-in AI Writer, and ready-to-use segmentation templates, you’re starting from a prepared foundation rather than building each element from scratch.
5. What’s the fastest way to reuse a campaign in Moosend?
The quickest method is to duplicate a previous campaign. This keeps the layout, settings, and structure intact, so you only need to update the message, visuals, and links. It’s the most efficient approach for recurring campaigns like newsletters, promotions, or product updates.
Content marketing plays a bigger role in digital marketing than most teams realize. It gives your SEO, email marketing, social media, and landing pages something meaningful to offer in the first place.
Without useful content, campaigns become harder to sustain. Search visibility drops, emails become less relevant, and marketing messages start to feel disconnected.
Strong content helps connect those efforts. It gives people a reason to engage with your brand and move closer to taking action.
In this post, we’ll explore how content supports your wider marketing efforts and share content marketing tips for your digital marketing strategy.
How Does Content Marketing Support Digital Marketing?
Content marketing gives your digital marketing channels something useful to share, giving people a reason to find you, trust you, and take the next step.
Since every channel depends on it in different ways, content shouldn’t be treated as a separate blog function; it should support the entire customer journey.
For instance, someone might discover your brand through search, read an article, join your email list, click a newsletter, and eventually convert through a landing page. Content keeps those interactions connected.
In a nutshell, content marketing supports digital marketing by helping you:
- Show up when people search for answers
- Explain your value before someone talks to sales
- Give email campaigns more helpful material
- Keep your message consistent across channels
- Build trust with useful examples, proof, and education
- Move people toward the next step with less friction
Best Content Marketing Tips for Your Digital Strategy
The tips below will help you create more purposeful content, use it across channels, and connect it to measurable results.
1. Set clear goals before creating content
One of the easiest ways to waste content effort is to create pieces that have no real purpose.
Before you write a piece of content, define what it should accomplish. The goal may be brand awareness, email list growth, lead generation, or conversion support.
Each goal changes how the content should be written. For example:
- Awareness content should be easy to discover and simple to understand.
- Lead generation content should offer a clear reason to subscribe or convert.
- Nurture content should answer objections and build confidence.
- Conversion-focused content should make the next step feel natural.
This is where content becomes strategic instead of reactive.
A useful way to plan is to assign each asset a primary and a secondary goal. For instance, a blog post may be built to attract organic traffic first and support email signups second through a form.
Here’s an example from Drip’s blog:

That small decision improves focus, helping you avoid generic content that fills the calendar but doesn’t support the business.
Broader marketing research also shows how important alignment has become for modern marketing teams. When content is tied to clear goals, it is easier to plan, approve, distribute, and measure.
2. Build content around real audience questions
The best content usually starts with actual customer queries.
Your audience is already telling you what they need help with. You can find those questions in sales calls, support conversations, search queries, comments, reviews, community discussions, and internal team notes.
Each of these questions is a content opportunity. So, start by grouping them into stages:
- What do people ask before they understand the problem?
- What do they ask while comparing options?
- What do they ask before they take action?
- What do customers ask after they buy?
This gives your strategy a greater range, allowing you to create content that supports discovery, evaluation, conversion, and retention.

For example, a broad topic like “email marketing” may be too general on its own. A more useful question might be, “What should a welcome email include?” or “How often should small teams send newsletters?”
Those questions are easier to answer, easier to structure, and more useful for the reader. Also, you can find these queries on Google by scrolling down to the “People also ask” section, or use tools like Ahrefs and Semrush.
3. Improve visibility by optimizing content for LLMs
Search behavior is changing. People now search in more conversational ways, and AI-powered search experiences often prioritize content that answers questions clearly and directly.
That means that even if you answer audience queries, it may still not be enough to get your brand out there. Content that performs well today is structured, specific, and easy to understand.
So, to get better visibility, focus on:
- Answering the main question early
- Using clear headings and logical structure
- Covering topics with enough depth and context
- Writing naturally around related terms and concepts
- Creating focused sections that are easy to scan
This is especially important for AI Overviews and other AI-driven search experiences, where content needs to be clear enough for systems to interpret and surface confidently.
The goal is not to “write for AI,” but to create content that’s useful, organized, and easy to understand for both people and search systems.
4. Use content to strengthen your email marketing
Email marketing performs better when you have something useful to send.
Many email programs struggle because they rely too heavily on promotions, company updates, or repetitive reminders.
Content gives your emails more value. It helps you educate subscribers, stay visible between campaigns, and create better reasons for people to keep opening your messages.
Different types of email content support different stages of the customer journey:
- Welcome emails: Introduce your brand and guide new subscribers toward a useful next step, such as a guide, tutorial, or product walkthrough.
- Newsletter emails: Share educational content, industry insights, updates, or useful resources that keep your audience engaged consistently.
- Promotional campaigns: Add context to your offer by explaining the problem, use case, or value before prompting the conversion.
- Onboarding emails: Help new users understand your product, discover features, and reach value faster.
- Re-engagement emails: Offer useful content, updates, or new resources to reconnect inactive subscribers with your brand.
- Post-purchase emails: Support customers after conversion with tutorials, FAQs, recommendations, or educational follow-ups.
- Lead nurturing campaigns: Deliver content that gradually moves subscribers from early interest to sales readiness through education and trust-building.
For example, this welcome email from Fable immediately introduces the brand, explains its product philosophy, highlights safety and durability, and gives new subscribers a first-purchase incentive.

Instead of jumping straight into promotion, the email focuses on building trust and helping readers understand the brand first.
5. Repurpose content across digital channels
A strong content strategy shouldn’t make every channel start from scratch. One good idea can support several parts of your digital marketing plan.
Repurposing, though, doesn’t mean copying and pasting the same content everywhere. To make it work, you need to adapt a single useful idea across different formats and moments in the customer journey.
For instance, a blog post about analysis paralysis in marketing could become:
- A newsletter about over-reporting and decision fatigue
- A LinkedIn post on why “perfect attribution” slows teams down
- A checklist for making faster campaign decisions
- A landing page section about simplifying reporting workflows
For example, Moosend’s newsletter repurposed a broader discussion of analysis paralysis into a shorter, more focused email. Instead of trying to cover the entire topic again, it highlighted the core problem, explained the impact, and turned the content into actionable advice readers can apply quickly:

This helps you get more value from every idea and makes your message more consistent, since each version stems from the same core point.
Content repurposing matters because audiences consume information in different ways. Some people read long-form guides. Others prefer email, video, social posts, or shorter summaries.
6. Keep your messaging consistent across channels
When your blog says one thing, your email says another, and your landing page says something else, the experience feels fragmented. Even if each piece looks polished, the overall message becomes harder to trust.
Consistency entails using the same core promise, audience understanding, and tone across touchpoints.
This matters because people rarely move through a clean, one-step journey. Someone may find your article in search, subscribe through a form, read a welcome email, click a campaign, and land on a conversion page. If each step feels disconnected, confidence drops.
Good content helps prevent that by giving your team shared language. It clarifies the main themes, proof points, objections, and next steps that should appear across channels. It also helps your brand feel more recognizable without sounding repetitive.
7. Focus on quality over quantity
More content doesn’t automatically mean better results. In many cases, it creates the opposite problem. Teams publish quickly, but the work becomes thin, repetitive, or loosely connected to the customer journey.
Quality matters because your audience has limited attention. If a piece doesn’t answer a clear question or help someone make progress, it becomes noise.
Also, this doesn’t mean every article needs to be long or complex. A smaller number of strong pieces can often support your strategy better than a high volume of weak ones.
For instance, one useful piece can attract search traffic, feed an email sequence, and help sales conversations. Ten generic posts may do very little.
So before you publish more, ask whether each piece deserves to exist. Does it answer a real question? Does it support a clear goal? Can it be reused across channels? Does it help the reader make a better decision?
If the answer is no, volume won’t fix the problem.
8. Create a simple workflow your team can manage
A good content strategy should also be sustainable.
If your process depends on last-minute ideas, unclear ownership, or endless approvals, consistency will eventually break. That isn’t usually a creativity issue but a workflow problem. But does this mean you need a complex process to manage everything?
Well, no. For many teams, a simple flow works best:
- Choose one topic tied to a clear goal
- Define the audience question behind it
- Decide which channel will lead
- Draft the core asset
- Adapt it for email, social, or landing page use
- Review for message clarity
- Publish and measure the result
This kind of workflow keeps the team focused. It also reduces the chance of content getting stuck because no one knows who owns the next step.
A smooth flow is also important when content supports conversions. If the blog post, email, and landing page aren’t aligned, the journey becomes less effective.
9. Measure the results that matter most
You don’t need a complicated dashboard to understand whether content is helping your digital strategy.
Start with the signals that match the goal of the piece:
- For visibility, look at search impressions, clicks, and the types of queries that drive traffic.
- For engagement, check email interaction, scroll depth, page behavior, and repeat visits.
- For conversion support, take a look at form fills, assisted conversions, demo requests, or lead quality.
The point here is to measure the right things to get to the right conclusions.
Google’s Search Console is useful for understanding how people find your content through search. It can help you see which queries bring traffic, which pages earn clicks, and where there may be room to improve.
This matters because content performance is not only about traffic volume. A smaller audience with stronger intent may be more valuable than a larger audience that never takes action.
Useful measurements help you answer practical questions like: “Which topics attract the right people?” and “Which emails drive people back to useful resources?”
That’s how content becomes a strategic asset instead of a publishing habit.
Common Mistakes That Weaken Content Marketing Results
Most content problems stem from weak alignment. Some of the most common mistakes include:
- Publishing content without a clear goal
- Choosing topics that are too broad
- Writing for channels instead of real audience needs
- Treating email marketing as promotion only
- Creating one-off pieces with no repurposing plan
- Letting messaging drift across channels
- Measuring traffic without measuring quality or intent
- Chasing content trends that do not support the strategy
- Publishing content just to maintain volume
- Creating disconnected assets that don’t support the customer journey
Google’s starter guide is a helpful reminder that the basics still matter. Clear pages, useful content, understandable structure, and relevant links make content easier for both users and search engines to navigate.
The same principle applies to your wider marketing strategy. If the content is hard to understand, disconnected from the journey, or created only to fill a schedule, it’ll be harder to make it perform.
Building a Successful Digital Marketing Strategy with Content
Changes in search behavior, algorithm shifts, and AI are already transforming how people discover information online.
But one thing remains constant: people still look for useful content.
They still search for answers, compare options, learn new skills, and look for brands they can trust. AI may change how content is discovered, summarized, or delivered, but it doesn’t remove the need for clear, relevant, and genuinely helpful information.
That’s why content still sits at the center of strong digital marketing strategies, giving every channel more value, direction, and purpose.
So, to succeed, create content people actually want to engage with and build a strategy strong enough to support the entire customer journey.
FAQs
Here are some common questions about content marketing.
1. What is content marketing?
Content marketing is the practice of creating and sharing useful content to attract, engage, and support a specific audience. It can include blog posts, emails, guides, videos, case studies, landing pages, newsletters, webinars, and downloadable resources. The goal is to help people understand a topic, solve a problem, compare options, or take the next step with more confidence.
2. How does content marketing support digital marketing?
Content marketing gives each channel stronger material to use. Search uses content to answer queries. Email uses content to educate and nurture subscribers. Social media uses content to start conversations. Landing pages use content to build trust and guide action. That’s why content works best when it’s connected to a larger strategy. It helps every channel feel more useful and consistent.
3. What are the most popular types of content marketing?
Common types of content marketing include blog posts, newsletters, email sequences, videos, case studies, guides, webinars, landing pages, templates, checklists, and social media posts. The best format depends on your audience and goal. A blog post may work well for search visibility, while an email sequence may work better for nurturing leads over time.
4. How can small teams create content more consistently?
Small teams can create content more consistently by keeping the process simple. Start with one clear goal, choose topics based on real audience questions, create one strong core asset, and repurpose it across email, social, and landing pages. A lightweight workflow also helps. Assign ownership, set realistic deadlines, review for clarity, and measure only the signals that align with the content’s goal.
Fashion brands compete for attention in some of the most crowded inboxes around.
The best emails stand out because they do more than announce a new collection or promote a sale. They reflect the brand’s style, personality, and perspective, giving subscribers a reason to keep opening future campaigns.
That’s a harder brief than it sounds, particularly when most inboxes are full of similar promotional layouts and discount codes.
This roundup collects real fashion newsletter examples from apparel and footwear brands that get it right, covering product launches, buying guides, brand storytelling, and values-led campaigns. Each one includes a breakdown of what specifically makes it work, so you can bring those lessons to your own fashion email templates.
Fashion Email Marketing Design Best Practices
Here are the design principles that consistently show up in fashion emails that actually perform.
These aren’t universal rules, but patterns worth keeping in mind as you build or refresh your approach to fashion email marketing.
Here’s a detailed breakdown:
- Lead with a full-width hero image: Fashion is a visual category. Opening with a strong, editorial-quality lifestyle shot sets the tone before a subscriber reads a single word.
- Keep the copy tight and purposeful: Short sentences, confident tone, no filler. The product images carry the weight; copy just needs to frame the mood.
- Use color and layout to signal positioning: Background color, typography weight, and layout structure all communicate brand identity before a subscriber reads anything. Your email newsletter design should be immediately recognizable.
- Use annotated product images to build credibility: Calling out specific details directly on the image, such as fabric name, construction detail, measurements, signals that the brand knows its product deeply and gives shoppers a reason to look closely.
- Design for the brand world: The strongest fashion emails feel like an extension of the brand’s editorial voice, not a promotional blast. That consistency builds recognition and trust over time.
- Pair CTAs with supporting copy: Fashion brands that perform well don’t drop a CTA button at the end. Instead, they set it up with a line of copy that adds context and earns the click.
- Design for mobile: Single-column layouts, large text blocks, and thumb-friendly email CTAs are standard. Most subscribers will open your email on a phone, so make the experience as friendly as possible.
Best Fashion Newsletter Examples to Get Inspired
Below are real campaigns from fashion brands, each highlighting a different approach you can adapt for your email marketing strategy.
1. Rouje — lookbook email example

Rouje’s summer newsletter fully commits to the lifestyle concept before attempting to sell anything.
The opening hero image drops subscribers into a specific mood and season, and the copy that follows mirrors how the target customer actually talks about getting dressed, with lines like “no plan, no outfits planned.” The product grid that follows feels like a natural continuation of that scene rather than a pivot to the “sell.”
What works:
- Lifestyle-first hero image sets an editorial tone before any product is shown, making the scroll feel like browsing a magazine rather than a catalog.
- Minimal copy mirrors how the target customer thinks about getting dressed, which builds immediate recognition without any marketing language.
- Multiple product entry points in the grid let different subscribers click into whatever appeals to them, rather than funneling everyone toward one item.
- Two CTAs spaced across the email extend engagement without the email ever feeling pushy.
If you want to recreate this style, Moosend’s drag-and-drop email builder makes it easy to blend editorial content with shoppable product sections, without needing custom code.
2. Asphalte — product launch campaign

Asphalte’s preorder email for their Pleated Trousers turns a single product into a full narrative.
The email opens with a bold, magazine-cover-style hero image, then slows down to show a second photo with four numbered callouts pointing to the fabric. The approach treats the subscriber like someone who actually wants to understand how something is made.
What works:
- The annotated product photo with numbered callouts gives the email a level of product depth that most fashion emails skip entirely, and builds the kind of credibility that converts browsers into buyers.
- The copy is confident and restrained, which signals that the brand knows exactly what it made and who it is for, without any persuasive language.
- The preorder mechanic creates genuine anticipation without resorting to countdown timers or artificial scarcity messaging.
- Bold logo typography in the hero makes the email immediately recognizable in the inbox before a subscriber reads a single word.
3. Allbirds — product range newsletter

Allbirds’ “Your Daily MVPs” email presents four shoe styles across two gender categories without the layout ever feeling like a catalog. Handwritten-style annotations on two of the lifestyle photos add a casual, human touch that fits the Allbirds brand tone without softening the commercial intent.
What works:
- Gender-segmented sections with their own CTAs make the email easy to navigate and reduce the decision fatigue, which is the same principle that makes email list segmentation so effective in a broader email strategy.
- Handwritten-style annotations on the lifestyle photography give a casual touch that softens what is otherwise a straightforward product email.
- Product tiles are clean, consistently shot, and laid out in a grid that makes comparisons easy without making the page feel crowded.
- The two CTAs at the very top let subscribers self-select.
Tip: Brands that use dual CTAs often collect those preferences at signup with a popup builder that includes product preference checkboxes. The result is faster and more relevant email personalization from the start.
4. Highway Robery — personality newsletter example

Highway Robery’s “Pass the remote” newsletter is a demonstration of what happens when a brand trusts its voice completely. The product, a black lightning-bolt-print cotton robe, appears after the copy has done all the work of establishing the mood, so it serves as a natural conclusion rather than an interruption.
What works:
- The opening copy is funny, specific, and completely on-brand before a product appears, which means the email earns attention rather than demanding it.
- The minimal design, with a plain background, clean product photos, and no decorative elements, lets the voice carry the entire email.
- The casual, deadpan product descriptions remove all sales pressure, which makes the products feel more desirable rather than less.
- The pop-culture image in the footer adds a splash of fun while clearly indicating what kind of brand this is.
5. Taylor Stitch — single product email

Taylor Stitch’s Piston Jacket email is built around a single hero image, product description, CTA, and a second lifestyle photo to close. The hero shot is a close-up of the jacket’s corduroy texture, worn open in natural light, and the product copy leads with a reference to the 1950s garage staples before getting to fabric specs.
What works:
- The full-bleed hero photo puts the product in context, worn and lived-in rather than staged on a hanger, which communicates the brand’s positioning without any copy
- The product description leads with story and heritage before it gets to fabric and construction details, which is the right order for a brand selling premium basics to people who care about provenance
- The black-and-white second image creates a visual gear shift that keeps scrollers engaged and makes the email feel more like editorial content
- The warm off-white background runs throughout and reinforces the premium, unhurried positioning without requiring any additional design work
6. Amundsen Sports — editorial campaign

Amundsen’s “The Shorts Guide” email reframes a product category email as a decision-making tool.
Rather than simply showing a range of shorts and linking to the collection, the email opens with the premise that the brand will help you find your fit, explaining the measurement system and then introducing three named product styles by use case rather than material.
What works:
- The guide framing makes the email feel like a useful service rather than a promotional push, which is a different kind of value exchange that builds subscriber trust.
- The three product styles are named and described by use case rather than by fabric or silhouette alone.
- The deep burgundy background is consistent with Amundsen’s broader brand aesthetic.
- The closing section on brand philosophy is a confident way to end a commercial email, betting that the brand world is compelling enough.
7. Nomasei — product focus newsletter

Nomasei’s “Zoom on Silencio” email gives the single kitten heel pump a full editorial treatment across multiple photos, styling variations, and a copy block that explains the product’s philosophy as much as its features. This email copy is personal and founder-adjacent, making it read less like a campaign and more like a recommendation.
What works:
- Multiple photos of the same shoe from different angles and on different people build buying confidence, particularly for footwear where fit and silhouette read differently on different feet.
- The copy leads with the feeling the product is meant to evoke before it gets to the practical specs, which is the right order for a brand with a strong aesthetic point of view.
- Practical sizing guidance and strap detail are placed naturally within the flow rather than in a separate spec block at the end. This keeps the email reading as one continuous recommendation.
8. Kirrin Finch — new arrivals and preorders
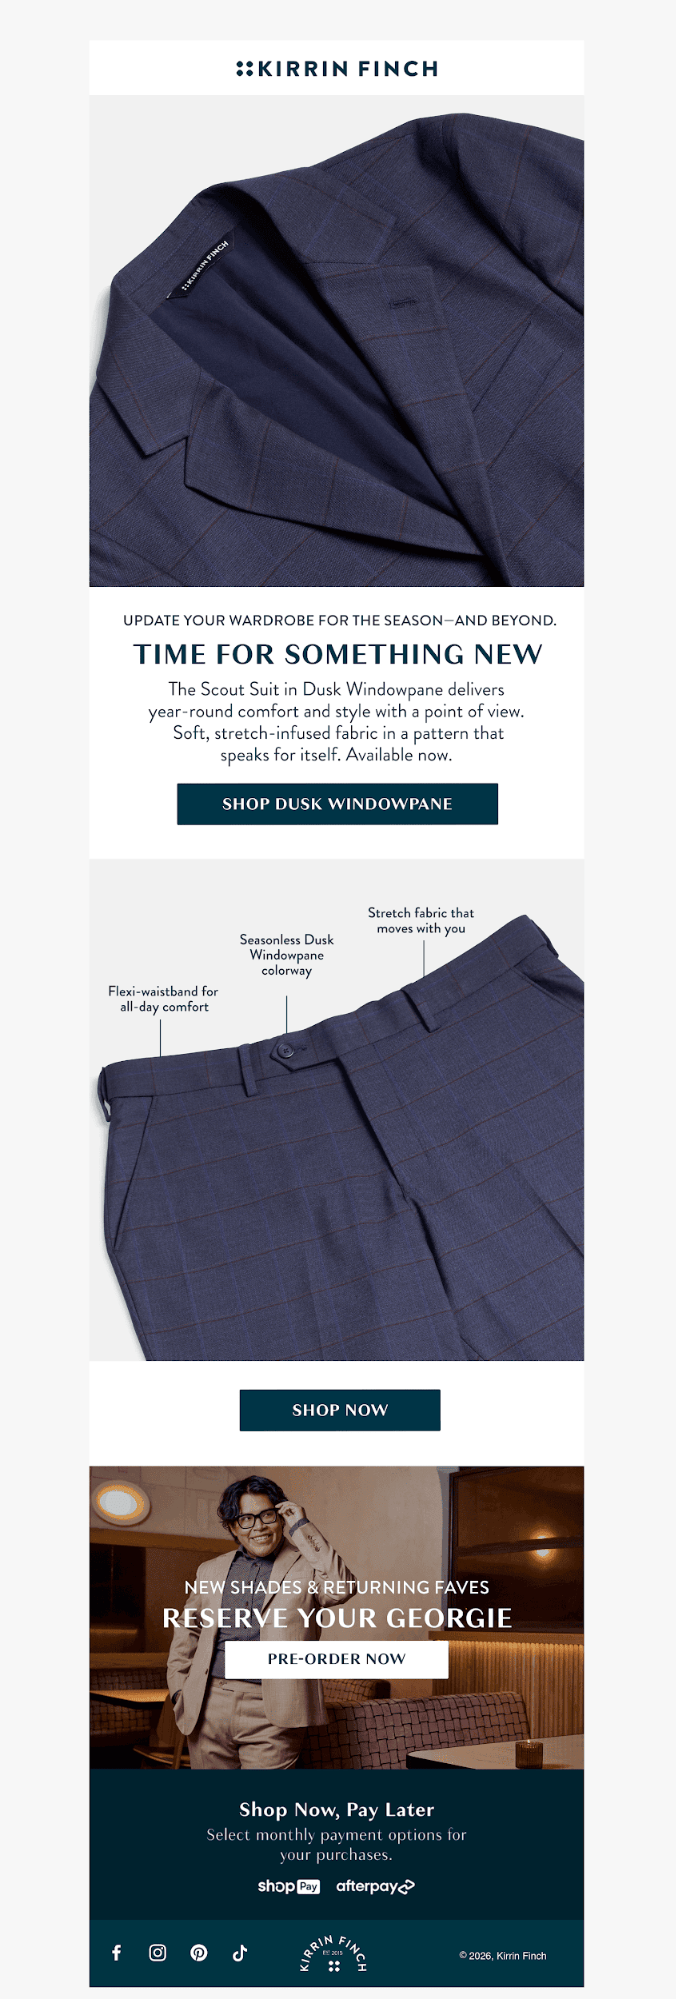
Kirrin Finch’s email structure does the work. Each section gets its own image block, and the visual hierarchy is clear enough that a subscriber can scan and click into whichever part is relevant without reading every word.
Best practices:
- The annotated product image highlights three specific features of the Scout Suit, communicating product depth at a glance without requiring the subscriber to read a description.
- The preorder CTA gets its own full-width image block with a separate headline and CTA button, giving it visual parity with the main campaign rather than burying it beneath the fold.
- The Shop Now, Pay Later section addresses price concerns by highlighting flexible payment options through familiar provider logos.
9. The Frankie Shop — brand moment email

This email from The Frankie Shop promotes an original interview series filmed inside a roaming yellow cab during Paris Fashion Week, in which the host conducts candid conversations with friends of the brand between shows. This fashion email example presents six featured guests in a grid that functions like a magazine table of contents.
What works:
- The interview series concept gives the email a reason to exist beyond selling and signals that the brand has a perspective on culture, not only on clothing.
- The guests are real people rather than models, which lends the campaign an authenticity that straightforward product photography cannot replicate.
- The grid of six featured guests, with names and titles, functions like a magazine table of contents and creates multiple click-through incentives, since subscribers are likely to recognize at least one name and want to know more.
10. Emoi emoi — brand values newsletter

Emoi emoi’s “Are you familiar with this story?” email opens with a large editorial serif headline, then goes directly to a photo of the two founders and a mission statement quote. There’s no product in the first half of this fashion email; instead, the brand walks through its sustainability commitments across three categories, with specific, verifiable actions.
What works:
- The founder photo and direct quote open the email with a human face and a specific mission statement, establishing the brand as something built by real people with a real point of view rather than a faceless ecommerce operation.
- The sustainability commitments are organized into three concrete categories with specific, verifiable actions rather than vague language about caring for the planet, which makes the claims land differently.
- The footer navigation treats the email like a content hub with multiple entry points rather than a single-purpose send, extending its usefulness beyond the campaign itself.
Turn Heads in the Inbox
What these examples have in common is not a single formula.
Each one makes a clear decision about what the email is trying to do, whether that is launching a product, building a world, or telling a story, and then designs everything around that decision. That’s a useful frame to bring to your own campaigns, whether you’re a small brand sending your first newsletter or a larger team trying to make your emails feel less generic.
Ready to put those ideas into practice? Sign up for a free Moosend account and build your next fashion newsletter with customizable templates, an intuitive email builder, and built-in automation.
Employee newsletters come in all shapes and sizes. But the most engaging ones do more than deliver info and keep everyone posted. They make employees feel included and excited about where they work.
When that happens, reading these emails becomes a daily habit. They open them to learn the latest company updates and be part of an active community. This little moment of engagement is what businesses are looking for.
But to reap their benefits, you shouldn’t limit the content of these emails to business updates and announcements. To tap into every engagement opportunity, here are top employee newsletter ideas, examples, and tips to keep everyone more than just informed.
Where business news meet team-bonding and fun
Turn employee newsletters into moments of connection from $9/month.
Start for freeWhy Should Businesses Create Employee Newsletters?
A recent Microsoft report reveals that employees receive 117 emails daily. With this number in mind, making team members look forward to internal newsletters gets challenging.
But if you do it right, these messages can grab attention and motivate employees to come back for the next update. Let’s see why:
- Improve employee engagement: Regular newsletters allow you to share business updates, industry news, and employee spotlights. Through them, you generate conversations and keep people invested in your company’s culture.
- Create a sense of belonging: Remote work has become the norm for many companies. Internal communication emails help employees feel connected and included, instead of isolated.
- Boost employee satisfaction: These messages show that you value employee contribution to your company goals. Brands that celebrate team and individual achievements in their newsletters boost employee morale and make them feel appreciated.
- Prevent information overload: When you keep team members informed through regular newsletters, you save them time from chasing updates across multiple channels. That way, you help them stay focused and productive, improving employee experience.
- Enhance transparency: Timely internal newsletters let your employees know what’s happening across teams and projects. This is essential to reduce concerns and unnecessary rumors while maintaining trust.
- Encourage employee growth: You can use these emails to share training opportunities, upcoming events, job openings, well-being tips, and educational content. By doing so, companies actively invest in employee development.
Top Employee Newsletter Ideas and Examples
Ready to engage your employees with your company newsletters? We’ve got you covered with creative ideas to keep your workforce satisfied and aligned with your goals. You’ll also find some of Moosend’s pre-made, fully customizable email templates you can use as a foundation.
1. Business changes
Employees should learn about company changes directly from leaders like the CEO or the HR Manager, not through office chitchats or a private Slack channel. Notify people about strategy, leadership, and policy changes to avoid the negative consequences of misinformation.
Make sure to be proactive by answering potential questions ahead and explaining how these changes may affect different departments or your customers. You can share an FAQ section or follow up with an anonymous survey to encourage them to share their questions or concerns.
If the update is complex or lengthy, break it down with bullet points and “takeaways” to make the content digestible.
2. Product launches or updates
By sharing product launches or updates, you help employees understand the value proposition and how different departments contribute to your business’s success.
Also, an internal newsletter that keeps everyone up to date about new or enhanced products can serve as a shoutout to those involved in the project. Consider including relevant blog content or product pages in your email so employees can check them at their own pace.
Here’s an employee newsletter example by Moosend informing team members about product improvements:

Want to gather employee insights before getting your new product or service out in the world? Use an email solution like Moosend to create and share a feedback form in your employee newsletter to learn their opinion.
3. Company initiatives
Do you have an exciting event planned, such as an office party or a team-building day? Or want to prompt employees to join volunteer projects, emphasizing their positive impact on the environment or the community? Then share those initiatives in your next employee communications message.
To make these employee newsletters work, identify the optimal time to send them so your employees can plan ahead.
Keep in mind that out-of-office initiatives and in-person events may interrupt workflows and employee routines. So, share all relevant information in advance, including signup details and whether attendance is optional or mandatory.
4. Industry news
Delivering regular industry updates demonstrates your company’s commitment to development. When employees are aware of industry trends, they can easily adapt and follow changing guidelines to align with new goals and strategies.
Use your company newsletter to share the latest news from your niche. If you want it even more effective, make it team-specific. For example, keep your marketing team up to date with email marketing growth trends and offer sneak peeks into what your competitors are up to.
To encourage participation, invite employees to submit niche-specific updates they find interesting so you can feature them in the next newsletter. Besides contributing to content creation, this shows that you value their opinion and expertise.
5. Employee achievements
Celebrating employee achievements in your company newsletter makes team members feel rewarded for the effort they put in day-to-day. This is particularly true for remote employees or newcomers who may not have had the opportunity to connect with their coworkers.
This kind of recognition in your newsletter increases overall employee satisfaction.
For a more personal touch, let your people talk about their journey, challenges, and aspirations. If you feature several employees, narrow it down to a few quotes to avoid overwhelming readers.
You can use a newsletter template like the one below and tweak its sections to highlight employee achievements and celebrate milestones like work anniversaries. Make sure to include images so their coworkers can put a face to the stories.

6. New hire onboarding
You probably already send onboarding emails, so why not do the same for new hires? A timely and carefully-crafted company newsletter is the perfect way to welcome them and help them understand your products, services, and processes early on.
A welcome note from the founder or CEO is always a nice touch, making every newcomer feel appreciated and part of the team from day one. You can also deliver educational and training materials or short FAQs that support employees during their first days or weeks.
Another approach is to assign each new team member to a “buddy,” meaning a go-to person for queries and concerns. In this case, use this employee newsletter idea to introduce that person and the details of the buddy program.
7. Company culture
Employees who feel connected to their company’s culture mention they’re 47% less likely to explore new work opportunities. This indicates that promoting your business culture shouldn’t come as an afterthought.
These are some effective ways to inspire employees with your core company values:
- Share stories of team leaders and members explaining the company culture.
- Feature behind-the-scenes content showing how culture shapes everyday decisions.
- Highlight projects (e.g., well-being courses) that employees can participate in.
For a lighthearted approach, focus on team traditions or workplace rituals that showcase your company’s personality.
Welcome Pickups engages employees through a dedicated Fun corner. There, they encourage team members to share hilarious moments from their days in the office so the company can promote a positive workplace in future emails.

8. Press coverage
Company-wide news isn’t the only updates your employees care about. They may also be interested in how your business looks on the outside. This is why company emails should include latest press coverage and media mentions of your organization, products, and services.
This is an excellent method to emphasize the effect of your employees’ work on your products, services, and customers. Make sure to point out which individuals or teams contributed to the positive publicity.
You can also use AI to summarize key points from longer articles. By doing so, you save time from turning press coverage into employee-focused takeaways. It’s also an effective way to grab attention faster and make the content easy to scan.
9. Employee highlights
Every employee deserves a special spot in your newsletter, so dedicate a section to introduce a different employee each time. Make sure to highlight their role in the organization and key projects they’ve managed.
To add a human touch, include outside-work routines, fun facts, and interests so their coworkers can understand more about them, not just what they do for a living. You can turn it into a short interview with unexpected questions, such as: “If you could spend time with a historical figure or a famous person, who would it be and why?”
Or ask them to recommend their favorite books, podcasts, TV shows, recipes, and the list goes on.
10. Personal development resources
Learning is an ongoing process. Businesses that invest in their workforce’s professional development are more likely to score higher on employee engagement and retention. Another benefit for companies is that people earn new skills that help them thrive in their roles.
Use this email newsletter idea to inform employees about available training sessions or webinars. If your company participates in industry conferences, make sure to offer them the opportunity to attend. Simplify the process by letting them register for the conference or course directly through the CTA.
If possible, include feedback from peers who have completed the training to make it more inviting.
You can also gather learning preferences during employee onboarding, so you can tailor training opportunities from the start. This way, employees will tell you’re committed to personalizing employee perks.
11. Internal mobility opportunities
Some of your employees may have reached the end of the road in their current role. So, instead of losing them to a competitor, why not guide them toward internal roles?
Your internal newsletter could offer them early access to open positions across the company, which is an effective way to reward their loyalty.
To simplify the process, add a CTA that links directly to the job posting. You can also share the contact details of the HR representative managing the role, along with simple instructions on how to apply.
12. Crisis support
You should treat your business as a living entity. With that comes the responsibility to respond thoughtfully to real-world events, such as social and economic crises or natural disasters.
Employees expect their company to be present when emergencies arise. You can show how you care by providing real support and keeping everyone updated about measures your company is taking.
List segmentation allows you to reach each employee with the right message. For example, if your business operates worldwide, you can group employees based on their location.
In the event of a local emergency, such as an earthquake, consider sending practical resources to those in affected regions, like evacuation guidance. For the rest of your workforce, share suggestions to support relief efforts, such as donation programs.
If your internal communication platform doesn’t offer this option, you can use Moosend’s tools to segment employees by location. Then, automate your newsletters to reach each employee at the optimal time based on their timezone. Just sign up for an account to start creating and scheduling your internal emails.
13. Employee referral programs
Perhaps your employees aren’t looking to switch roles themselves, but they can still benefit from open positions in another way: by referring a friend.
When searching for applicants, create a newsletter to promote your new hire referral program and encourage employees to bring in qualified candidates.
The email content should clarify how the referral program works, outlining the steps employees should take to recommend a candidate. Also, using incentives like a bonus or extra paid time off helps businesses drive more referrals.
14. Holiday celebrations
Employees often wait for the holidays to relax and spend time with their family and friends. For businesses, this time of the year offers the opportunity to foster a sense of belonging and community with holiday-themed email content.
It could take the form of:
- Local traditions
- Funny stories from past celebrations
- Videos from holiday events on different office locations
- Recipes or decoration tips
You can add a greeting from the founder where they thank all employees for their effort and reflect on the company journey. Want to give people more reasons to open the next company newsletter? Organize an internal giveaway and announce the winners in the email.
If you operate in different countries or have culturally diverse teams, consider featuring holidays and traditions from different countries and cultures. This helps you showcase your commitment to equity and diversity, making sure every employee feels included.
You could also leverage special occasions to highlight milestones. For example, use the Father’s Day email template below to celebrate dads in your workforce. Personalize it by adding their names and photos, along with short quotes about their fatherhood experience.

15. Wellness resources
Work-life balance isn’t just a buzzword. Caring for employee well-being should be a top priority since it shows a positive company culture while ensuring loyalty and productivity.
Here are some ideas on what to include in these newsletters:
- Actionable tips for a healthy lifestyle
- Mental health-focused resources
- Easy-to-make and balanced recipes
- Success stories of people who embraced change
- Wellness challenges like a 7-day hydration streak
Now, when can you leverage this employee newsletter idea? It could be a monthly newsletter that supports your team members consistently. Alternatively, check the calendar for seasonal occasions, like Blue Monday, or any health-specific holiday to deliver relevant resources. You can also feature content like healthy recipes or workout tips.
Another option is to include stories from employees who improved their wellbeing and lifestyle, for example by adopting a pet or becoming a yoga instructor.
16. Employee surveys
Employee feedback helps brands gauge sentiment across teams and understand their pain points. With a regular newsletter, you can ask for their input on various areas and initiatives through embedded polls or surveys.
Here are a few topics worth exploring:
- Working conditions
- Office space and management
- Learning opportunities
- Feedback on team leadership
- Internal communication and transparency
To increase completion rates, keep the survey short and focused. It’s better to ask for feedback on a quarterly basis than bombarding them with different-themed questions at once.
Also, mention that the survey is anonymous and communicate how you’ll use the insights. Lastly, if you acted on past feedback, share those changes with employees to show you’re listening.
17. Sustainability initiatives
If your employees care and probably already participate in environmental initiatives, then why not join forces? Use your internal newsletter to let your people know how your business is making a difference.
Start with any action you’re taking towards sustainability, whether it’s in manufacturing, packaging, or shipping. If you don’t sell physical products, outline initiatives in business operations, such as using sustainable email marketing or reducing office waste.
Motivate employees to get involved by offering practical tips they can follow in the workplace and at home. Another way to encourage participation is sharing images or videos of past sustainability projects and their positive impact.
18. Perks updates
Just the other day, I revealed a top company secret to a colleague: how they can use their private health insurance. It’s not like they had never heard of it before, they had just forgotten the process.
To avoid these missteps or misconceptions, invest in employee newsletters to remind existing employees and inform new ones about company benefits.
The same goes if there are updates, such as benefits added to or removed from your list and instructions on how to use them. Include resources like videos to make the information easier to digest. That way, employees can revisit them at their own time without the need to reach out to their manager or human resources.
19. Motivational quotes
Motivational quotes from well-known figures may offer employees a quick boost or help them get through a rough day.
For a more personal touch, ask team members to share their favorite quotes and feature them in the newsletter next to their name and headshot. You can increase employee engagement by allowing people to vote for their favorite quote through an embedded poll.
Consider turning this into a regular newsletter that employees expect every Monday morning. A small dose of motivation might be all they need to start the week on the right foot.
Here’s a pre-built template you can use to share your favorite quotes. To involve employees in the process, include a quick survey so they can submit their own inspiring quotes.

20. Meeting recaps
This is one of the most common employee newsletter types, aiming to inform employees about recent meetings. Typically, they include the recording so employees who missed the meeting or want to watch it again can catch up anytime.
Use your internal emails to recap key takeaways in a digestible format using bullet points or short paragraphs. You can also mention upcoming meetings and presentations to build anticipation. Teams that regularly share presentation materials can also integrate best PowerPoint APIs to automate slide generation, distribution, and updates for recurring meetings and company announcements.
But if you want to take this employee newsletter idea a step further, leverage the opportunity to keep the conversation going. Allow employees to submit questions regarding past or upcoming meetings or suggest new topics.
21. Fun facts and trivia
Most people love a good trivia contest. It’s super fun and initiates useful conversations. To make your trivia newsletter the next talk of the office, share fun facts about your company, its products or services, and people.
It’s probably the coolest way to talk about the origins of your business. Start by asking employees whether they know how the founders came up with the business idea. Consider turning it into a true or false game, like “Did our founder get the idea from their mom?”.
You can do the same with surprising achievements, like Brad from the Product Team running a marathon seven years in a row. To spice things up, offer a small prize to the employee who gets the most answers right.
22. Pet stories
Who says pet photos are only for Slack? Most employees love seeing cute or funny moments of their coworkers’ furry friends and your employee newsletter is the ideal space to feature them.
A “Pet of the month” section with a short bio and details like favorite snacks can easily capture attention or even give everyone a good laugh.
Engage employees further by encouraging them to share photos and stories about their pets. To get them into a friendly-competition mood, add an interactive element like a poll so you can crown the champion.
How to Create an Effective Internal Newsletter
Above all, you need your employee newsletter to resonate with your team. Here’s how you can create engaging emails:
- Use an email marketing platform: Tools like Moosend, ConstantContact, and MailerLite allow you to craft professional emails, segment your list, and personalize your content. You can also set up automation workflows for timely messages and measure engagement through email analytics.
- Create branded templates: The platforms mentioned offer drag-and-drop editors and built-in newsletter templates that speed up content creation. You can easily customize the design to match your branding by incorporating your logo, colors, and visuals. Also, most email solutions let you save your templates and reuse them in future emails.
- Segment your list: To ensure you target the right employees with the right message, you need to segment your email lists. For example, separate employees by role or interests to send them tailored training recommendations.
- Put people and value first: To avoid overwhelming busy employees, prioritize content that genuinely interests your team over routine broadcasts. Well-being tips, real-time business updates, and development resources perform better, as they can become tools of professional and personal growth.
- Make the design scannable: Invest in a clear structure with headings, short sections, information hierarchy, and white space for a clean design. Avoid long-form text, but if you must use it, break it up with bullet points and visuals to make it more readable.
- Choose a human tone: In internal communications, there’s usually a thin line between informing and sounding patronizing. Adopt a friendly, human tone and corporate jargon-free language. This approachable style helps employees relate to your company.
- Set a regular schedule: Sending one employee newsletter and disappearing for months won’t work to boost employee engagement. Instead, send your emails at a regular frequency (like weekly or bi-weekly) to train employees to expect your news. Consistency matters, but you can deliver newsletters outside of the cadence if there’s a timely message, like a new hire or industry news that can’t wait.
- Measure employee engagement: Understanding the effectiveness of your internal newsletters is key to seeing what brings results. Monitor opens, clicks, and analyze heatmaps to see which content types had the most traction. Don’t forget to use surveys and polls regularly to ask for direct employee feedback.
Get Your Employees on Board
Effective internal newsletters aren’t empty, generic updates. They foster a sense of connection, communicate values, and celebrate the people behind the brand.
Get inspired by our favorite employee newsletter ideas to increase employee satisfaction and retention. While brainstorming, consider involving employees in the email creation process by asking for their input or employee-generated content to feature in the next newsletter.
Lastly, keep in mind that practice makes perfect. So, always experiment with new employee newsletter content ideas to see what makes people anticipate company emails the most.
FAQs
Let’s check some frequently asked questions about employee newsletters:
1. What is an employee newsletter?
An employee newsletter or company newsletter is an email campaign designed for internal communications. Business owners and executives use them to keep employees informed about anything happening across the company. For example, they can share product launches, company events and initiatives, and milestones, among others.
2. What makes an engaging company newsletter?
Engaging newsletters are easy-to-read, engaging, and professional. Focus on creating clean and polished designs and leave breathing room between different sections. Also, it’s important to share practical resources depending on the topic. You can add interactive components like surveys or polls to increase engagement. Lastly, adopt a professional but friendly voice to establish connections easier.
3. What is the optimal frequency for employee newsletters?
There’s no right or wrong here. The key is to decide on a schedule that serves your newsletter goals while respecting your employees’ workload. Most businesses opt for a monthly or bi-weekly cadence. What’s more important is to stick to the schedule. However, not every minor update deserves an employee newsletter, so make sure to send one when there’s something employees can learn, enjoy, or take part in.
Most restaurants are now discovered online, which means good food and service alone are no longer enough to keep tables full.
The best restaurant marketing strategies combine local visibility, email marketing, social media, loyalty programs, and targeted promotions to attract new diners and retain regular customers.
Whether you want to reach locals, attract tourists, or increase repeat visits, the right strategies can help you grow brand awareness, drive bookings, and increase long-term revenue.
Best Marketing Channels to Promote Your Restaurant Business
Did you know that 88% of diners research restaurants online before visiting, while 54% discover new places through social media? That’s why choosing the right digital marketing channels to promote your business matters:
- Local SEO: Your restaurant needs to appear when people search for nearby places to eat. A well-optimized Google Business Profile helps you show up in Google Search and Maps, making it easier for diners to find your menu, location, reviews, and opening hours.
- Email marketing: This is one of the best ways to turn first-time diners into regulars. You can send welcome offers, birthday discounts, seasonal menu launches, reservation reminders, and loyalty rewards to keep customers coming back without relying on social media algorithms.
- Social media marketing: Platforms like Instagram, TikTok, and Facebook are ideal for showcasing your food, atmosphere, and events. Short-form videos, behind-the-scenes content, and giveaways can help restaurants attract attention and encourage shares.
- Influencer & creator partnerships: Local food creators and micro-influencers can quickly boost your restaurant’s visibility. Reviews, tasting videos, and tagged posts act as modern word-of-mouth marketing and help build trust with local audiences.
- Paid advertising: Google Ads and social media ads help restaurants target local customers, tourists, and people searching for specific cuisines. They’re especially useful for promoting events, new openings, and seasonal campaigns.
Top Restaurant Marketing Strategies to Implement Today
Now let’s see how to grow your restaurant with these simple tactics.
1. Prioritize local marketing with ‘Google My Business’
Local marketing strategies should be your top priority if you’re aiming to increase overall footfall at your restaurant.
Not only that, but investing in local marketing will help you build loyalty and encourage repeat dining. A whopping 88% of users call or visit a local business within 24 hours of searching, especially if it appears in a location-specific search or within a local publication.

So, to establish a local online presence, start by listing your restaurant on Google My Business. This ensures your business appears in Google Maps and Search, enabling customers to find hours, menus, and reviews, leading to higher engagement and more bookings.
To do this, head to business.google.com/add. Here you’ll have the chance to add details about your business, including your address, a live website, and opening hours.

If a local diner searches for an “Italian restaurant in Chicago,” for example, your local Italian restaurant is more likely to appear as an option.
2. Introduce customer engagement and loyalty programs
The easiest way for a growing restaurant to turn a profit is to focus on repeat diners.
Regular footfall from high-paying customers keeps your restaurant busy, even during off-peak hours.
In fact, repeat diners are your strongest marketing tool of all. Their positive reviews and local word of mouth are key to driving year-round footfall.
This said, you’ll have to do more than make good food to keep your regulars coming back. Among the restaurant marketing strategies mentioned, introducing customer engagement and loyalty programs could be your most effective move yet.
Offer repeat customers incentives such as discounts, freebies, or exclusive offers to encourage repeat visits. Whether you’re using a stamp system to offer 25% off on the 10th visit or allowing customers to build points toward a free menu item, these incentives drive repeat dining.
Better still, you can automate point allocations for loyalty schemes via your POS system. This means that when a customer pays, points or stamps are added to their profile and can be redeemed later.
Here’s a great example from Asian chain restaurant Wagamama’s Soul Club loyalty program:

Members receive a welcome reward just for signing up, then earn stamps every time they spend money through dine-in, click-and-collect, or delivery orders. As stamps build up, customers unlock free sides and mains, encouraging repeat visits and higher engagement.
3. Use email marketing to re-engage customers
Another popular restaurant marketing strategy for re-engaging diners is email marketing. If you’ve set up a loyalty program or simply set up a system for email-based digital receipts, you’ve instantly created your own mailing list.
Email marketing drives engagement for your restaurant, especially if you have something to offer your customers.
Try greeting any new subscribers immediately with a “Welcome” email, ideally offering a small gift (like a free appetizer) to encourage a first visit.
Here’s an example from Eat’n Park:

Better still, if you’ve gathered information from previous bookings about a diner’s birthday or anniversary, this is a great time to send a personalized message offering them a discounted meal to celebrate the occasion. This approach is often seen in a broader customer success playbook focused on building long-term relationships.
Using Moosend for your email marketing, you can set up custom fields (such as date of birth or anniversary) that are populated from data in reservation forms, loyalty programs, or sign-up pages.

That way, you can trigger emails based on those dates, using conditions like “X days before birthday” and personalize any content with dynamic tags (name, offer, or favorite dish).
4. Build a booking system
Online reservations have become a major part of the dining experience, which makes a booking system one of the most effective restaurant marketing strategies for increasing footfall. Giving customers a fast, simple way to reserve a table online helps turn interest into confirmed visits, rather than relying solely on walk-ins.
However, there is a key difference between adding a booking option to your website and investing in a booking system.
Adding a booking widget is a simple way to receive customer inquiries, for instance, via an email form. This notifies your team of a booking, but only if they are checking their emails.
Building a booking system takes this one step further. With the help of vibe coding, you can now build a reservation system using AI. For UX beginners, you simply describe the kind of booking system you want, such as setting time slots, table sizes, or confirmation flows, and AI tools will generate it for you.
Here’s an example from Casa D’Angelo:

These systems can connect directly to your POS system, helping your team manage tables in real time and provide customers with instant confirmations.
5. Optimize your website for mobile
When it comes to creating a powerful restaurant website, mobile optimization is everything.
If your website is slow loading on mobile or makes it difficult for mobile users to book a table and read the menu, you’ll lose potential diners as a result.
In fact, 62% of consumers are less likely to choose a restaurant if they can’t read the menu on their mobile device.
To combat this, cross-check your web design across all devices and ensure that each booking feature, image, and menu attachment works well on mobile screens.
Here’s how Gramercy Tavern’s menu looks on mobile:

Reliable web hosting also helps maintain fast loading times and a smoother booking experience during peak dining hours.
6. Run targeted social media campaigns
Social media platforms such as Instagram and TikTok should be at the center of your restaurant marketing strategies, especially if you want to capture the attention of younger diners.
As more and more diners discover a new restaurant on social media, creating targeted social ads that showcase high-quality food photography and behind-the-scenes videos could be the key to grabbing the attention of aesthetically minded Gen Z.
Better still, why not create interactive social content for your restaurant that drives further engagement in the comments?
Instagram giveaways, for example, are great sources of engagement, especially if you ask users to share content or comment on a post for a chance to be in to win.

Take this post from Cactus Club Cafe, for instance. Their giveaway of a $100 gift card for food and drink required followers to tag their peers in the comments for a chance to win.
Centering your giveaway on tagging and sharing is crucial, as your current followers instantly advertise your growing restaurant on their own feeds.
7. Partner with local foodie influencers
Another social media trick to leverage is influencer marketing campaigns. Partnering with local foodie influencers and mukbangers (people who livestream themselves eating and interacting with their audience) immediately exposes your restaurant to their large, highly engaged followings.
One of the best restaurant marketing strategies to date is word-of-mouth marketing. If influencers enjoy a free meal on you and then vlog/write about the entire experience in return, you receive a powerful review that showcases the best features of your restaurant and its food.
As a result, their followers take their advice and start booking tables to try the food for themselves. Within days, your restaurant could be inundated with new bookings.
If you’re a smaller establishment, aiming to appeal to a local audience, make sure to connect with local influencers that serve your target demographic.
While big influencers offer that powerful reach, micro-influencers often deliver superior engagement.
In fact, micro-influencers can drive 13% higher engagement rates on platforms like TikTok, making them highly effective for driving action.
8. Invest in seasonal marketing
Creating seasonal campaigns not only drives more customers but also provides the perfect opportunity to create themed menus, change up color schemes, and attract new demographics.
Think Fourth of July BBQ specials, pumpkin spice fall menus, Valentine’s Day dinner packages, and summer seafood platters. Every season, holiday, and local event gives you a new opportunity to market your restaurant and bring customers through the door.
Starbucks dominates seasonal marketing, with its range of season-centric drinks. From festive favorites to the classic autumnal PSL, they know how to drive customers through the door.

Don’t forget to share your seasonal specials on socials and create an email campaign promoting limited-time menu changes for subscribers to get their hands on.
Using Moosend, you can also automate these seasonal campaigns by segmenting your audience and scheduling targeted emails with dynamic content, so the right customers get timely updates on new menu launches and limited-time offers.
Start Promoting Your Restaurant Business
Choosing the perfect restaurant marketing strategies for your business will depend on the results you’re hoping to achieve.
For smaller businesses aiming to reach a local audience, taking the time to perfect your Google My Business profile and connecting with local foodies could be the key to boosting visibility in your target area.
Those of you looking to expand footfall from all angles should dive headfirst into online marketing. From email campaigning to social media ads, targeting digital-first diners is the key to driving profits.
FAQs
Here are some common questions regarding restaurant marketing.
1. What are the best restaurant marketing strategies for attracting more customers?
The most effective restaurant marketing strategies combine local SEO, social media, email marketing, and loyalty programs. Restaurants that optimize their Google Business Profile, run targeted social campaigns, and send personalized email offers are more likely to increase bookings, repeat visits, and customer engagement.
2. How can email marketing help restaurants grow?
Email marketing helps restaurants stay connected with diners through welcome emails, birthday offers, seasonal promotions, and loyalty rewards. It’s one of the easiest ways to re-engage past customers and encourage repeat visits with personalized offers and automated campaigns.
3. What should restaurants send in their marketing emails?
Restaurants can send promotional offers, new menu announcements, event invitations, seasonal specials, reservation reminders, and loyalty rewards. Personalized emails based on birthdays, dining habits, or previous bookings often perform better because they feel more relevant to the customer.
4. Why is local marketing important for restaurants?
Local marketing helps restaurants appear in nearby searches when potential customers look for places to eat. Optimizing your Google Business Profile, collecting reviews, and creating location-based content can improve visibility in Google Search and Maps, leading to more calls, bookings, and walk-in traffic.
Open rates have always been an easy win to point to. You open your report, see a solid number, and it feels like things are working exactly as they should.
But when you think about how people actually handle their inbox, that number starts to lose its meaning.
Take me, for example. I open almost every email just to clear my inbox, but most of those messages barely get a second of attention.
So, if an email can be opened, cleared, and forgotten in a flash, then that number says less about engagement and more about habit.
Which brings us to the burning question: are email open rates a vanity metric?
Go beyond vanity metrics
Get clear insights into clicks, conversions, and what actually drives results.
Try MoosendWhy Open Rates Became the “Go-to” Metric
At face value, open rates answer whether the subject line was compelling enough to get your email opened.
A high percentage is often seen as success, giving marketers a clear, easy-to-report result to stakeholders.
But that’s only part of the reason they stuck. They also:
- Provide an early signal: Before automation, tracking, and advanced analytics, open rates gave marketers something to work with.
- Make performance easy to understand: You can share them with anyone, and they make sense instantly, regardless of data expertise.
- Make subject lines feel measurable: When you test a variation, you see the open rate change, and this feels like progress.
- Work well as benchmarks: Teams can compare open rates across industries, campaigns, and time periods without needing much context.
- Create a sense of control: You send a campaign, check the metric, and optimize based on it. This makes the process feel simple and manageable, especially for beginners.
But, as mentioned earlier, there’s a catch.
The Problem with Open Rates Today
A few years ago, if someone opened your email, it usually meant they chose to. However, that’s no longer the case. Systems now play an equally important role.
Privacy features and inbox behaviors, for instance, can trigger an open without any real intent. So while the number still moves, it doesn’t always reflect a conscious decision to engage.
We’re seeing the same pattern elsewhere, too. Security systems automatically scan emails and click links, which can even lead to false clicks or unexpected unsubscribes. This is a reminder that not every “open” and “click” in your report comes from a real person.
But even when the open is real, it can only tell you the email was accessed, not whether it was read, understood, or acted on. You can see this clearly in real campaign data:

While the open rate reached over 12%, which on the surface looks like a good result, the click rate was just 0.09%. That gap tells a very different story. People opened the email, but almost no one engaged with it.
This is exactly where open rates can mislead. The campaign looks successful at first, but the outcome doesn’t really back it up.
That’s where things start to go off track. When you rely solely on open rates:
- Subject lines get more attention than the content that follows.
- Engagement and conversions become secondary.
- Campaigns appear successful but fail to deliver real results.
- Decisions move away from what actually drives the business.
The Metrics that Tell the Full Story
So, if open rates don’t give you the full picture, what should you look at instead?
The answer is a combination of email marketing metrics that show what people actually did after opening.
1. Click-through rate (CTR)
CTR shows whether people took the next step, moving the conversation from “they opened” to “they engaged.”
If your open rate is strong but the CTR is low, your subject line did its job, but the content or calls-to-action didn’t follow through. If both are strong, your message landed as it should.
2. Click-to-open rate (CTOR)
Click-to-open rate (CTOR) shows how many people clicked on your email out of those who opened it.
It ignores everyone who didn’t open it, so you can focus only on what happens inside the email. If people open but don’t click, your subject line worked, but your content or email design didn’t. CTOR helps you spot that.
3. Conversion rate
This is where things get real. Conversion rate shows whether the email led to an actual action, whether that’s a purchase, a signup, a webinar registration, or something else.
Clicks can show interest, but conversions show the impact. They tell you if your email didn’t just get attention, but actually moved someone to do something that matters to the business.
4. Revenue per email/campaign
For eCommerce, this metric answers a simple but important question: what did this campaign actually generate?
You can have average opens and clicks, and still see strong revenue. That’s because this metric looks beyond activity and focuses on outcomes. It shows whether your emails are not just being seen or clicked, but actually driving value.
5. Unsubscribe & spam complaints
Open rates might show that people noticed your email, but these metrics show when that attention turns negative.
A spike in unsubscribes or spam complaints usually happens due to irrelevant content, poor targeting, or over-sending. Ignoring them can hurt both your performance and your email deliverability over time.
Taken together, they show you what that attention actually led to, so you can improve your strategy.
How to Use Open Rates the Right Way
To use open rates effectively, you need to look at them in context. Not all emails are built with the same goal, so the way you interpret them should change, too.
For action-driven email campaigns
Open rates still have a place here, but only as a starting point.
They’re useful when you’re testing elements at the top of the email, like subject lines, sender names, or timing. If a new subject line drives more opens, that’s a good signal.
But it’s only the first step. What matters is what happens next. Did people click? Did anything happen after that?
For example, you might test two subject lines and see one clearly wins in opens. At first, it looks like a hit, but if clicks and conversions stay the same or even drop, nothing has really improved. You got more attention, but not more action.
Looking at single campaigns won’t get you far either. Detecting patterns matters more.
If opens stay steady but clicks drop, something inside the email isn’t working as expected. If opens drop but conversions and revenue increase, you may be reaching fewer people, but the right ones.
Here’s how to approach open rates in action-driven campaigns:
- Check clicks to confirm interest: See if people actually engaged with the content after opening.
- Look at conversions to see if it worked: This shows whether the email led to a real action, such as a purchase or a signup.
- Review revenue to understand impact: Evaluate the value of those actions and whether the campaign contributed to business results.
- Look at retention to see if it lasts: See if people come back or continue engaging beyond that one interaction.
But what if your email isn’t meant to drive clicks?
For zero-click newsletters
In some cases, like zero-click newsletters, the goal is to deliver value directly in the inbox. There’s nothing to click, and that’s intentional.
Here’s an example from Masters in Marketing:

This changes how you use open rates. Instead of focusing on what happens next, you look at whether people keep coming back. Steady opens over time, and consistent subscribers show that the content is still working.
When that’s the case, the email is doing its job. A drop in open rates usually signals that the content is becoming less relevant. That’s where you need to step in. Revisit your topics, adjust your format, and test new angles to see what brings readers back.
In a nutshell, if your goal is to drive action, open rates are just the starting point. If you’re offering value inside the email itself, open rates become part of the result.
So, Are Open Rates a Trustworthy Metric?
For a long time, open rates have served as a simple metric for measuring progress. But the way people use their inboxes and how emails are processed has changed, yet the metric hasn’t kept pace.
That doesn’t make open rates useless. They can still help you understand what gets attention and assist with quick optimizations.
The problem starts when they stand on their own. Used in isolation, they can quickly become a vanity metric. But when you look at them alongside clicks, conversions, and outcomes, they become useful.
That’s when numbers stop piling up and start showing you what works.
FAQs
Below are some common questions about open rates.
1. Why are email open rates becoming less reliable?
Open rates are less reliable today because they’re influenced by privacy features and automated systems. Tools like Apple Mail Privacy Protection preload email content, which can register an open even if the user never reads the message. As a result, open rates no longer reflect clear user intent.
2. Can you still use open rates to improve email performance?
Yes, but only in specific cases. Open rates are still useful for testing subject lines, sender names, and send times. However, they should always be paired with metrics like clicks and conversions to confirm whether the improvement is meaningful.
3. What is a good alternative to open rates for measuring engagement?
There isn’t a single replacement. Instead, engagement should be measured through a combination of metrics such as click-through rate (CTR), click-to-open rate (CTOR), and conversion rate. These metrics show what users actually do after opening an email.
4. How can you tell if a campaign truly performed well?
A campaign performs well when it drives action. Strong performance usually includes healthy click rates, solid conversions, and measurable business impact like revenue. Open rates alone can’t confirm this.
5. Should you stop reporting open rates altogether?
No, but their role should change. Open rates can remain in reports as a supporting metric, helping you spot trends or test top-level elements. They shouldn’t be used as the sole indicator of success or as the basis for key decisions.