


Hi, I’m Nick and I will walk you through this WooCommerce tutorial really fast.
Like most people, I am not a fan of wordy step-by-step guides, so here’s the nitty-gritty to jump-start your eshop (and profits).
Try Moosend Today
The easiest and most affordable email marketing and newsletter software!
Installing and Configuring The WooCommerce WordPress Plugin
So, you got your WordPress site up and you chose a crazy awesome theme that reflects your business – cool beans so far, right?
If you’re looking for an awesome WordPress theme, check out Astra. It’s fast!
Now it’s time to install and configure the WooCommerce Plugin for WordPress.
Let’s get the money rolling in! Cha-ching!
Firstly, as you might have guessed you need to install the WooCommerce Plugin.
Hover over the Plugins tab and click Add New.
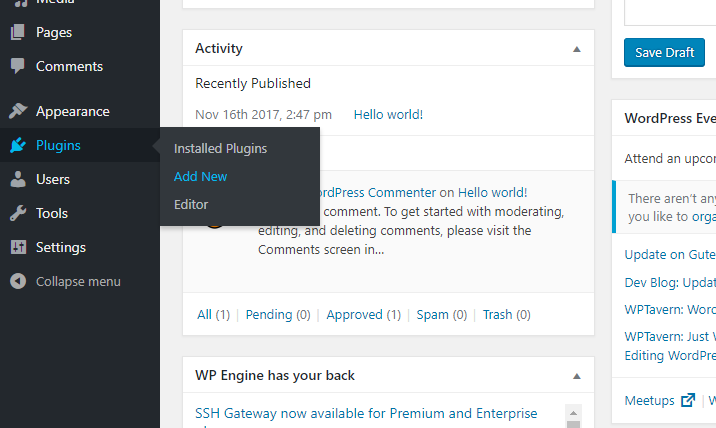
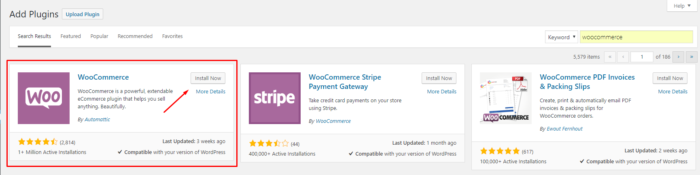
Search for Woocommerce using the search box in the top right corner and install the plugin. Make sure to activate the plugin before doing anything else.
Now that you have installed and activated the plugin, two new tabs appear on the WordPress side menu.
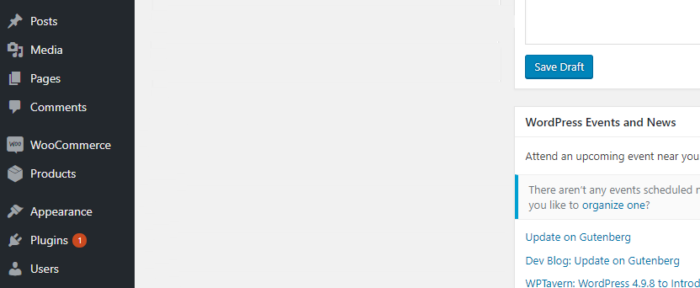
The first tab is “WooCommerce”- this will be your Command Center, so to speak; this is where you can see all the orders coming through your store.
Additionally, in this tab, you can create discount coupons, monitor the performance of your store with in-depth reports, and/or update various Woocommerce settings.
The second one is called “Products”: this is where all your AMAZING products and their respective categories go.
Before delving deeper, fill in all the basic information an eCommerce store requires in order to operate:
- Your physical address, currency, and type of products
- Payment method/s
- Shipping details
Woocommerce has created a super easy-to-follow setup wizard (see below) that makes the whole process a lot less daunting.
To access the Setup Wizard simply click on the “WooCommerce” tab. Hit the Help button* on the top right corner and the drop-down menu appears.
*(Help button not working? Make sure your AdBlock is disabled.)

Now let’s get you a successful e-commerce store!
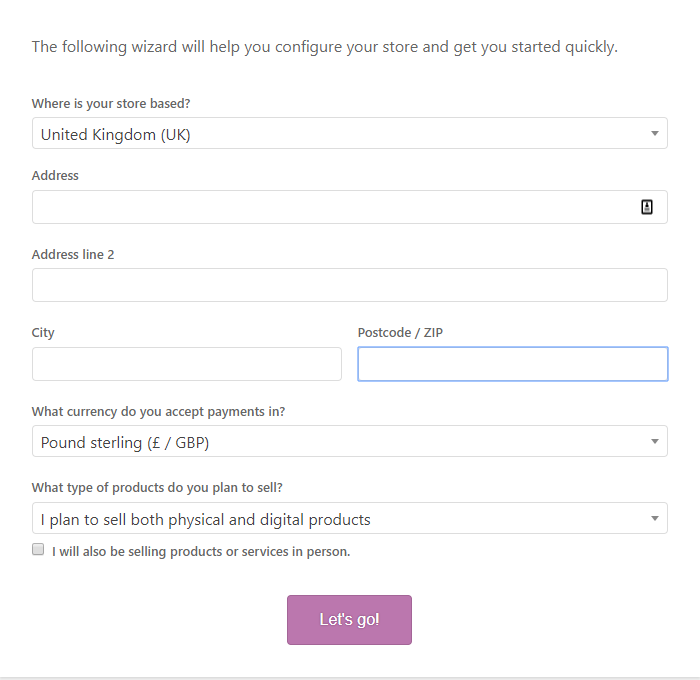
WooCommerce Tutorial – Step 1: Address, Currency, Product Type
Fill in all the requested information and click “Let’s Go!”.
WooCommerce Tutorial- Step 2: Payment Method/s
In this step, you are going to select one or more payment methods to offer in your WooCommerce store.
In the Setup Wizard, you can choose between PayPal and Stripe or both. You can also install additional payment methods later!
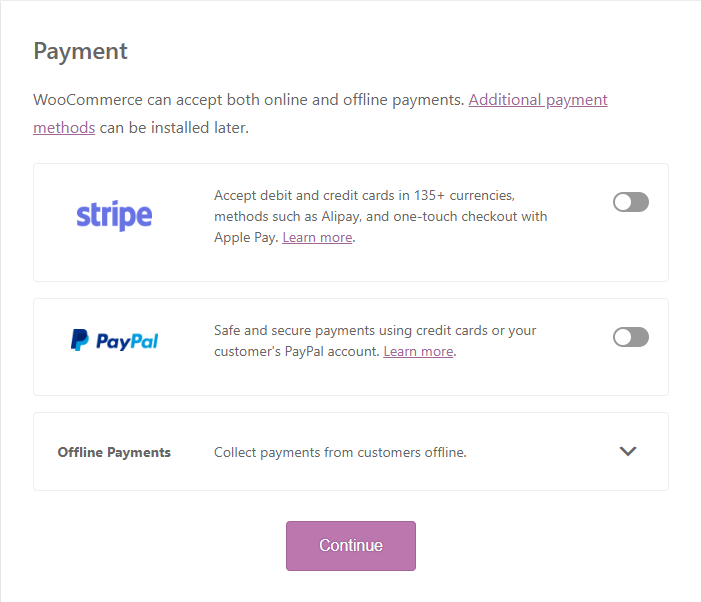
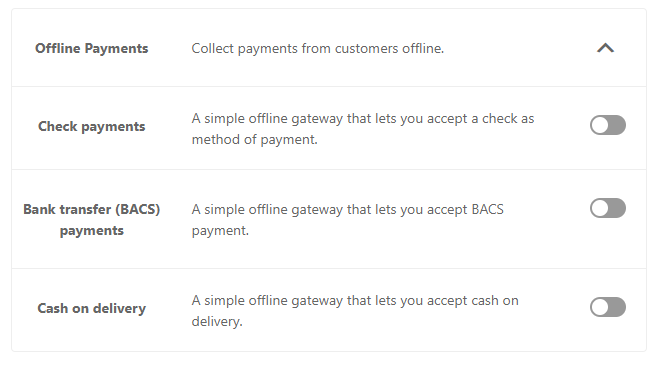
In addition to online payment methods, you can also activate Offline Payments.
Click on the drop-down menu to choose from a range of offline options:
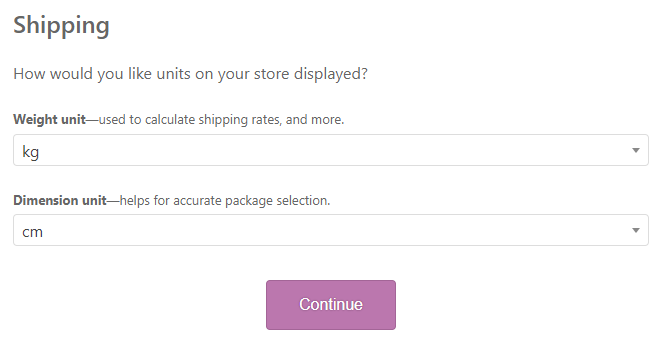
WooCommerce Tutorial- Step 3: Shipping Details
You’ve selected the available payment methods for your WooCommerce store, so now it’s time to configure the shipping details.
In this step, you are able to select the metric you want to choose for the dimensions and weight of the package.
Choose the ones that are commonly used in the geographic location most of your customers come from.
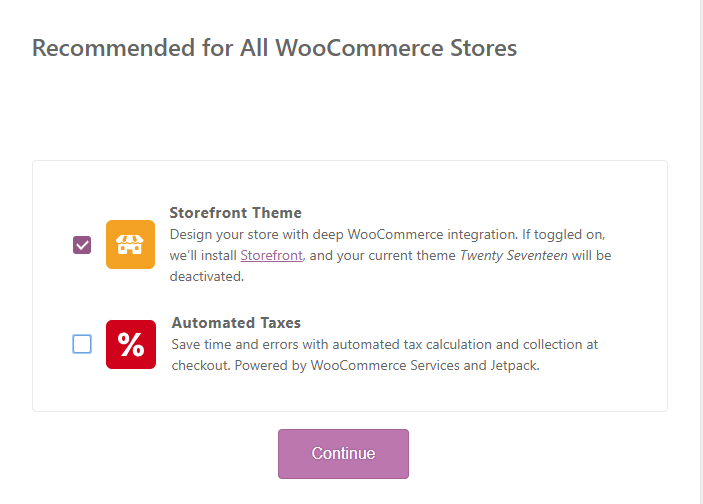
WooCommerce Tutorial- Step 4: WooCommerce Recommendations
The next step is sort of optional, but you might want to follow through with it.
The wizard is going to recommend some additional plugins/themes to make your Woocommerce experience even better.
WooCommerce Tutorial- Step 5: Ready to Start Selling!
You did it! If you followed all the steps carefully you now should be ready to embark on an amazing journey!
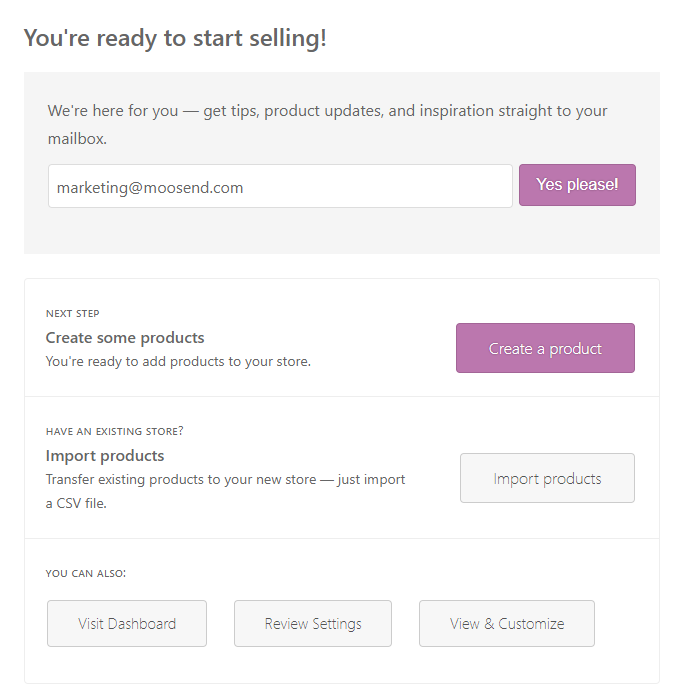
This concludes the basic Woocomerce Plugin Tutorial setup.
The next step of this journey is to start adding products to your shop.
Read the next section to learn how to add your very first product to your eCommerce store!
How to Add and Manage Products with the WooCommerce Plugin
By now, you should have your WooCommerce Plugin configured. In case you haven’t, don’t worry; you will have plenty of time to fine-tune all the details later.
Creating an awesome eCommerce store comes down to product presentation, especially since your customer cannot physically interact with them.
It’s important to provide a number of pictures, a long and a short description of the item which explains all the features and attributes of the item.
Now let’s take a look at how to add your first product through the WooCommerce plugin.
We’ve previously mentioned the two new Tabs that appeared on the WordPress side menu; the first one was “WooCommerce” and the second one was “Products”.
The WooCommerce tab was your command center now the Products tab is your troops.
Firstly, click on the Products tab and hit the Add New button.

This will open up the Add New Product page. If you’ve worked with WordPress before, this is basically the same thing as creating a Post for your blog.
WooCommerce Plugin Tutorial- Step 1: Add Product Content
Time to get the creative juices flowing!
In the following screenshot, you can see three content boxes.
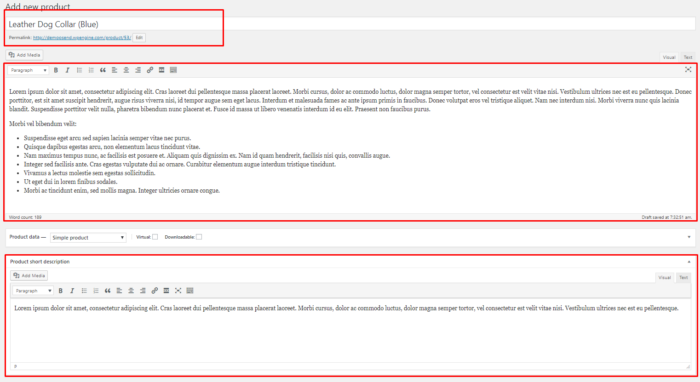
The first one is your product title. This is where you have to provide the name of your product and maybe some of its features, such as color.
Onto the next one, we have our main body; this is where the magic happens.
Try to be as specific as possible. Cover a lot of aspects of the product dimensions, weight, special features, etc.
Last comes the short description. Now, if the long description is where the magic happens, the short description is reality and, if you are not careful, you might get punched in the face.
Basically, in this section, you try to describe the product in a few words whilst creating the need to buy this product.
WooCommerce Plugin Tutorial- Step 2: Product Category, Featured Image, and Gallery
Make sure before launching your eCommerce store to write down all the relevant product categories you will potentially need.
This will allow you to quickly get the categories out of your way.
To do that go to Products -> Categories and enter:
- Name: the name of your category
- Slug: the unique URL of the category
- Description: a few words about the specific category
- Set thumbnail: an image that reflects the group of products
- Click Add New Category
- You’re all set!

Time to establish a visual connection between your potential customer and the product.
But how do you do that?
Well, it’s super easy, you have to use high-quality and accurate images of your products. The more the merrier!
And if you sell products that can be easily shown while being used make sure you show those images.
Select a relevant category of your product as seen on the right side and set a featured image.
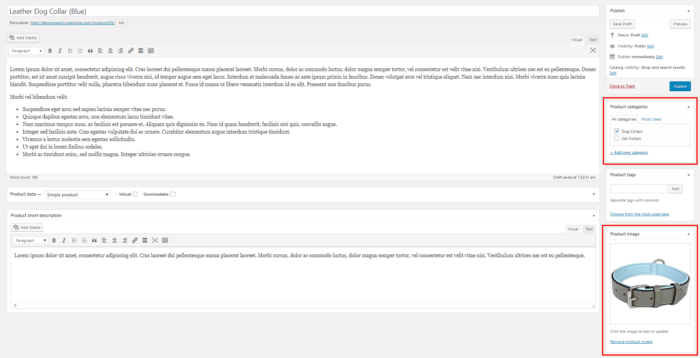
Beneath the featured image you will be able to add as many pictures as you like to your gallery.

Read this guide on creating SEO product descriptions by InvoiceBerry!
WooCommerce Plugin Tutorial – Step 3: Product Type and Data
We covered the product-related content in the previous two steps. In this step here I am going to show how to add all the relevant product information.
Just beneath our main product description you can find and enrich it with a ton of product data to improve the user experience.
When you open the Product Data tab, this is the first screen you see:

Let’s take a look at the various product types:
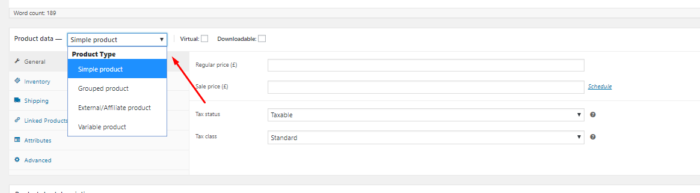
A simple product is a physical product where you can add its price and stock unit and start selling them pretty much instantly.
A grouped product is a set of simple products.
An external/affiliate product is a product of which you are not the actual seller; you provide an affiliate link where people can click and go to the partnered store.
Last but not least, a variable product is a type that you will probably use if you sell different iterations of a product, for example, various sizes of belts, t-shirts, etc.
If you are a beginner, a simple product is probably the way to go!
WooCommerce Plugin Tutorial- Step 4: Price, Inventory, Shipping
WooCommerce offers you the ability to add a two-price option: Essentially, the first one is the regular price, at the standard price of the product at hand, and the other one is the sale price which you can set whether you want to add a discount on a specific product.

Once you’ve set a sale price, you can schedule a product to go on sale for, say, 10% off on a specific day.
With regards to taxing, there are various plugins that will make this whole process much easier like TaxJar. I highly recommend you read this guide on taxing by WooCommerce.
Now for the inventory, you can set the SKU (Stock Keeping Unit) which is the amount of stock you have available at any given time, for every product.
Set the status of your stock (In Stock, Out of Stock, On Backorder)

You can also activate the Manage Stock option to enable backorders.

On the shipping tab, you are able to set the product dimension and its weight.
If you want to read more on shipping methods and classes, click here.

Additionally, here is an overview of how to leverage WooCommerce plugins for your shipping.
Last, WooCommerce allows you to set a specific product from your store as an Upsell or Cross-sell.
An Upsell is a sales technique whereby you, the store owner, recommend similar products to the one the customer sees. Here’s the twist: these items are of higher value. The objective is to
A Cross-sell, on the other hand, is a technique whereby you recommend products complementary to the ones purchased by the user.
To set this up on your WooCommerce store, click the Linked Products tab and select the items you wish to Cross-sell or Upsell.

If you followed all the steps and have a theme installed (I’ve installed Storefront) you will end up with a product page like so:
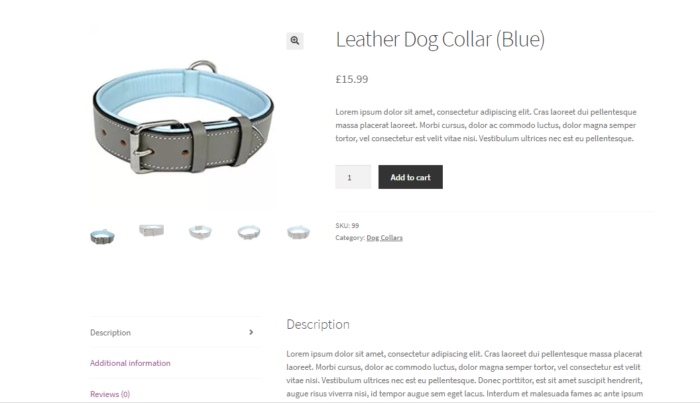
At this point, you should have a good grasp of how to set up the WooCommerce Plugin and add Products to your store.
The following section is going to cover some of the extra but essential steps that your eCommerce store needs.
Here’s a quick overview of the things that we will cover:
- Lead Capturing
- Welcome Email Onboarding
- Abandoned Cart Email
- Thank You For Your Purchase
Setting up those automation channels will give you the competitive advantage you will need to be successful in your niche.
Take a deep breath and let’s dive right into it!
How to Set up Lead Captures for WooCommerce
Let’s start with the basics, what is lead capturing?
A casual definition will be:
The process of capturing someone’s information when they enter your website. In most cases, that will be their email address.
Surely you do not expect someone to walk into your eCommerce store and just hand over their email address, right?
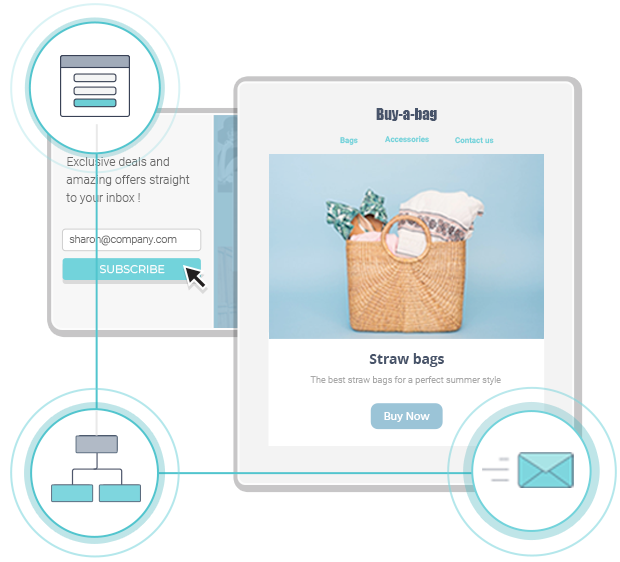
The most common, yet effective, way to capture someone’s email address is with pop-ups.
We talked with Greg from Wisepops and this is what he had to say about pop-ups.
“On average, popups convert 5.9% of visitors into subscribers (source: internal data). With a strong incentive, this ratio can go up to 15%. In other words, popups are one of the best ways to collect emails and create a relationship with your visitors. If you’re not using popups on your eCommerce store, you’re missing out”
Now I hope you understand how important it is to use pop-ups, especially for eCommerce!
Let’s take a look at one example, before going over how to set up your own unique pop-ups!
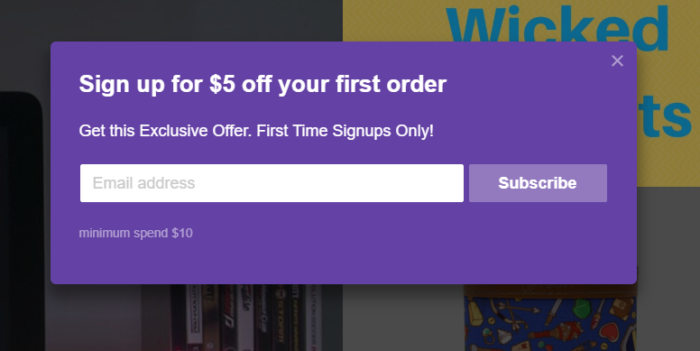
So this popped up after being 3-5 seconds on the store’s website.
To determine the time at which your own pop-up appears really depends on the i) average time someone spends on your eCommerce store as well as the ii)type of the incentive you are offering through the popup.
Pop-ups provide the customer who entered the website with an incentive; in this case, it’s 5$ off their first order.
If you have a first-time signup incentive, the time you should aim for the pop-up to appear will be 50-60% of the average time people spend on your website.
Now it’s time to set up your pop-up.
There are a lot of pop-up builders/plugins available out there, some are free and some are not.
Let’s take a look at some of them!
Moosend’s Subscription Forms and Popup
First, we’re going to explore subscription forms as a way to capture leads.
A subscription form is a type of form that you add to your website and in contrast to the pop-ups the user cannot shut it off.
It’s a static element that grows your list passively.
Here at Moosend, we have created our own subscription form plugin that you can install and create AWESOME forms using our designer.
Designing your own subscription form is as simple as registering for a free account with Moosend.
Install our plugin from the WordPress plugin directory.
Go to Plugins-> Add New and search for Moosend Forms.
Make sure to activate the plugin before doing anything else.

You must have an active Moosend account in order for the plugin to work because we are going to need the API key in order to finish the setup.
Go to the WordPress Dashboard and locate the Moosend For WP in the sidebar menu. Click on it.
To easily get your API key click on the link as shown in the picture below:

Copy the API key and paste it into the text box, as in the example above.
Save and verify that your site is connected.
We’re almost there, bear with me!
Moosend Subscription Form Builder Configuration
It’s showtime!
Almost.
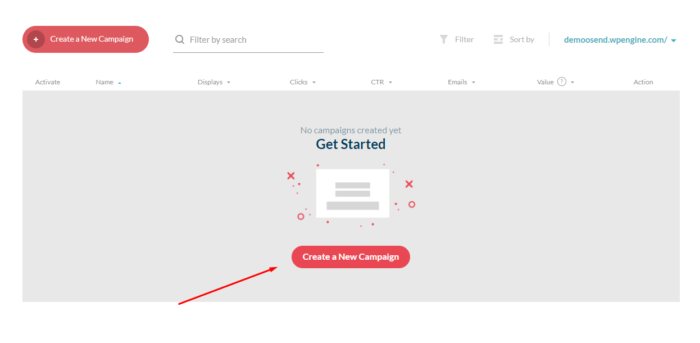
Click on Create Form.

Through our plugin, you can create the form through the WordPress Panel.
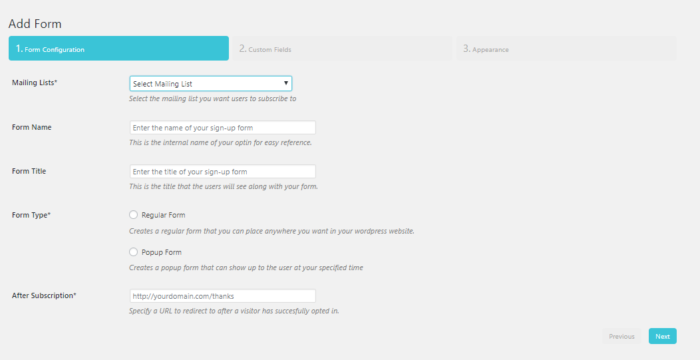
First, you will have to select a mailing list.
Set a form name to easily identify the form.
Insert a Form Title. This will appear above the text box. Choose the regular form.
Finally, enter the URL the form is going to redirect to when someone clicks Submit.
You could also enter specific custom fields such as their name.

At the last tab, you can customize the appearance of your form.

We offer a range of customizable features so you can make your form however you like!
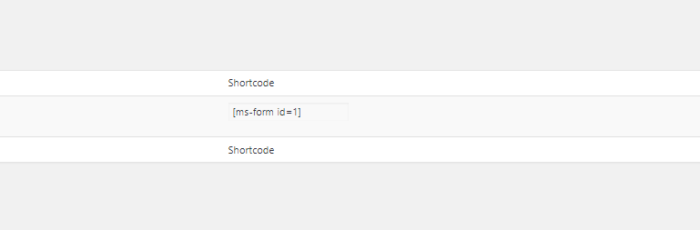
Navigate to the All Forms section of the plugin; this is where you can manage all the forms you will be creating.
By using the shortcode, you will be able to enter your form anywhere on your eCommerce Store.
Besides the Subscription Form, you can also create pop-ups using our plugin!
Cool, huh?
It’s the same process as before but this time instead of the regular form you choose pop-up.
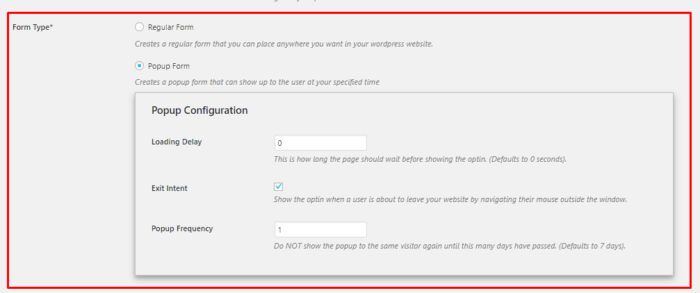
So, this time we are creating an exit-intent pop-up. Exit-intent refers to the pop-up being triggered when the user is about to exit our store.
To activate that, simply check the Exit Intent box, and set the loading delay to 0.
You can customize the pop-up the same way as the form.
Use the shortcode to add the exit pop-up to any page you want!
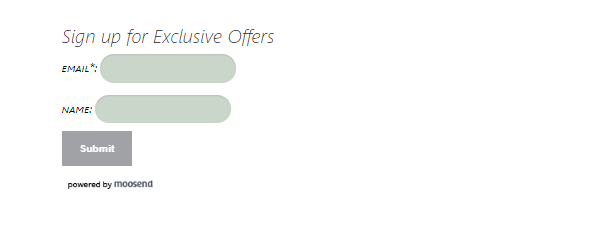
This is what the pop-up looks like on your store:
So, now your subscription form is all set, which means you can start growing your list as of… NOW!
In addition, Moosend can also be used in parallel with other plugins such as Contact Forms 7 and weForms that offer other types of forms.
Installing Sumo For Your WooCommerce Store
Sumo is a list-building tool that enables you to effectively grow your email list automatically through customized pop-ups.
You can download Sumo for free through the WordPress plugin directory. There are also paid versions that offer additional services.
Let’s take a look at how to install and configure Sumo for the first time on your new eCommerce store.
Open your WordPress admin dashboard and click on Plugins->Add New.
Search for Sumo.
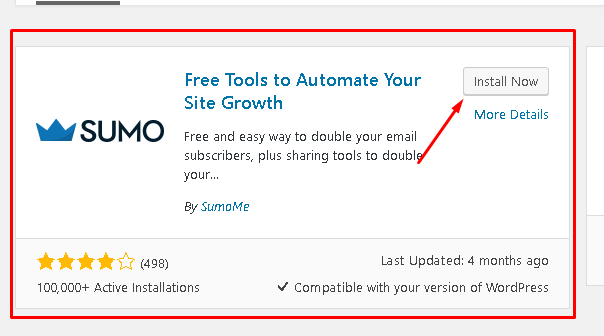
Click Install. Make sure to activate your plugin before doing anything else.
Click on the Sumo tab and Register for an account with them.
After registering you will be redirected to the Sumo dashboard where you can manage your Sumo Apps.
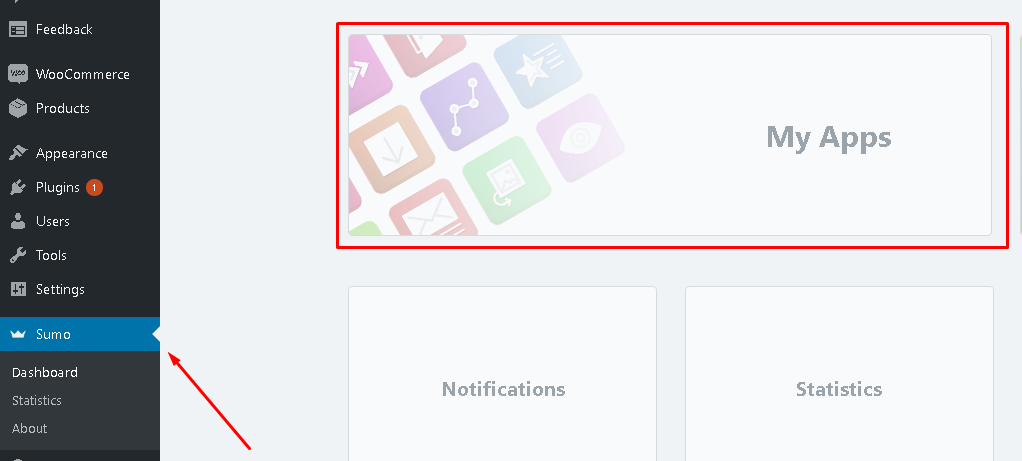
Click on Sumo Apps and you will be redirected to the Shortcuts section of the Sumo dashboard. Ready to get started with designing your first pop up?
Sumo features a fantastic pop-up designer which is easy to use and fully customizable.
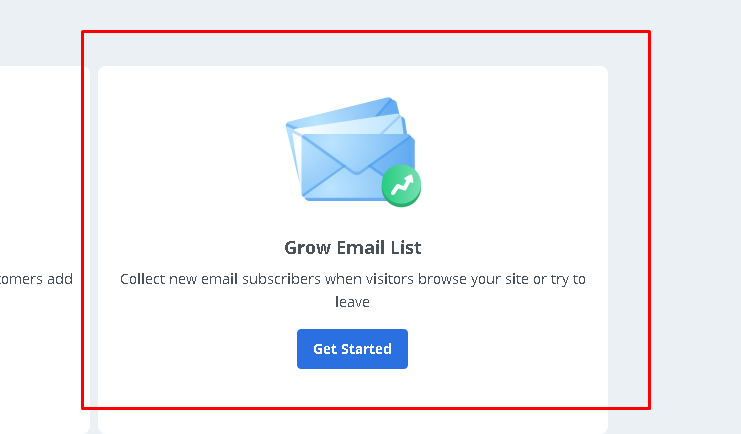
Since our eCommerce store is new, I’ve decided that it’s wiser to create a discount pop-up for first-time subscribers.
Simply put, we will offer visitors a discount code in exchange for their email addresses.
Let’s take a look at how to design your very first, cool nevertheless, pop-up.
Sumo Pop-up Builder Configuration
In this first step, we will customize our plugin to clearly state what we will offer to them if they subscribe as well as use a compelling picture of our products.
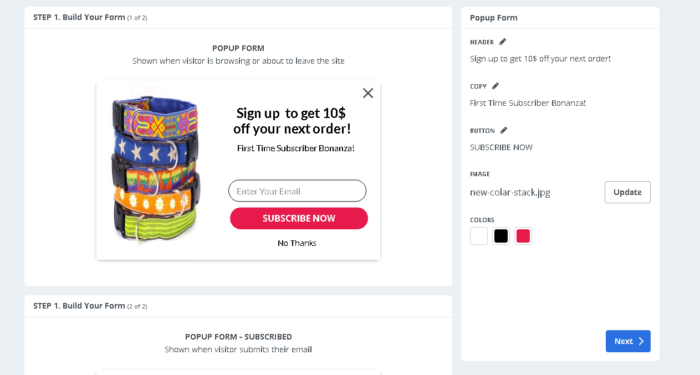
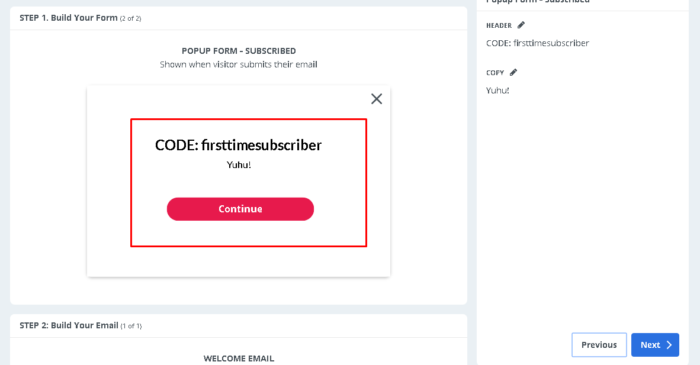
The next step is to design what your readers see when they submit their email through the form.
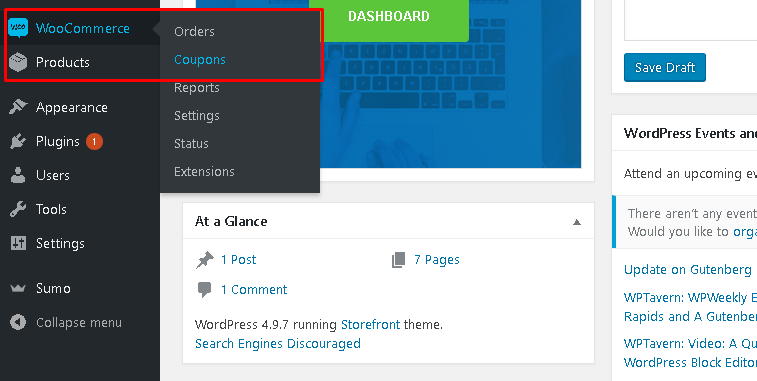
Before designing that aspect of the pop-up, let’s take a step back and create our 10$ off code.
Go to your WooCommerce tab and click on Coupons.
Fill in the relevant coupon details such as the name of your coupon, its type, and how much it will deduct from the customers’ cart.
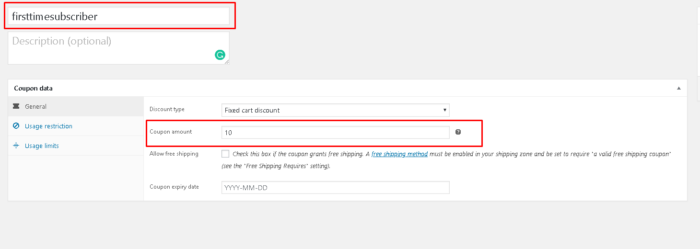
Hit Publish and you are set!
Through the Coupon tab, you can also monitor the performance of your coupon.
And you are set!
Now let’s talk design.
What does your customer see when they submit their email address through the pop-up?
Yup, you got that right; the user gets the code through the pop-up!
This makes it so much easier for our customers to just copy the code and immediately go to the cart to use it.
Next up, Sumo allows you to create a welcome email and send it right away when someone enters his email.
This is an optional step and totally depends on whether you would like Sumo to take care of your welcome email.

You could definitely use Sumo’s Welcome email. Although why use Sumo when you can use an email marketing and automation software like Moosend to not only automate your Welcome Email but send out amazing newsletters with special offers?
Now you will have to set up the frequency of the pop-up.
For now, you will want to leave the default settings aside due to a lack of performance indicators such as average time people spend on your store or the bounce rate.

When you acquire those KPIs, you might want to take another look at those settings but being a new eCommerce store owner you will want to take small and calculated steps.
Click Next and… that’s about it!
Let’s take a look at what our pop-up looks like:

And this is what users get after they submit their email:

Ladies and gentlemen, this is how you create a simple yet effective pop-up with SUMO!
Installing Wisepops for your WooCommerce Store
Wisepops is a pop-up builder with an easy-to-use interface and a super user-friendly pop-up editor.
By now you should know how to install WordPress plugins (I should hope so, at least).
Click on Plugins->Add New and search for Wisepops install and activate the plugin.

Navigate to the Wisepops tab in the WordPress sidebar menu.
And click on Link it Now.

Register for an Account with Wisepops and you should be set to start building awesome pop-ups.
Let’s take a look at how to design your pop-ups with Wisepops editor.
Wisepops Pop-up Builder Configuration
After you link Wisepops with your WordPress site, you have to go to their website and log in to their platform.
You will be greeted by their Dashboard where you can create and configure your pop-up campaigns.
Now the fun begins!
Wisepops actually offers you a huge range of pre-made templates for various cases from simple email sign-ups to acquiring feedback (through the pop-up).
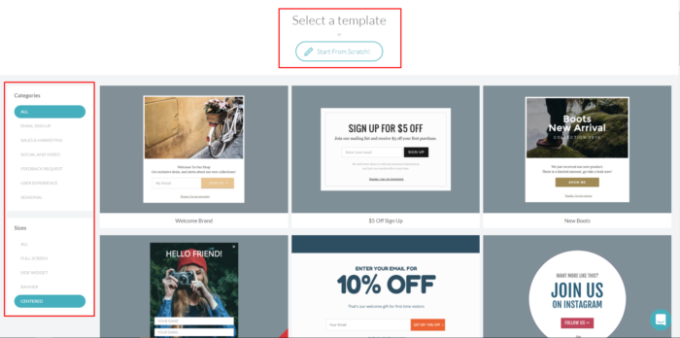
You can also create your own from scratch if you feel creative enough!
Let’s use a premade template to make things much easier.
As in the Sumo example, we are going to create a first-time subscriber pop-up with an incentive.
Select a template and let’s explore all the cool design features Wisepops offers.
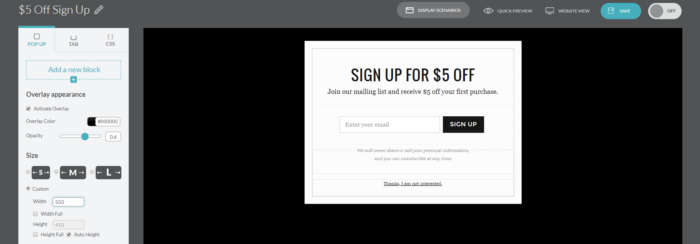
You can use the left sidebar menu to change pretty much every design aspect of the pop-up.
But since we are using a premade template we are only going to change the text and how/when the pop will appear.
Now that the text reflects our incentive, you will want to change the display settings of the pop-up.
Click on Display Scenarios.
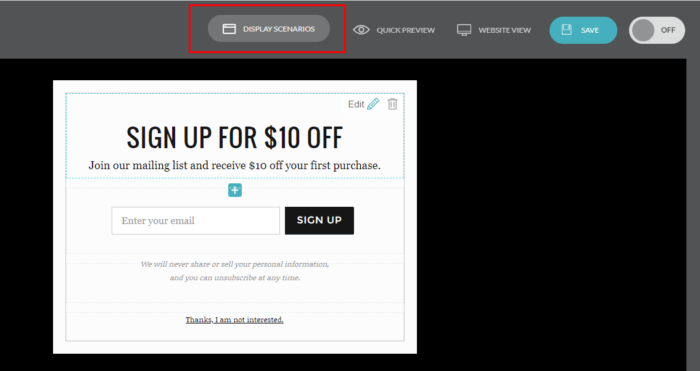
A pop-up will appear (how fitting) to select when you want the popup to appear either on the main page or maybe when someone tries to exit your eCommerce store.
These are the alternative scenarios Wisepops offers:
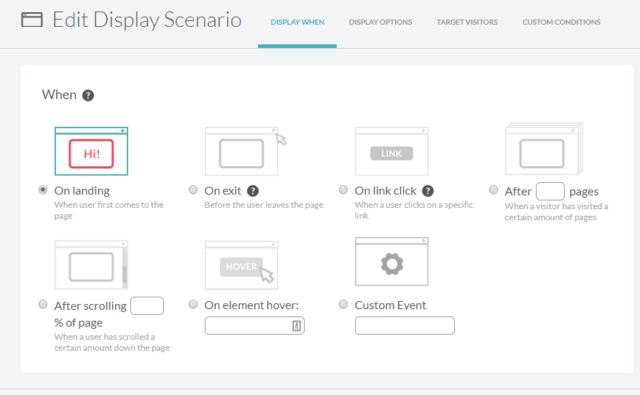
Since we are offering a first-time subscriber incentive we are going to display the plugin when a visitor enters the store. Although an exit-intent pop-up with such an incentive can also be a great solution.
Next click on the Display Options tab to set whether you want the popup to appear on all pages and when.
Additionally, you can change how the pop-up will appear on the page for example slide-in, fade-in, etc.
All these settings are being configured through the Display Options tab.
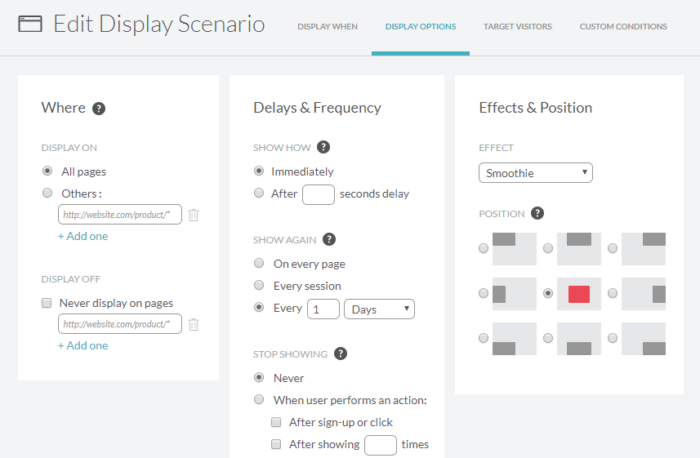
For the given example we are going to set the pop-up to appear on all pages and 4 seconds after a visitor enters our store.
I have selected the slide-in effect and appearance at the bottom left corner of our store.
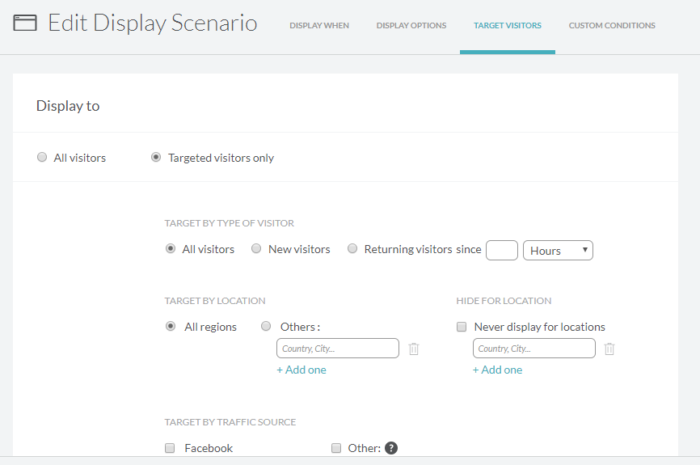
The next tab is Target Visitors, in that section you are able to set parameters as to which visitors will see the pop-up. Which is SO cool, right?
If you want to block certain countries you can use the “Never display for locations” fiend to enter countries/cities you want to hide your pop-up form.
Save your changes and turn the pop up on:

It is worth mentioning that if you use Wisepops you will need to integrate an email service provider to take care of the email process when someone subscribes to your list.
Besides that, let’s take a look at how the pop up will display in our store:
Bonus: A great alternative for pop-ups is Elementor’s WordPress Popup Plugin.
How to Track Customer Actions on Your eCommerce Store
So far we’ve shown you how to set up your store and configure some basic lead captures that will help you increase your conversions.
Time to take things up a notch:
Let me show you how to track the actions of your visitors and act upon them.
This will allow you to take the experience of your visitors on a whole new level with enhanced personalization.
Moosend Website Tracking
Moosend has created a website tracking plugin that will allow you to capture the actions of your visitors and tie them to specific campaigns.
To use our tracking software you need to have a Moosend account. If you don’t have one, click here to register for free.
Initially, you have to connect your website to Moosend’s platform.
This is done by logging in to the platform and going to Account and then clicking on Tracked Websites.
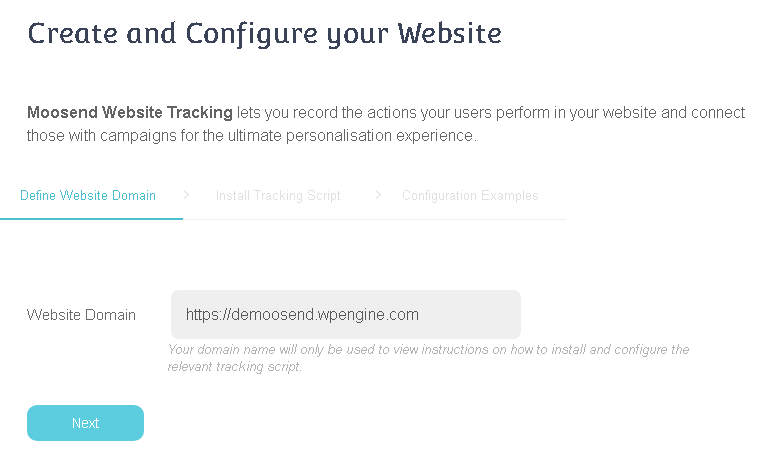
A mailing list will be created upon adding your website automatically.
The next step will be to install the tracking code to your eCommerce store.
There are two ways to install the tracking code on your website. The first one is with the use of our plugin (Moosend Website Tracking), and the second is for custom installations using the Header and Footer Script Inserter to add the code “manually” to the theme files.
After you install and activate either of those two plugins you will have to verify your website.
To do that, navigate to WordPress Settings and click on Moosend Website Tracking Settings copy and paste your website id and click Save changes.
You can locate your Website ID under the Tracked Websites settings within the Moosend Platform:
![]()
Use the Header and Footer Script Inserter to add the tracking script to your website.
To locate the script, navigate to your Tracked Websites click on the website you want to track user activity, and scroll to the bottom.
The script will look like this:
![]()
Copy the code, open the Script Inserter plugin, paste the code on the header text box and click Save:

Now your website should be verified and ready to track user actions:

How to Create a Welcome Email Sequence for WooCommerce
In brick-and-mortar stores when a customer enters the store either the owner or sales assistants cheerfully welcome them and ask if they need any help.
In the eCommerce store, the same principle exists although the use of a different medium to transmit that message is used; email.
Emails bridge the gap between the eCommerce store and its customers.
Therefore, it is important when a customer creates an account on your eCommerce store to send him a personalized welcome email.
With Moosend, this is easily done with the use of automation recipes. A recipe is a series of conditions that allow you to send emails based on whether a condition is met.
Let’s go through how to create your first welcome email with Moosend:
Login to your Moosend account and navigate to Automation. Click on Create new automation.
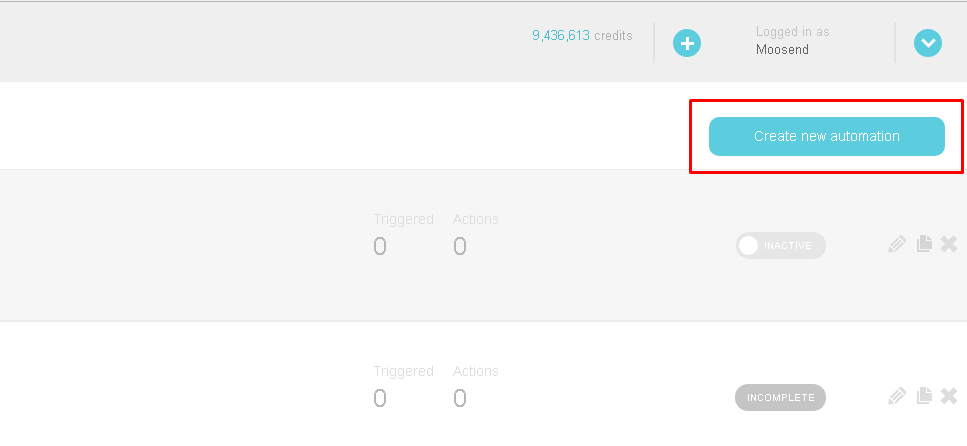
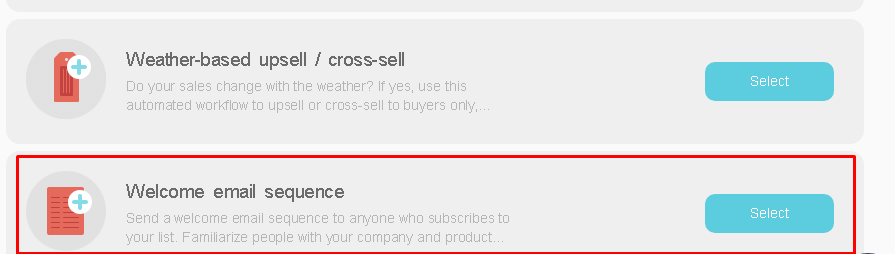
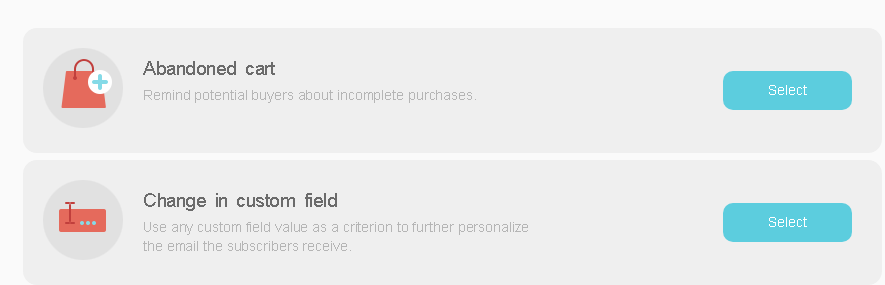
Then you will be prompted to select the automation you want to create. Moosend offers a great range of email automation for you to use available at all of our pricing plans.
Select the Welcome email sequence from the list.
Now you will be able to edit the name of the automation to distinguish it from other automation you will create down the road.
Under the name, you will see how many steps you have to complete in order for the automation to be completed.
As well as all the steps of the recipe in the middle.

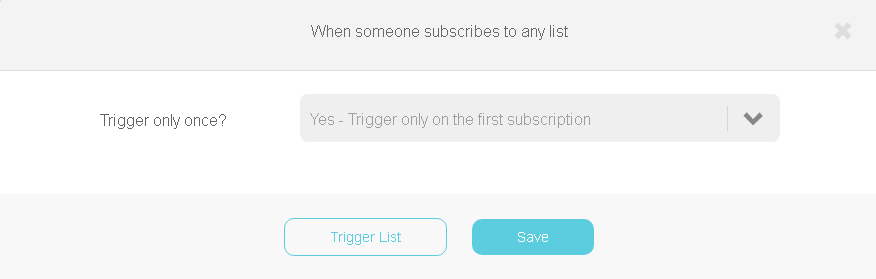
Click on the first step of the automation which is “When someone subscribes to any list”.
And set it to “YES-Trigger only on the first subscription”.
This will trigger this automation only once every time a new customer subscribes to your store.
The next step of the automation is to set a specific action when the automation is triggered.
You can set a specific time interval for the automation to trigger. We are going to remove this step as this is a welcome email that we want to hit our customer’s inbox as fast as possible.
To remove a step simply click on the (-) icon on the right side of the trigger box.
Now we are going to use the “Then send an email campaign” trigger.
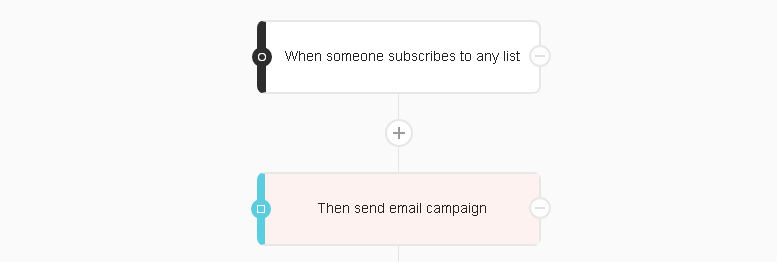
Click on the send email campaign trigger to configure the trigger.
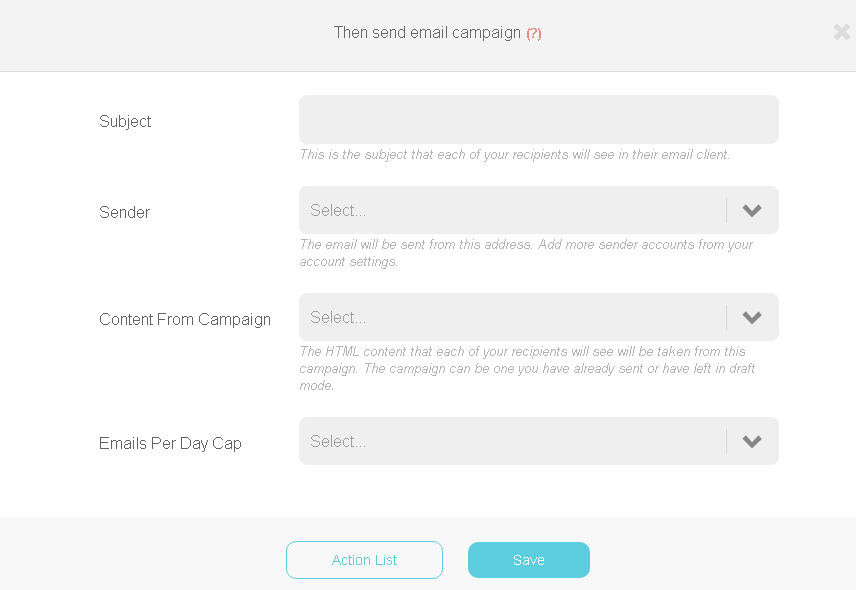
The fields are pretty much self-explanatory:
- Set the subject line of the welcome email
- Add the sender (the email address you will be sending the emails from)
- Select the content from one of your campaigns
- Set an “Email per day” cap.
The most important step is the “Content From Campaign”.
This is where you select an already made email campaign from your list that we will use its content.
By content, we mean what’s inside the email that we are sending.
You will be able to design your super AWESOME welcome email right through our Designer.
And if you feel hopeless for inspiration we’ve created a massive list of welcome emails top companies have used over the years.
Make sure that your automation is active.
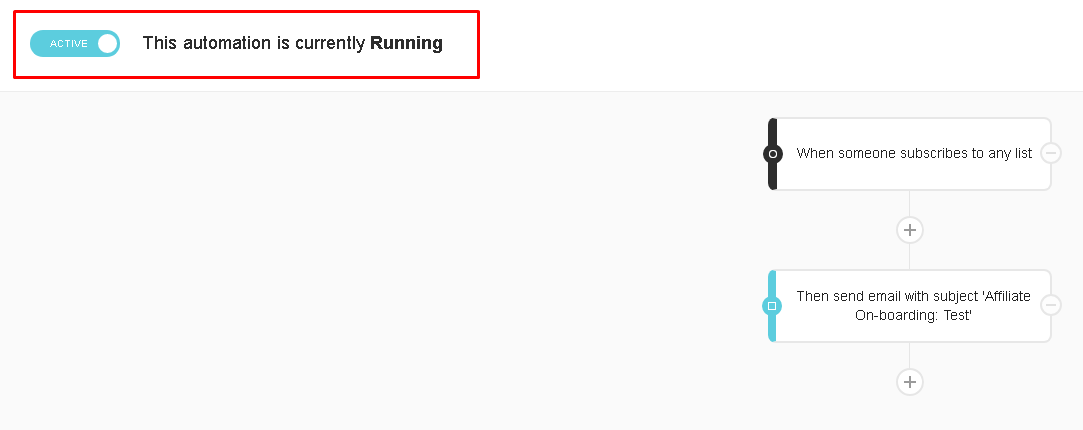
That’s it you’ve just created your first email automation!
There are also tons of other steps you can enter to make your welcome email much cooler.
Our awesome support staff has created a step-by-step process for you.
Click here to read more on welcome email sequences.
How to Create Abandoned Cart Email Automation for WooCommerce
One of our researches showed that cart abandonment reaches a staggering average of 69% across all industries.
So what will you do to act on that abandoned carts?
One of the most popular cart-retrieving methods is emails.
We previously talked about tracking user actions on your website this is how we identify which user has left items within his cart and as soon as we get that data an automation workflow can be created to deal with that abandoned cart.
Setting up an automation channel to act upon your abandoned carts will significantly increase your conversions!
Let’s take a look at how to set an abandoned cart email automation with Moosend.
Log in to your Moosend account and navigate to Automation, click on create a new automation and select the abandoned cart recipe.
Selecting a recipe through our directory will have all the necessary automation steps already set up for you. Moreover, you have the freedom to add/change additional automation steps to make your emails even cooler!
The image below shows the basic automation structure of a cart abandonment email automation:
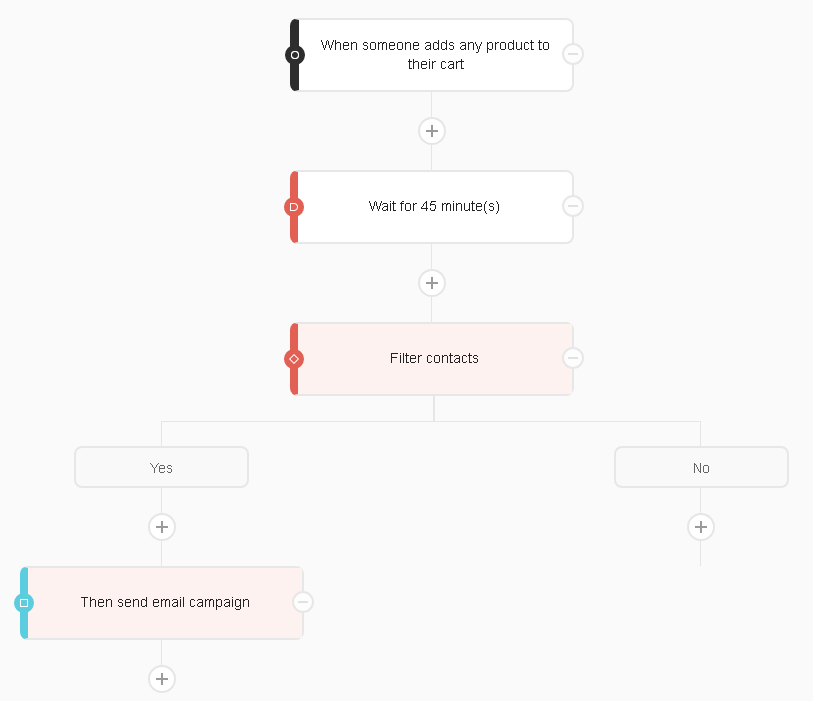
The first step of the shopping cart abandonment recipe is “When someone adds any product to their cart.” This will be triggered every time someone adds any product from your store to their cart.
Moving forward the second step or, as we call it, the control step is a “wait time interval” condition that provides the necessary time to the customer to go through with the purchase or not.
The third step in the cart abandoned automation recipe and the most important is “Filter contacts”.
The Filter contacts step will filter your contacts and determine which contact has proceeded with a purchase or not, this will allow the automation to send the abandoned cart emails to people who actually did not make a purchase.
Let’s take a look at this step:
Click on the Filter contacts block.

Initially, you have to set in which dataset (aka contact list) you want this filter to be applied to.
Click on the drop-down menu (“Apply this set of the filter to”) and choose the appropriate list from your eCommerce store.
All the other steps are pre-filled therefore there is no need to make any changes.
In short, the next steps determine whether someone from your list has made a purchase or not.
Click on Save and you are set!
The last step is the “Then send email campaign”
This is where you select the email campaign you want to send when someone abandons their cart.

Fill in all the relevant details such as the subject line, the sender, the campaign’s content, and emails per day cap.
Click on Save and activate your automation!
Click here to read an in-depth article from our support team!
How to Create Thank You For Your Purchase Email Automation for WooCommerce
So far we’ve covered two of the most important pieces of email automation eCommerce stores need.
Now we will take a look at Thank You emails. Essentially, thank you emails are a cool way to thank users or shoppers for taking certain actions.
For instance, you can thank users for registering their products, signing up for your newsletters, or shopping with you.
In essence, you want to make your customer feel like they are in an actual store casually buying something.
This adds to your brand value and customers’ loyalty towards your brand.
Thank you emails are a shortcut to incrementally building brand loyalty.
Let’s take a look at how Moosend provides you with the necessary tools to automate your Thank You emails.
We are going to use automation called “New customer thank you email”.
Navigate to Automation search and select the automation.

Time to set up the automation steps:

Click on the first step “When someone purchases any product”.
You can set this to trigger for every purchase or for their first purchase.
And, select your website from the tracked websites list.

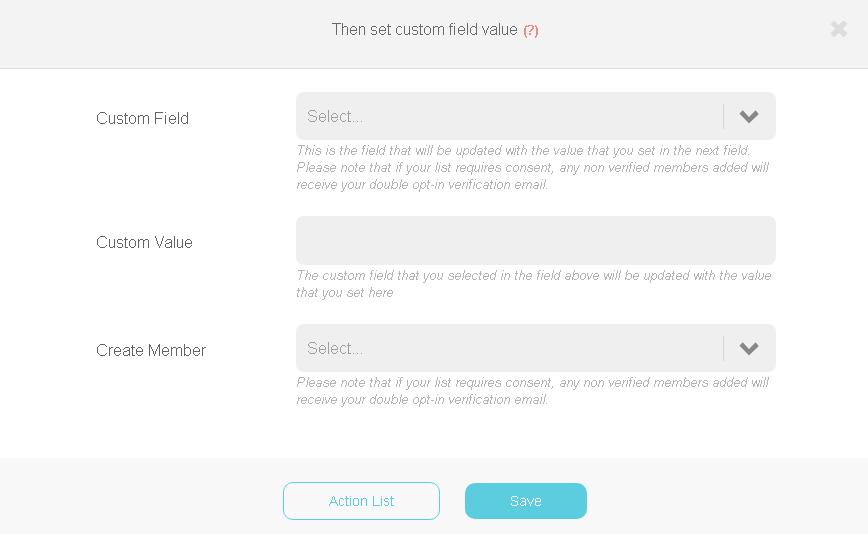
The “Then set custom field value” step enables you to create a custom field in order to tag subscribers that have purchased an item from your eCommerce store.
Read this extensive support article to learn how to set up your custom fields!
The third step is the “Wait a specific time interval”. By now, I take it you are familiar with this step!
You will want to set up the thank you mail to go out within a reasonable time window of 3-5 minutes. This should allow sufficient time for the purchase to be completed.
Last but not least is the “Then send email campaign” step as we discussed before this is where you set the subject line, sender, content, and emails per day cap.
Have trouble crafting your thank you email sequence? Read our article of 23 awesome thank you emails you should be using!
You’re all set now!
Wrap-Up
I’m so very proud of you!
You’ve made it! You have you’ve completed our step-by-step WooCommerce Plugin Tutorial!
You can now take over the world(not literally but you can make a ton of money!).
If you think this is one of the most detailed WooCommerce Tutorials out there leave a comment below!
What’s next?
Bonus Resources:
You can reach me at [email protected] with any inquiries regarding WooCommerce!
Similar Posts

 Published by

 Published by


Create, send and optimize your email marketing campaigns