
Gmail Promotions Tab: How It Works [2026]
I admit it, it took me a while to become a Gmail believer. Not to reveal my age or anything but I grew up with Yahoo and changing my email provider proved harder than I thought. I’m sure a lot of you nod your head in understanding out there.
But, guess what, Gmail is amazing! It’s so neat and practical, and, honestly, it sorts through my inbox better than Mary Kondo would. Yes, Gmail’s Promotions Tab included.
As a newcomer back in 2013, this little tab created quite a stir among marketers. In fact, it still does. But let me tell you, I came to love the way my promotional and marketing emails sit all in one place, so I don’t have to endlessly scroll down to find that sales newsletter that caught my eye a while ago. And that’s what your subscribers think too.
Unlike what people believed at first, the Gmail Promotions Tab is not a junk folder. On the contrary, it’s an organized section within your inbox that groups and highlights your promotional emails. It’s Gmail’s clever way to categorize messages for easy access, ensuring a streamlined, clutter-free inbox experience.
So don’t let Gmail Promotions Tab scare you. Learn to love it. It’s your friend and it helps you more than you imagine. Let’s see how.
The easiest and most affordable email marketing and newsletter software!
What The Numbers Say
First, let’s talk a little about why Gmail matters and why you should care.
Gmail:
- Holds 20% of the global email market
- Had about 1.5 billion monthly active users in 2019
- 61% of 18-29-year-olds use Gmail
- Accounts for 27% of all email opens
Plus, 75 % of all Gmail users access their email on mobile devices. Hooked? Wait, there’s more!
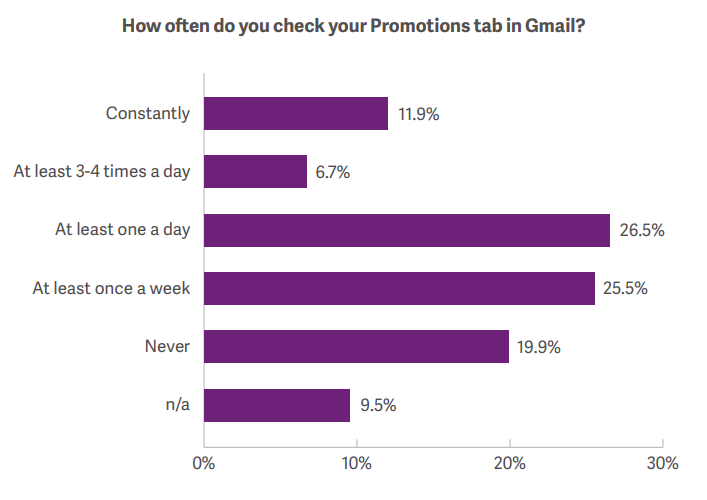
According to a survey conducted by Return Path called The Email Marketer’s Guide to Gmail Categories users check their Promotions tab a lot more often than previously thought.
See?
Almost 45% of survey respondents said that they check the Promotions tab at least once a day. This means that a significant section of your target audience will still see your email even if it is placed in the Promotions tab! Hooray!
How It Works
When you send a marketing email to your subscribers, Google scans each email for certain things that determine whether it will take your email into Spam or one of the Gmail tabs: the Primary Inbox, Promotions tab, or Social tab.
This outcome is based on algorithms that account for engagement, content, and sender information. Marketing emails tend to have specific indicators that land them in the Promotions tab:
- Email open rates
- Clicks
- Newsletter unsubscribes
- Spam complaints
- Conversions
- CTR (click-through rates)
Benefits
Gmail is extremely popular, so it’s highly possible that the vast majority of your promotional emails will hit this specific provider. And like the numbers prove, the Promotions tab isn’t an instant death. On the contrary, it’s a valuable ally in the email marketing battle for 2 important reasons.
It improves engagement
It might have been a scary change for marketers, but the truth is that the Gmail Promotion tab didn’t change read rates that much.
On the contrary, according to a recent research report, industries like entertainment, pets, restaurants, and furniture experienced an increased read rate with the Gmail Promotions tab. Other industries saw an increase in email deliverability rates, with fewer emails sent to spam.
Organized Inboxes Let Subscribers Focus on Your Message
Even the most chaotic mind loves a tidy inbox. When I open my inbox first thing in the morning, I want to have everything in order so I can devote my time to the emails I want to. There’s time for my personal emails, work, and stuff and then there’s time for the fun ones, you know, the promotional ones. I love opening my promotional emails over a cup of coffee when I’ve got nothing to do or when I feel like shopping. This is the right time to check those emails, and most probably it will drive to higher conversions since it was my decision to look at them. I have time and I am in the right mood, so bring them on!
Let alone that many of us want to keep a clean inbox, with all the Primary emails “read”. If a promotional email lands in my Primary inbox, most probably I’ll just mark it as read or simply delete it because I can’t just let it be. I have to act on it. Yes, many promotional emails I could have loved have gone with the wind.
Gmail Promotions tab helps users keep a neat inbox and not overlook your emails, by focusing on them without other distractions.
Email Annotations
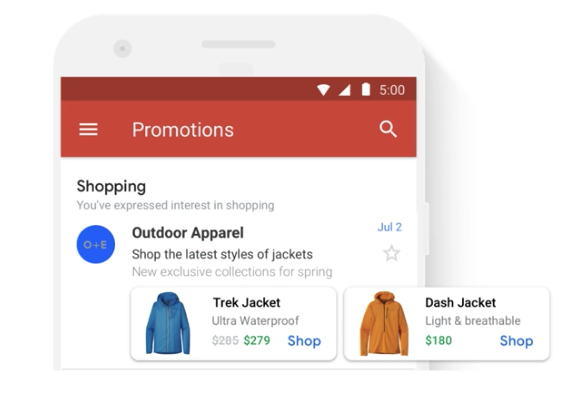
In 2018 Google introduced announced email annotations, that help senders deliver more value in the Gmail Promotions tab. Emails identified by Gmail as particularly valuable for the user, receive additional inbox features without having to open the email: email annotations!
Annotations let you include images, deals, expiration dates, and other offers to help you bring your promotional emails to life.
This totally eye-catching trick became a great addition to the Gmail Promotions tab because it gave marketers one more way to boost engagement and conversions. And you can use them too!
Making The Most Of Email Annotations
In order to create the most relevant email annotations, Google uses recipients’ interests to automatically highlight and group all emails one receives. All thanks to machine learning. Gmail lets you customize 5 elements:
- Image preview URL
- Deal badge
- Promo code
- Sender logo URL
- Expiration date
So, let’s see what all these elements you can fiddle with are, one by one.
Image Preview
This is a must if you want to grab your subscribers’ attention. But adding just any image won’t do. It must be the right image. I highly recommend you use a product or lifestyle image that matches your message and brand. As for the size, you don’t have to worry since images are automatically center-cropped.
Deal Badge
This is the green section where you can highlight your offerings. This could be the amount of discount or “Free Shipping”. Google advises users to add up to four words and while there is no set character limit for this, when your email text space is full, the deal badge truncates. So keep it as simple as possible!
Discount Code
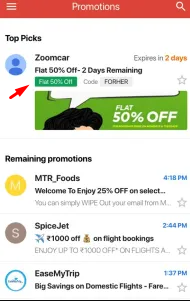
This is a section to be used only if your promotion involves a discount. If this is the case, then add your discount information and make sure you keep it short. Otherwise, there’s a risk it might be truncated.
Careful! If you’re not sending a discount promo email, then just leave this section as it is, without trying to repurpose it.
Expiration Date
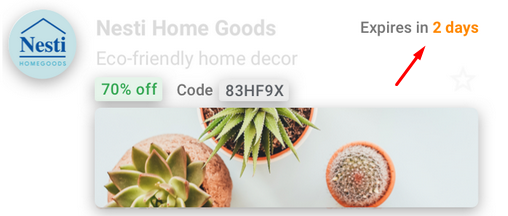
Setting an expiration date shows your subscribers when an offer expires, and it’s a great way to add a sense of urgency.
Whatsmore, this gives you 2 chances of appearing at the top:
1. When you first send your email
2. Three days before your offer expires
To optimize this section first set your time zone and then add the starting and ending time of your deal.
Logo URL

While this logo only appears in the email preview, it helps your email stand out and look professional at once. Make sure you always use an https:// URL, as this proves your URL is secure.
How To Enable The Previews
While any email may land in the Gmail Promotions tab, only the ones with specially annotated HMTL using a custom JSON code will support annotations.
Also, in case your email service provider stops the necessary scripts tags from your email, Gmail offers another way of annotating your HTML with the help of microdata.
Creating Slick Email Annotations With Moosend
I know, I know. Now that you’ve seen how cool email annotations are you want to enter the game.
Well, I got news for you! Moosend helps you create email annotations fast and easily in a few simple steps. And the best part? You don’t need any coding skills!
Let’s do this together.
1. Once you have created the design of the email you wish to annotate, click on the Settings tab on the left side.
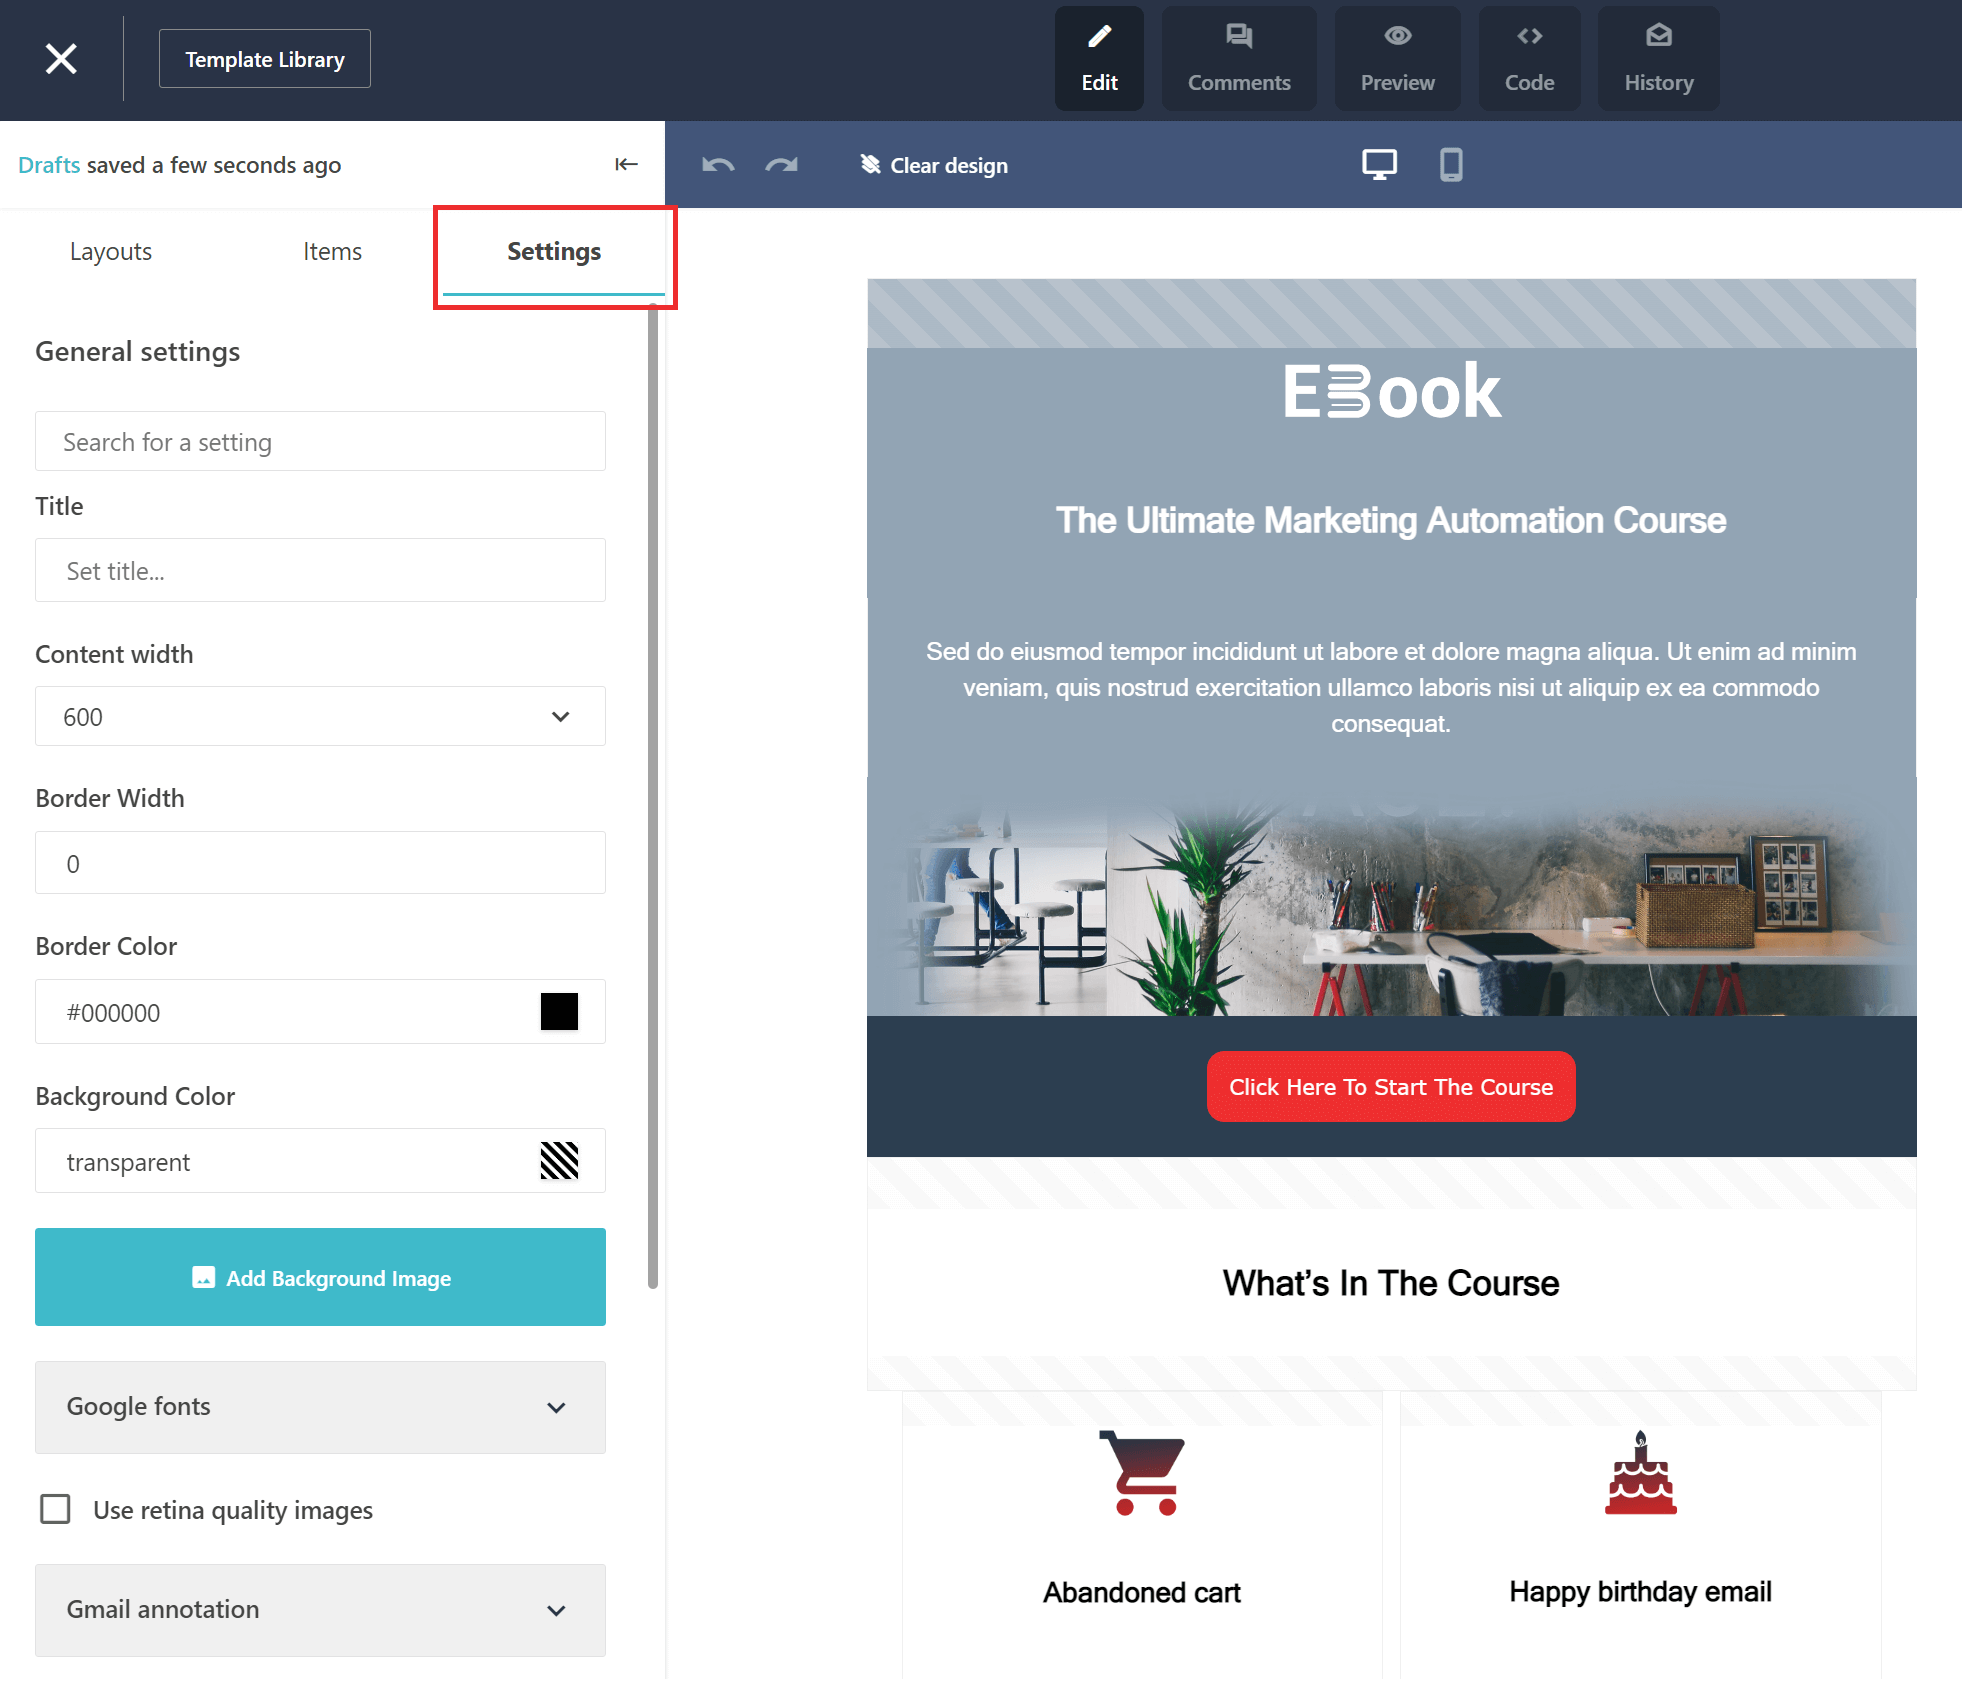
2. Next, click on “Gmail Annotation” to reveal the options.
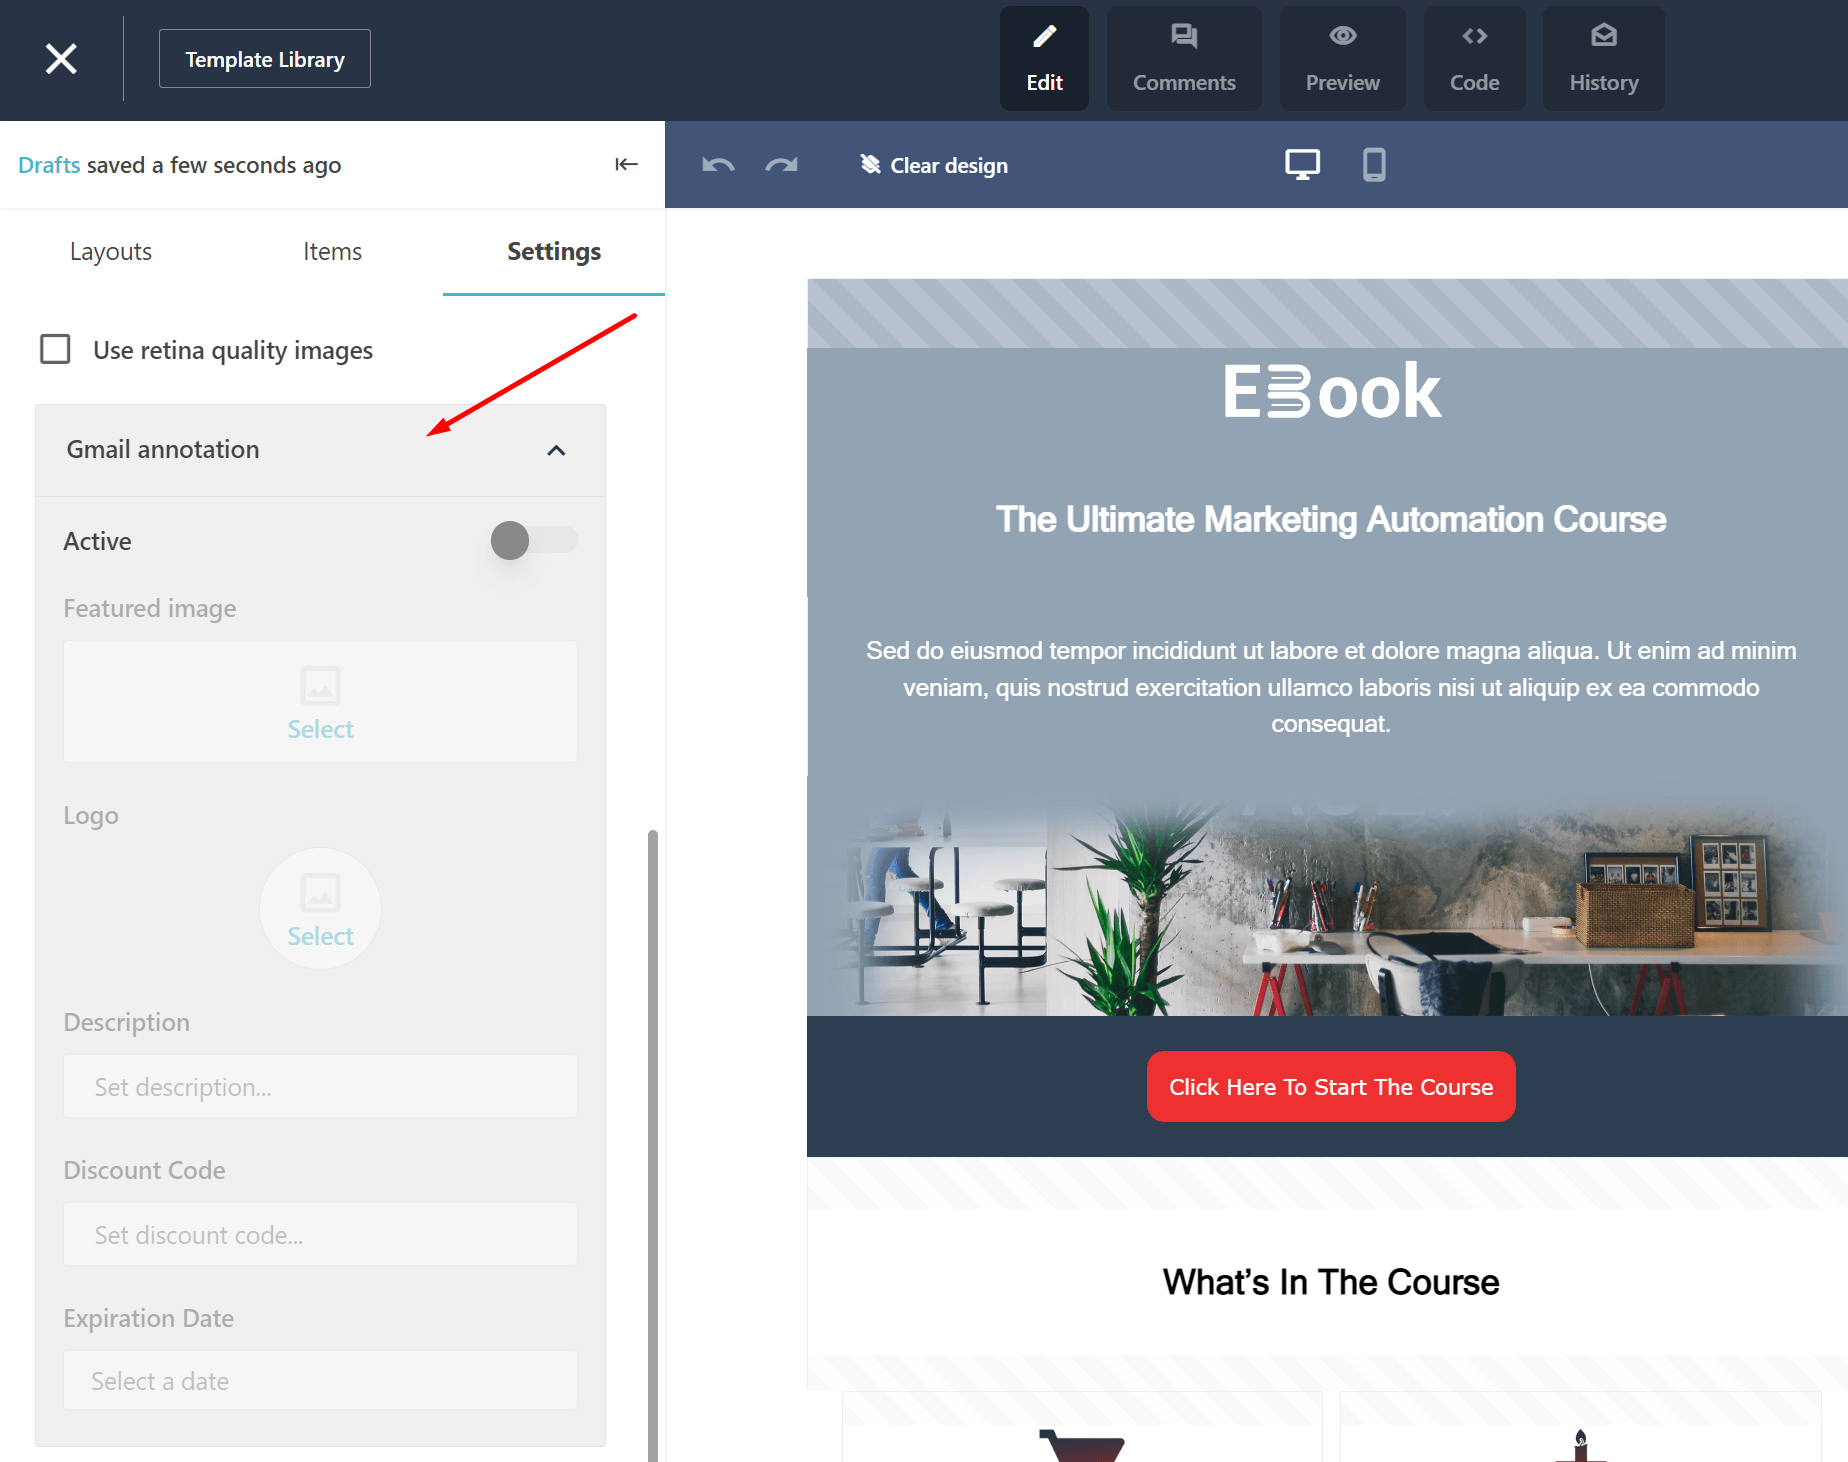
3. Enable the setting by clicking on the slider.
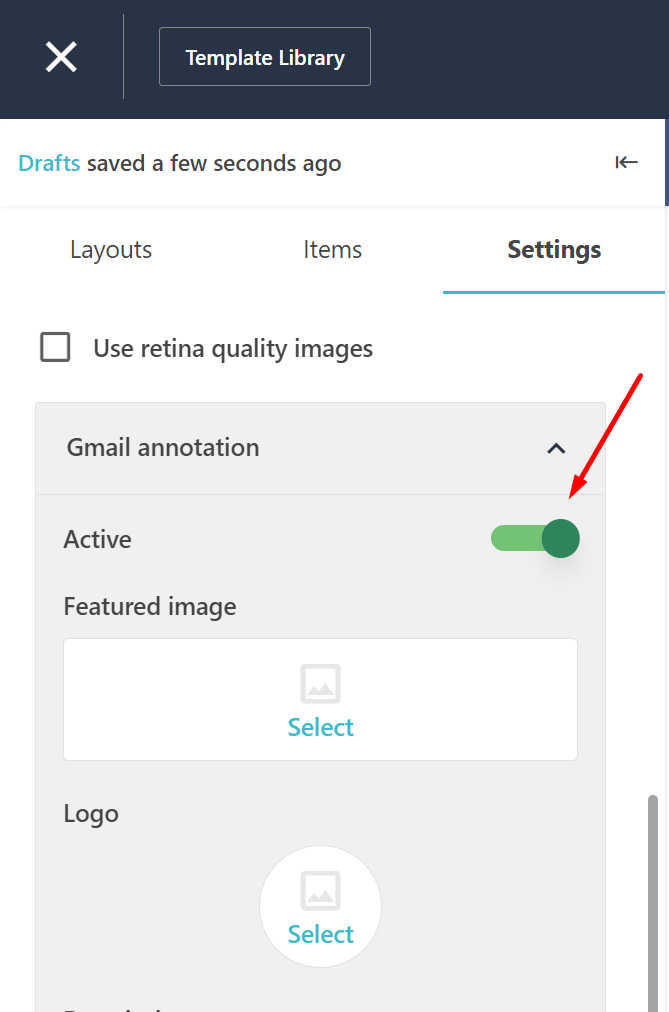
4. Next, add the Description, Discount Code, and Expiration Date that will show in your annotation.
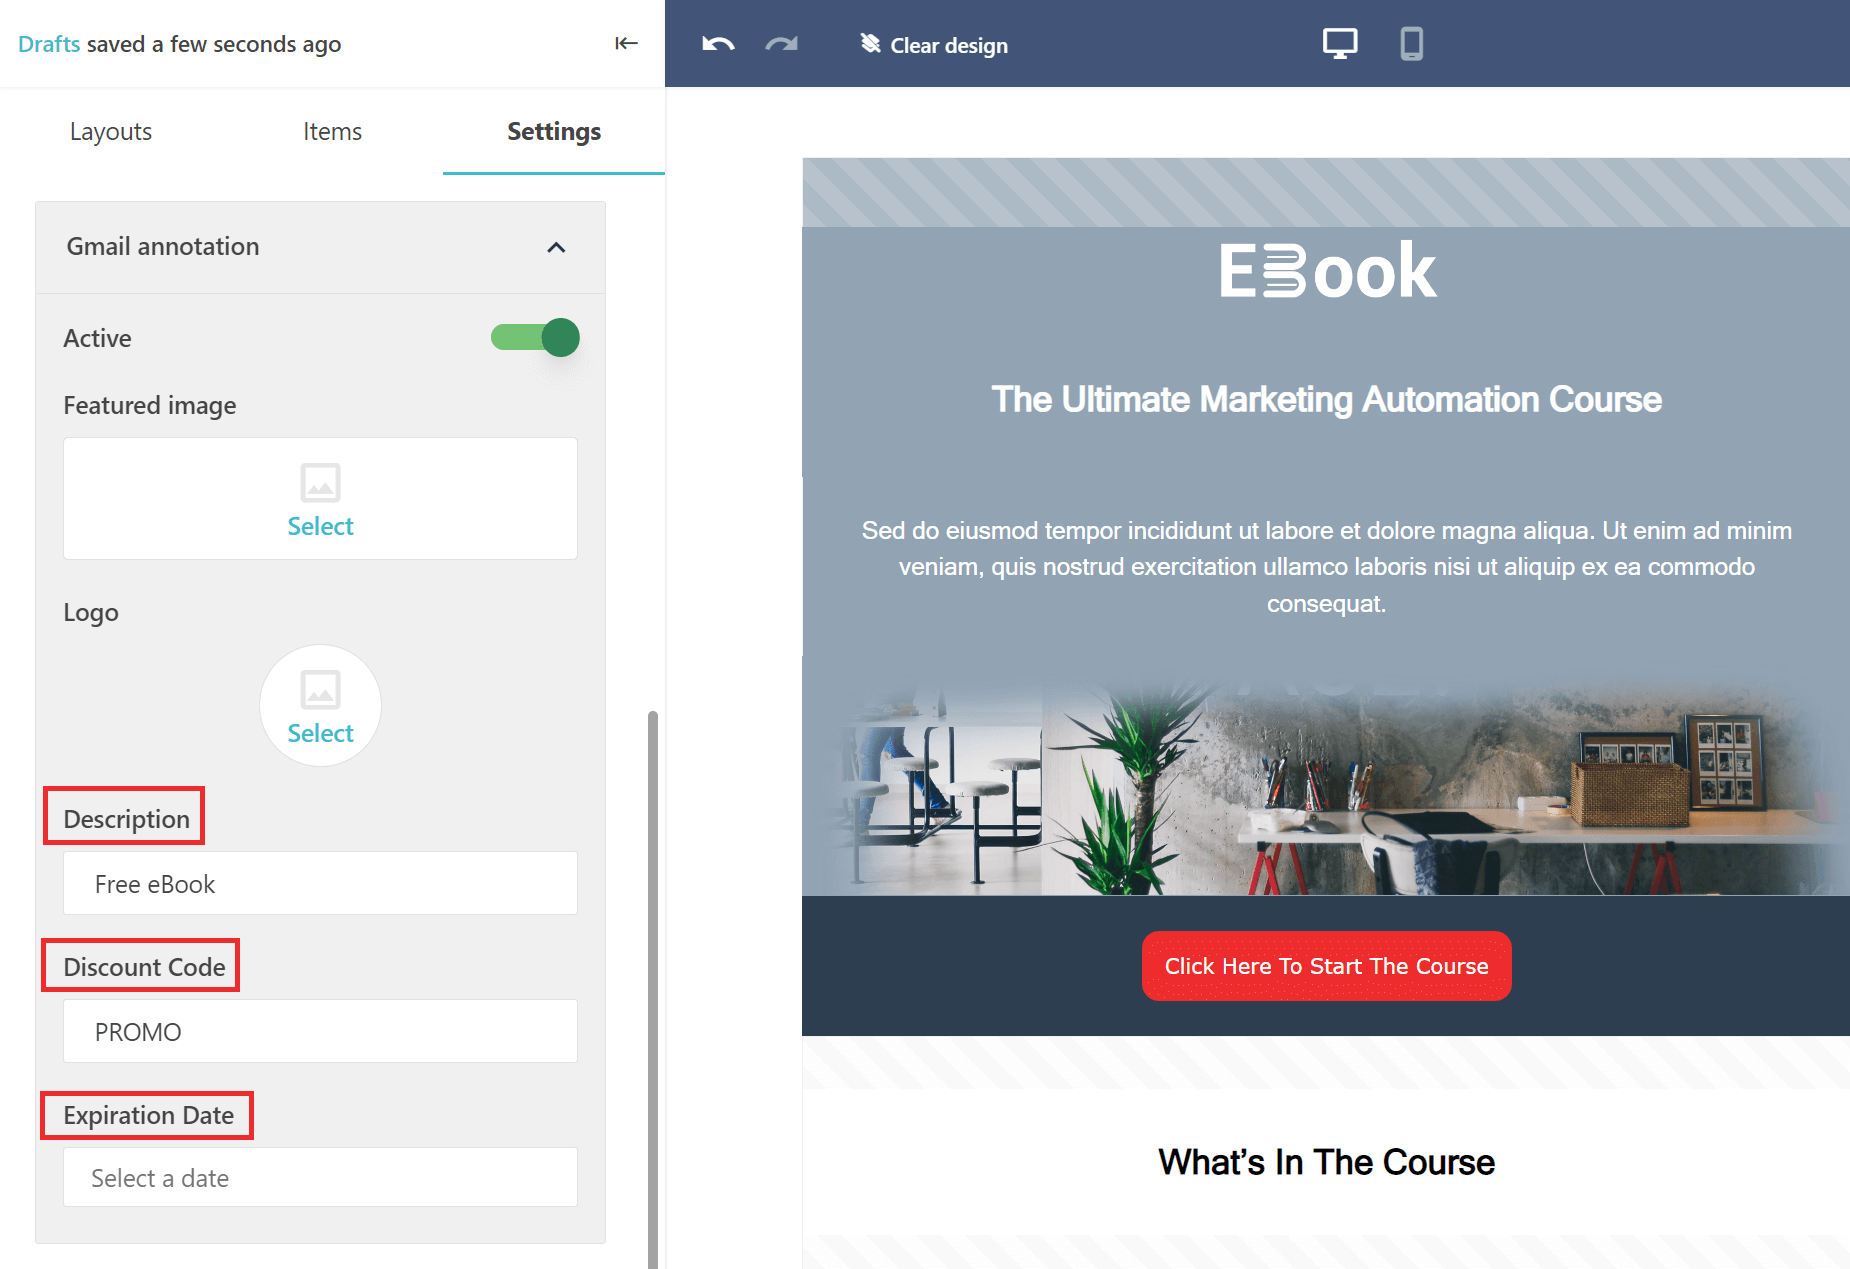
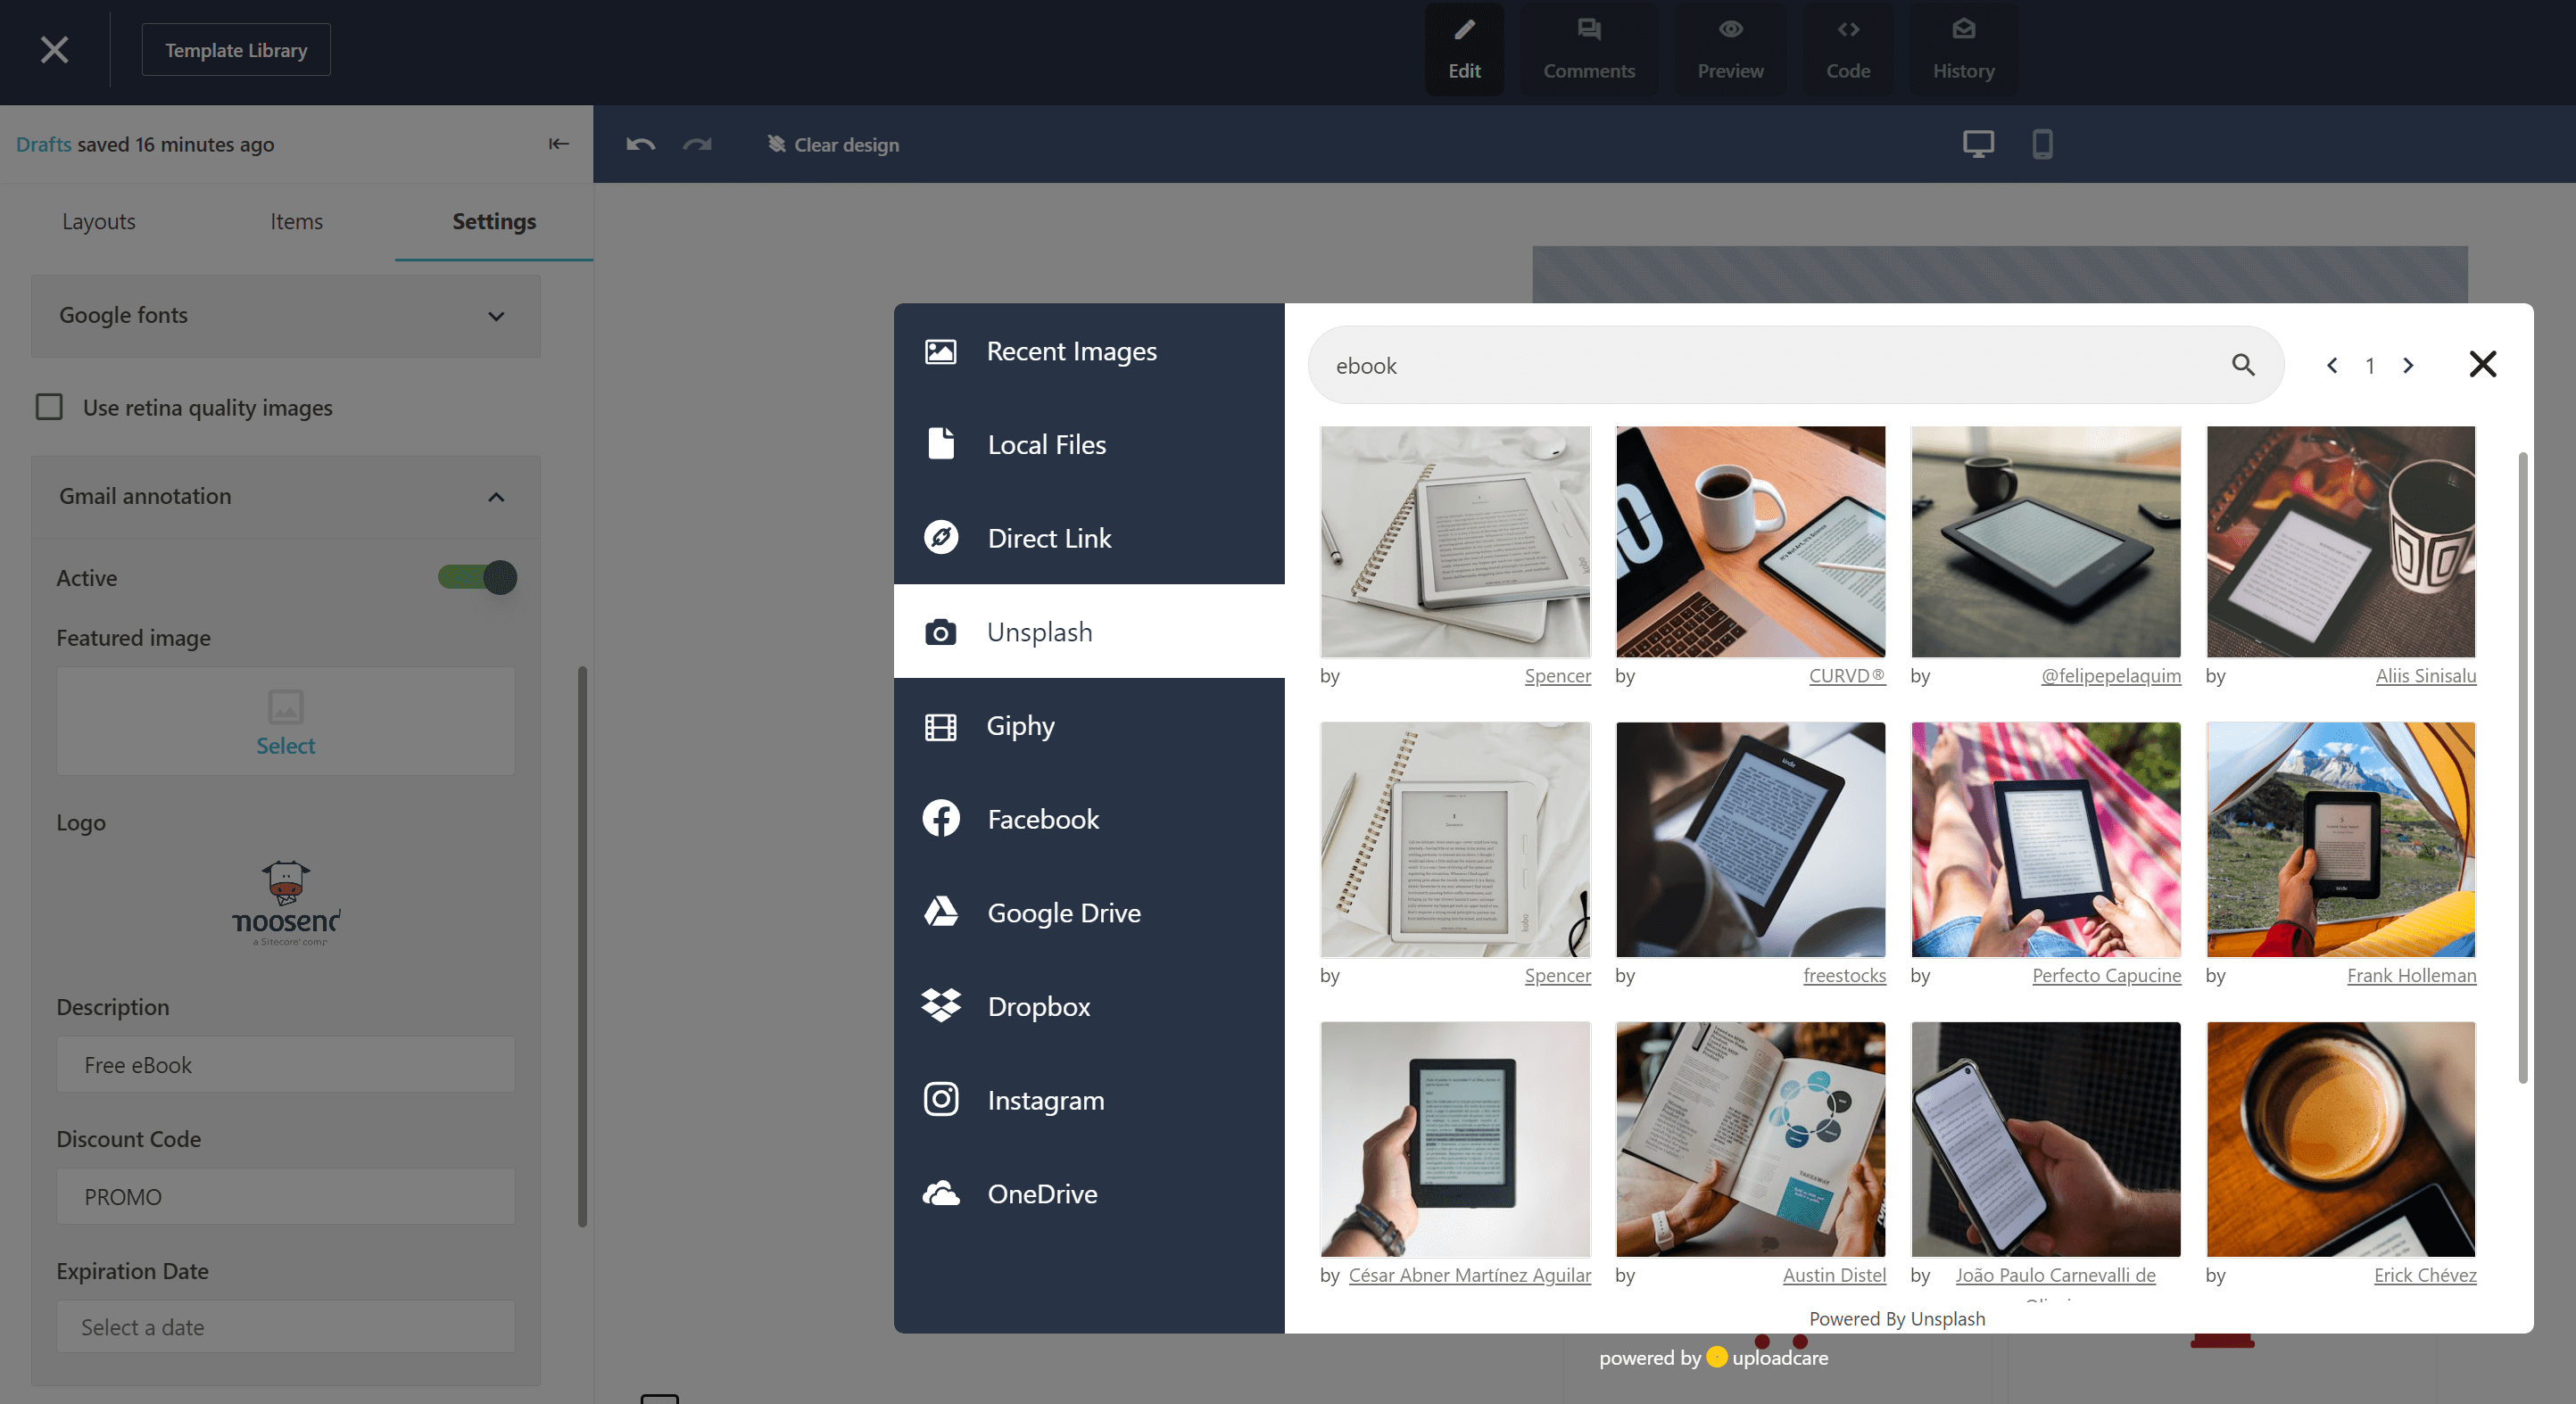
5. Now, it’s time to add a Featured Image for your annotation and your Brand Logo. By clicking on “Select” you’ll see that you have plenty of options available!
You can upload an image from your computer (local files), or directly from various other sources, such as Facebook, Instagram, Dropbox, Giphy, and many more!
6. Finally, click on “Preview” at the top bar and then click on “Google” to see how your email annotation will look live!
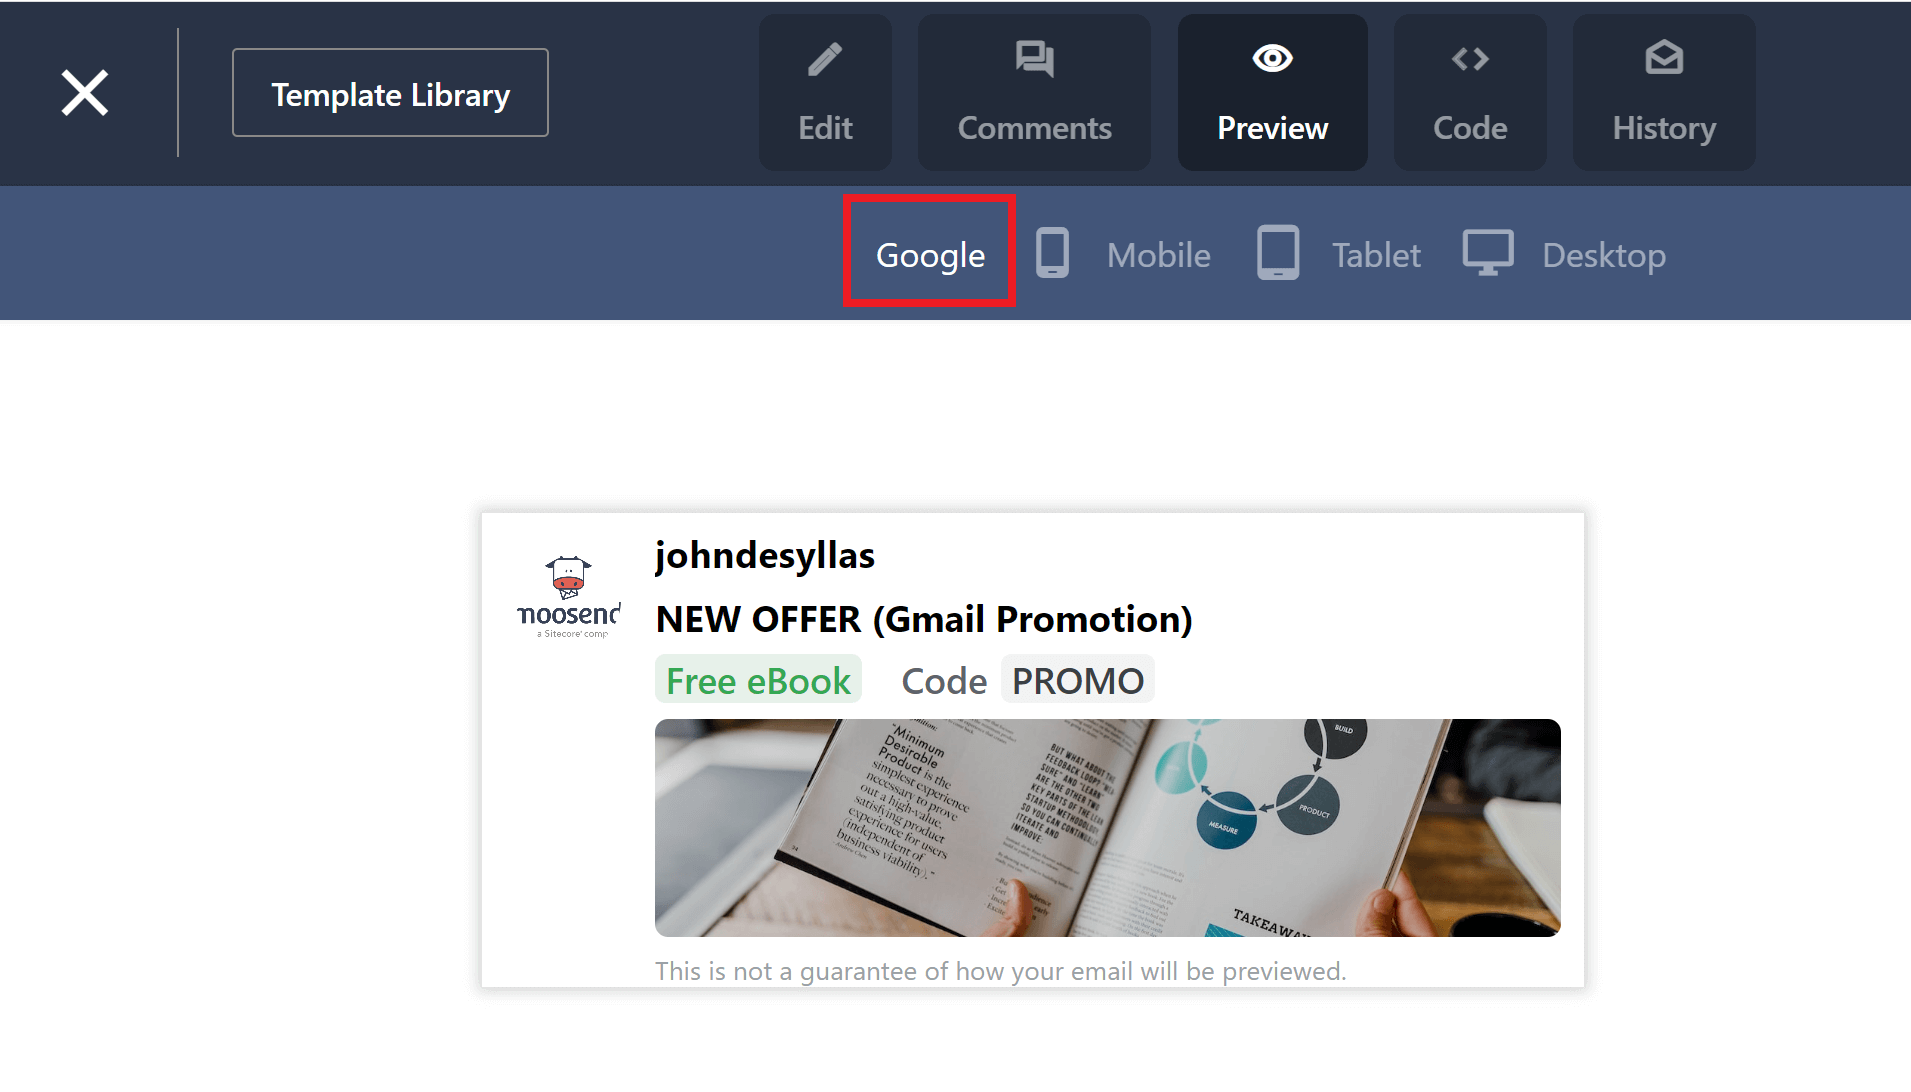
That’s it, you’re done!
Just keep in mind that enabling this setting, doesn’t necessarily mean that your annotation will always appear in the Gmail Promotion tab.
Why You Shouldn’t Aim For The Primary Tab
There are many guides out there on how to prevent your emails from landing in the Promotions tab. Yes, you can limit your links to 1 or 2 max, avoid using images and the list goes on. But, do you really want this?
No. And let me tell you why.
You’re left with a plain email
If you do all that you can to stay out of Gmail’s Promotions tab, you will end up sending an email that is simply not a marketing one. Images are a crucial part of your branding and they are instrumental in accomplishing your campaign goals. The same goes for your links.
You risk ending up in the Spam folder
Making all the acquired changes so your email lands in the Primary tab might annoy your receivers, making them feel like they have been tricked. This might lead your subscribers to unsubscribe or even worse mark your emails as spam. Don’t go there.
It’s A Wrap
See? The Gmail Promotions tab is a great partner after all! Instead of worrying that it will ruin your marketing efforts you now realize that it’s actually working to boost your clicks and conversions. So what’s there not to love?
And with Moosend you can create professional and effective email annotations with zero coding skills. So roll up your sleeves and get down to business!


 Published by
 Published by